Showing posts with label breakfast foods. Show all posts

Thursday, September 18, 2025

Blackberry Jelly

There’s just something about September that feels like the perfect time to bring out the mason jars, dust off the canning pot, and savor the last fruits of summer. For us, nothing says changing seasons quite like the sweetness of fresh blackberries. This Blackberry Jelly recipe is simple, nostalgic, and just the right way to hold onto those end-of-summer flavors while welcoming crisp autumn mornings. Spread it on a warm biscuit, drizzle it over pancakes, or tuck it away as a thoughtful homemade gift. 

This jelly recipe specifically calls back to The Harris Sisters' childhood when we would pick blackberries on our great-grandparents' farm. When I started growing a little blackberry patch in our backyard, I knew exactly what I wanted to make with our first harvest. And I'm sharing that recipe with you today.

If you have never used a water bath canning method to can jams or jellies before, you'll want to read the complete instructions online before you start making your Blackberry Jelly. 

Blackberry Jelly for Canning

To Make Juice

4 cups blackberries

4 cups water

To Make Jelly

3 3/4 cups of juice

1.75 oz powdered pectin

4 1/2 cups sugar

1/2 Tbsp butter (optional)

6-8 half pint (8 oz.) glass preserving jars with lids and bands

1 piece of food grade cheese cloth

  1. Make Juice: Wash the blackberries and put them in a large pot with the water. Mash the fruit and cook for 20 minutes on medium-medium/high heat, stirring occasionally to make sure the fruit doesn't stick to the bottom.
  2. Line a colander with cheesecloth and strain out the juice. Save the juice and discard the seeds and skins.
  3. Make Jelly: Put the juice, pectin, and butter (if you are using it) back into the large pot. Bring it to a full rolling boil on high heat, stirring constantly. 
  4. Add all of the sugar and return to a boil. Boil for exactly 1 minute, stirring constantly. Remove from heat. Skim foam if necessary.
  5. Ladle hot jam into hot jars, leaving 1/4-inch head space. 
  6. Follow water bath canning directions to complete the canning process. Process Blackberry Jelly 10 minutes. 
  7. Recipe yields 6-8 half pint jelly jars. (I ended up with 7.)


Notes:

I used hand-picked blackberries for this recipe, but you can use wild or store-bought blackberries too. Just make sure your measurements are the same when you start.

If you want to separate making juice and making jelly onto different days, refrigerate the strained juice until you are ready to make the jelly. It will take a little longer to bring the mixture to a boil because you are starting with refrigerated liquid in Step 3.

Jam and jelly recipes are finicky, so these types of things can cause your recipe not to set:
  • Doubling the recipe.
  • Measuring less than the full amount of sugar listed in the recipe or using a sugar substitute. If you want to use less sugar, use a recipe specifically developed for low sugar. 

As the seasons shift and September brings its cooler mornings, there’s something special about capturing the taste of summer in a jar. This Blackberry Jelly is more than just a recipe, it’s a sweet reminder of Southern traditions, simple pleasures, and the comfort of homemade goodness. Whether you’re enjoying it now or tucking jars away for holiday gifts, we hope this jelly brings a little Southern sweetness to your table all season long. 


Friday, October 18, 2024

Cherry Vanilla Jam

Who has cherry lovers in their family? We have them on both sides of our family so this homemade cherry jam recipe was a real hit! Today we're sharing our quick and easy cherry jam recipe that's a beautiful deep red color (so it's perfect for Christmas gift-giving).

This particular recipe is a mix of cherry and vanilla flavors, and it tastes delicious slathered on a warm, buttered biscuit. (And, here's another secret about this recipe, it's made it with frozen cherries, which means NO extra time pitting cherries and no stained hands!)

If you have never used a water bath canning method to can jams or jellies before, you'll want to read the complete instructions online before you start making your Cherry Vanilla Jam.


Cherry Vanilla Jam

3 pound bag frozen mixed cherries

2 tablespoons lemon juice

2, 1.75-ounce packages pectin 

1 tablespoon vanilla 

6 cups sugar

9 half pint (8 oz.) glass preserving jars with lids and bands

1 4 oz. glass preserving jar with lid and band


  1. Pulse cherries in a food processor and then place prepared fruit into an 8 quart pot. 
  2. Add lemon juice, pectin, and vanilla and stir. 
  3. Bring mixture to a full rolling boil that cannot be stirred down, over high heat, stirring constantly.
  4. Add sugar, stirring to dissolve. Return mixture to a full rolling boil. Boil hard exactly 1 minute, stirring constantly. Remove from heat. Skim foam if necessary.
  5. Ladle hot jam into hot jars, leaving 1/4-inch head space. 
  6. Follow water bath canning directions to complete the canning process. Process Cherry Vanilla Jam 10 minutes. 
  7. Recipe yields 9 half pint jelly jars plus 1, 4-oz. jar for taste-testing.


Notes:

Jam and jelly recipes are finicky, so these types of things can cause your recipe not to set:
  • Doubling the recipe.
  • Measuring less than the full amount of sugar listed in the recipe or using a sugar substitute. If you want to use less sugar, use a recipe specifically developed for low sugar. 

Other Jam & Jelly Recipes You Might Enjoy:

This post contains affiliate links.

Wednesday, October 9, 2024

Sausage Balls

This is the Sausage Ball recipe that The Harris Sisters family made growing up. If you look up "Sausage Balls Recipe" today, you'll find many different variations of this savory appetizer recipe, including ingredients like pimento cheese, cream cheese, onions, and all sorts of spices. 

But the recipe we used was made with only these three simple ingredients: Bisquick, cheddar cheese, and sausage, and those sausage balls were a hit every time.

We usually made this recipe at Christmas time, but this Southern snack food is also perfect for game day, wedding or baby showers, or breakfast or brunch potlucks.


Sausage Balls

3 scant cups Original Bisquick Pancake and Baking Mix*

1 pound pork sausage* at room temperature

16 ounces sharp cheddar cheese, shredded* (4 cups)


  1. Combine all ingredients in a large mixing bowl then mix by hand* until all ingredients are evenly combined.
  2. Roll dough into 1 1/2 inch balls and place one inch apart on a baking sheet lined with parchment paper.
  3. Bake at 350 degrees for 20-25 minutes or until lightly browned on the bottom.
  4. Serve sausage balls warm or at room temperature.

Notes:


To measure a scant cup of flour, scoop the flour into the cup using a spoon. Scant means almost a full cup, but not quite. Do not use the cup to scoop the flour and level it as you would normally do with baking, or you will use too much flour for this recipe.

We use Jimmy Dean Hot Sausage.

Make sure to shred your own cheese for this recipe versus using bagged cheese. Bagged cheese is drier than freshly shredded cheese and will contribute to a drier sausage ball.

The dough for this recipe is very stiff, which may make mixing it difficult to do with a spoon. You may have the most success kneading the dough with your hands as you would with bread dough.

The original back-of-box recipe (shown below) also includes the addition of Parmesan cheese, milk, and herbs, as well as sauces for dipping. We have never included those in our recipe. However, if after mixing your dough, it seems dry, you may want to add a splash of milk to help incorporate the ingredients.

Recipe makes approximately 4 dozen sausage balls.


Sunday, September 17, 2023

Apple Scrap Jelly

Today we're bringing you the third and final recipe in our series on apples. Don't forget to grab the first and second apple themed recipes for Spiced Apple Pie Jam and Homemade Applesauce too. 

At the beginning of our series, we discussed how the fall season brings orchard visits. This is why we launched our three-part series featuring apple recipes to help answer the question that comes after the visit: "What do we do with ALL THESE APPLES?!?" 

And with all the peeling and coring that you'll be doing when you make the apple recipes, you’ll be happy to know there is something you can make with all those scraps: Apple Scrap Jelly! In this recipe, you'll basically simmer the peels and cores to extract the juice from them and then use that juice to create jelly.

If you have never used a water bath canning method to can jams or jellies before, you'll want to read the complete instructions online before you start making your Apple Scrap Jelly.

Apple Scrap Jelly

Peels and cores from 12-15 apples (left over from making applesauce, baked apples, apple butter, or other apple recipes)

12 cups water

apple juice (optional)

4 cups sugar

8 Tbsp bottled lemon juice

4 Tbsp pectin

1-2 drops of red food coloring (optional)

6 half pint (8 oz.) glass preserving jars with lids and bands

1 4 oz. glass preserving jar with lid and band

  1. Place apple scraps and water in a large stainless steel pot. Simmer uncovered for approximately 30 minutes and reduce down to 8 cups of liquid.
  2. Strain reduced liquid through a cheesecloth-lined colander and measure out 8 cups. (Top off with apple juice to get to 8 cups, if necessary.)
  3. Whisk in 1/2 Tbsp pectin per cup of liquid. (Amounts for 8 cups of liquid are given in ingredients list above.) 
  4. Bring mixture to a full rolling boil that cannot be stirred down, making sure that you get the mixture to 220 degrees, stirring constantly. (This may take 20-30 minutes.)
  5. For every cup of strained liquid, add 1/2 cup of sugar and 1 Tbsp lemon juice. (Amount for 8 cups of liquid is given in ingredients list above.) 
  6. Return mixture to a full rolling boil. Boil hard 1 minute, stirring constantly. Remove from heat. Skim foam if necessary.
  7. If desired, add 1-2 drops of red food coloring and stir to incorporate. 
  8. Ladle hot jelly into hot jars, leaving 1/4-inch head space. 
  9. Follow water bath canning directions to complete the canning process. Process Apple Scrap Jelly 10 minutes. 
  10. Recipe (beginning with 8 cups of reduced apple liquid) yields 6 half pint jelly jars plus 1 4-oz. jar for taste testing.

Notes:

Because you are using the peels for this recipe, I would recommend using organic apples. That way, you are sure that you're not including pesticides in your finished product. 

For all of our apple recipes, an apple peeler / corer / slicer will make quick work of prepping the apples.

This recipe is written with a "starting point" of 8 cups of reduced apple liquid. That's because if you start with much more than that, you may have issues with your jelly setting up. If you try the recipe and decide you'd like to make A LOT more of it, I would recommend making it in separate batches to ensure success. 

We made two batches - the ones shown in the photos were a "Mixed Apple Jelly" made from a few different varieties of apples. And then we made another batch from exclusively Pink Lady apples and that turned out a pretty light pink color without the addition of any food coloring at all.

Depending on the varieties of apples you use, your jelly liquid may already be a pink color by step 5. So, you may not need (or may choose to omit) the food coloring in step 6. This is why it is listed as an optional ingredient.

Jam and jelly recipes are finicky, so these types of things can cause your recipe not to set:
  • Doubling the recipe.
  • Measuring less than the full amount of sugar listed in the recipe or using a sugar substitute. If you want to use less sugar, use a recipe specifically developed for low sugar. 

This post contains affiliate links.

Monday, September 4, 2023

Spiced Apple Pie Jam

As we *just* start to head into the fall season, that means apple-picking is upon us! And here's the perfect recipe for all those fresh-from-the-orchard apples. 

You know how sometimes you think you want to make a trip to a you-pick apple orchard - It's such a fun fall activity! But then your very next thought is, "What do I actually DO with all those apples?1?" Well, we've got you covered! We'll be bringing you a series of posts all featuring apples over the next several weeks, so be on the lookout for all the recipes in the series. Today's recipe is part one of the series.

This particular jam is a mix of fresh apples and the same spices that you might find in apple pie. It's yummy spread on toast or a biscuit, but it's also quite tasty swirled into your oatmeal for breakfast!

If you have never used a water bath canning method to can jams or jellies before, you'll want to read the complete instructions online before you start making your Spiced Apple Pie Jam.

Spiced Apple Pie Jam

6 cups diced peeled apples (about 6 apples)

2 cups apple juice or apple cider

2 Tbsp. bottled lemon juice

3 Tbsp. powdered pectin

1 tsp ground cinnamon

1/2 tsp ground allspice

1/4 tsp ground nutmeg

2 cups sugar

5 half pint (8 oz.) glass preserving jars with lids and bands

  1. Bring apples, apple juice, and lemon juice to a boil in a 6 quart stainless steel pot. Reduce heat and simmer uncovered for 10 minutes or until apples are soft, stirring occasionally.
  2. Whisk in pectin and spices. Bring mixture to a full rolling boil that cannot be stirred down, over high heat, stirring constantly.
  3. Add sugar, stirring to dissolve. Return mixture to a full rolling boil. Boil hard 1 minute, stirring constantly. Remove from heat. Skim foam if necessary.
  4. Ladle hot jam into hot jars, leaving 1/4-inch head space. 
  5. Follow water bath canning directions to complete the canning process. Process Spiced Apple Pie Jam 10 minutes. 
  6. Recipe yields 5 half pint jelly jars.


Notes:

For all of our apple recipes, an apple peeler / corer / slicer will make quick work of prepping the apples.

Jam and jelly recipes are finicky, so these types of things can cause your recipe not to set:
  • Doubling the recipe.
  • Measuring less than the full amount of sugar listed in the recipe or using a sugar substitute. If you want to use less sugar, use a recipe specifically developed for low sugar. 
Go ahead and make plans to head off to a you-pick apple orchard near you to load up on some fresh apples!


If you're an apple lover (but not a home canner), we are kicking off the series with these other bonus Harris Sisters' apple recipes to get everyone started:

And stop by these other jelly and jam recipes too:

And make sure to check back in the coming weeks for follow-up recipes with the apple theme!

This post contains affiliate links.

Monday, November 14, 2022

Spiced Christmas Jam

'Tis the season for fresh cranberries to hit grocery store shelves near you. And since they're so readily available, here's a quick and easy jam recipe that also makes a lot of jars at once (so it's perfect for Christmas gift-giving).

This particular recipe is a mix of strawberries, cranberries, and spices, and it tastes so good slathered on a warm biscuit, fresh from the oven. (And, here's another secret about this recipe, you can make it with frozen cranberries and it will taste just as good!)

If you have never used a water bath canning method to can jams or jellies before, you'll want to read the complete instructions online before you start making your Spiced Christmas Jam.


Spiced Christmas Jam

40 ounces frozen unsweetened strawberries

1 pound fresh or frozen cranberries

5 pounds sugar

2  liquid fruit pectin packets, 3 ounces each

1 teaspoon ground cinnamon

1 teaspoon ground ginger

1/4 teaspoon ground allspice

1/4 teaspoon ground cloves

15 half pint (8 oz.) glass preserving jars with lids and bands

  1. Pulse strawberries and cranberries in a food processor and then place prepared fruit into an 8 quart pot. Add sugar and spices and stir. Bring to a full rolling boil; boil for 1 minute, stir.
  2. Remove from the heat; stir in the liquid pectin and return to a full rolling boil. Boil for exactly 1 minute, stirring constantly. 
  3. Remove from the heat. Skim off any foam with a spoon.
  4. Ladle the jam mixture into sterilized jars.
  5. Follow water bath canning directions to complete the canning process.  Process Spiced Christmas jam 10 minutes. 
  6. Recipe yields 15 half pint jelly jars.


Notes:

Jam and jelly recipes are finicky, so these types of things can cause your recipe not to set:
  • Doubling the recipe.
  • Measuring less than the full amount of sugar listed in the recipe or using a sugar substitute. If you want to use less sugar, use a recipe specifically developed for low sugar. 

This post contains affiliate links.

Friday, August 19, 2022

Pineapple Habanero Pepper Jelly

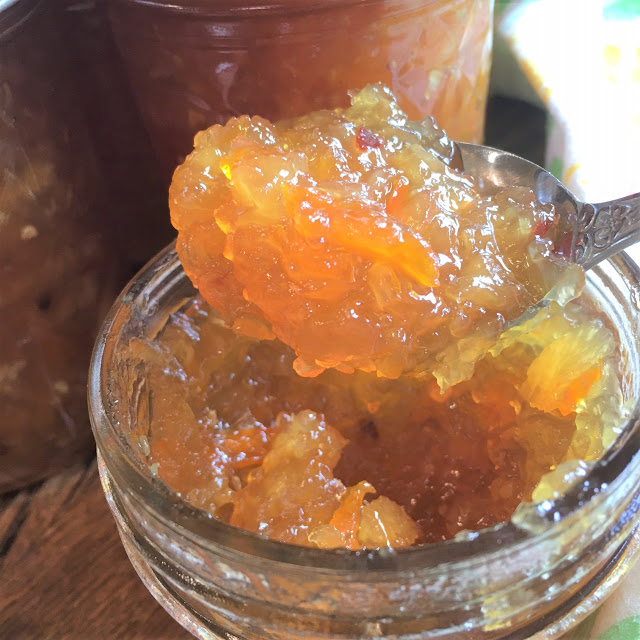
Right now, it's harvest season for peppers. If you've got a pepper lover in your group, you're going to love this recipe for Pineapple Habanero Jelly! My sister-in-law grows habanero peppers in her garden and gave me some of her habanero peppers. So, I made a batch of this jelly, which is sweet with the smallest kick of heat (so it's not too hot for even the kids in your group).

If you have never used a water bath canning method to can jams or jellies before, you'll want to read the complete instructions online before you start making your Pineapple Habanero Pepper Jelly.

Tips for Working with Habanero Peppers in the Kitchen

If you haven't handled habanero peppers in the kitchen before, keep in mind these must-follow rules when cooking with habanero peppers:

  1. Wear disposable gloves.
  2. After handling (even with gloves), wash your hands thoroughly. I use Dawn dishwashing detergent to ensure that any oils that may have made their way onto the skin are absorbed and washed away.
  3. Do not touch your eyes after handling these peppers.


Pineapple Habanero Pepper Jelly

3 cups finely chopped fresh pineapple, well drained (from 2 large fresh pineapples)
5 cups granulated sugar
1 cup apple cider vinegar
1 cup finely chopped golden delicious apple (from 1 large apple)
1 cup finely chopped orange bell pepper (from 1 large pepper)
3 orange habanero peppers, seeded and finely chopped
1 teaspoon crushed red pepper flakes
1 teaspoon butter
3 ounces liquid fruit pectin
2 tablespoons lemon juice
6 half pint (8 oz.) glass preserving jars with lids and bands
1 4 oz. glass preserving jar with lid and band

  1. Place the finely chopped fresh pineapple in a strainer set over a bowl. Press on the pineapple with the back of a spoon to release as much of the juice as possible. Allow the pineapple to drain while you're prepping the other ingredients.
  2. Combine the sugar, vinegar, apple, bell pepper, habanero, red pepper flakes, butter, and exactly 3 cups of the well-drained pineapple in a large pot. 
  3. Stir until sugar is dissolved. Bring the mixture to a full rolling boil and cook for 10 minutes. Watch the pot carefully and lower the heat a bit if the bubbling jelly rises near the top.
  4. Add pectin and lemon juice and bring the mixture back to a rolling boil. Cook for exactly 1 minute, stirring frequently.
  5. Remove pot from heat and skim off any foam on the surface. Ladle jelly into sterilized jars.
  6. Follow water bath canning directions to complete the canning process.  Process Pineapple Habanero Pepper Jelly 10 minutes. 
  7. Recipe yields 6 half pint jelly jars plus 1, 4-oz. jelly jar for taste-testing.


Notes:

When you purchase your fresh pineapple for the recipe, make sure to purchase very large pineapples. If the pineapples are on the smaller side, purchase more than two to ensure that you have 3 cups of chopped pineapple after the pineapple is peeled and cored. You can also substitute canned pineapple for this recipe. 

Jam and jelly recipes are finicky, so these types of things can cause your recipe not to set:
  • Doubling the recipe.
  • Measuring less than the full amount of sugar listed in the recipe or using a sugar substitute. If you want to use less sugar, use a recipe specifically developed for low sugar.
  • It is important to only add 3 cups of well-drained pineapple to this recipe. Don't try to add more than 3 cups or the recipe will not set correctly.
  • It is important to drain the pineapple well for the recipe to set correctly.
Serve this jelly:
  • as an appetizer with cream cheese on crackers or alongside your appetizer cheese tray as a complement to Havarti, gouda, fontina, or goat cheese.
  • as a topper for your baked brie. (If you've made our Pineapple Marmalade Brie before, this jelly would be very similar to the topping in that recipe.)
  • as a marinade, glaze, or sauce for chicken, fish, or pork.
  • as a sauce for meatballs in the crockpot.
  • slathered on warm cornbread or peasant bread, fresh from the oven.
This post contains affiliate links.

Wednesday, June 1, 2022

Vegetable Pancakes

Now that warmer months are upon us and fresh veggies are in season, I thought I'd share a vegetable pancake recipe that features a few different types of vegetables. These can either be straight from your own garden or fresh from the Farmers Market or local produce stand. However you come by your fresh veggies, you'll be glad you decided to make this savory veggie pancake recipe. 

And if you've got picky eaters at home, it's also a tasty way to get more vegetables into their diet. Vegetable pancakes are great for breakfast, lunch, a side dish for dinner, a vegetarian main dish, or even a party appetizer (because of their small size).


Vegetable Pancakes

3 large zucchini, grated and thoroughly drained

2 cups broccoli, grated

6 large carrots, grated

1 onion, diced and sautéed

1, 15 oz. can corn kernels, divided

4 large eggs, beaten

1 tsp. salt

1/2 tsp. pepper

1 tsp. garlic powder

1 cup breadcrumbs

1/2 cup flour

1/2 tsp. baking powder

oil for pan

green onions, thinly sliced (for serving)

sour cream (for serving)

sriracha sauce (for serving, if desired)

Grate & Drain Zucchini

  1. Grate zucchini, sprinkle with 1 teaspoon salt and set in a fine mesh strainer. Place a bowl or plate on top of the zucchini and weigh it down to help it release its liquid. 
  2. Let it sit for at least 30 minutes - 1 hour. After it has drained, wrap it in a clean kitchen towel or a piece of cheesecloth, squeeze to release the remaining liquid, and set aside.

Mix Pancake Batter & Cook Pancakes

  1. In a large mixing bowl, mix together flour, baking powder, pepper, garlic powder, and breadcrumbs. Add zucchini, broccoli, carrots, onion, and 1 cup of corn, and toss to combine.  Make sure to break up the zucchini and coat everything with flour mixture. (Set aside remaining corn for step 8.)
  2. Crack eggs into a small bowl, beat, and pour over the vegetable mixture. Mix to thoroughly combine.
  3. Heat a skillet over medium heat and add enough oil to lightly coat the bottom of the pan.
  4. Using a scoop, drop the vegetable mixture into the hot pan, and flatten with the bottom of the scoop form a patty.
  5. Cook for 2-3 minutes on each side, turning down the heat if they begin to brown too quickly.
  6. Remove from pan to drain on a cooling rack placed over a cookie sheet.
  7. Repeat process with remaining vegetable mixture, adding more oil if the pan becomes too dry.
  8. When final pancake has been cooked, roast remaining corn in pan for 1-2 minutes, or until kernels are lightly browned.
  9. Serve pancakes garnished with sour cream, green onions, and roasted corn. If you'd like your savory veggie cakes spicy, serve topped with a drizzle of sriracha sauce.

Pancake Cooking Tips

  • Use only enough oil to create a crisp, browned crust.
  • Avoid crowding the pan. Leave at least 1 inch of cooking space between pancakes.
  • Wait until first side has browned before turning. Check bottoms of pancakes before turning.
  • Turn each pancake only once.


Notes:

You can use a regular box grater to grate your vegetables, but if you use a food processor, you can cut your prep time for this recipe considerably.

Zucchini is a very watery vegetable, so take care to drain it well so that your pancakes don't turn out soggy.

This is the scoop that I used for this recipe. A small ice cream scoop would work too!

You'll notice that step 6 says to drain them on a cooling rack placed over a cookie sheet. Placing them on a paper towel on a plate will cause them to create steam and lose some of the crispy texture. 

If you'd rather bake these than fry them, bake them at 350 degrees for 20 – 25 minutes. The finished pancakes won't be quite as crispy. 

This post contains affiliate links.

                Monday, November 15, 2021

                Easy Brazilian Cheese Bread

                This Easy Brazilian Cheese Bread recipe is inspired by the savory pastry from Brazil, pão de queijo. With main ingredients like extra-sharp cheddar and Pecorino Romano cheeses, it's made to be enjoyed warm as a snack, an appetizer, or with your favorite meal. 

                These rolls have crunchy outsides, chewy insides, and a yummy, cheesy flavor. Because you combine the ingredients in a blender and pulse until smooth, it's an easy recipe to make. (And one your kids will enjoy helping with!)

                As an added bonus, it's also a gluten-free recipe because it uses tapioca flour.


                Brazilian Cheese Bread

                1 cup whole milk

                1 cup shredded extra-sharp cheddar cheese

                1 cup grated Pecorino Romano cheese

                1/3 cup olive oil

                2 eggs

                1 tsp salt

                2 cups tapioca flour


                1. Preheat oven to 375 degrees. Spray a 12-cup muffin tin with cooking spray. Set aside.
                2. Add milk, cheeses, oil, eggs, salt, and tapioca flour to blender, making sure to add tapioca flour last. Process on high speed for 30 seconds.
                3. Use a rubber spatula to scrape down sides of blender. Replace lid and process on high speed until smooth, about another 30 seconds.
                4. Pour batter evenly into muffin cups, filling each cup about 3/4 full
                5. Bake in oven until rolls are golden brown and puffed, 25-30 minutes.
                6. Remove from oven and place on cooling rack. Let rolls cool on cooling rack in muffin tin for 5 minutes.
                7. Run butter knife around edges of rolls to loosen from muffin tin and transfer to cooling rack. Serve warm.

                Notes:

                You can change the types of cheeses in this bread if you'd like to change the flavor, but there isn't really a good substitute for the tapioca flour. Tapioca flour provides the crispy crust and chewy texture of the Brazilian cheese bread, which is what makes it unique. This is the reason there isn't a good substitute.

                Monday, August 16, 2021

                Lemon Blueberry Quick Bread

                When our recent blueberry picking excursion left us with a huge bounty of blueberries, we started looking for yummy ways to incorporate them in quick and easy recipes.  This lemon blueberry bread came together quickly and was a huge hit with the whole family.  I love this bread for breakfast with coffee, while the rest of my family enjoyed it as a dessert bread.  Either way, it's a winner.  Bonus points if you make two and freeze one for later.  You will thank yourself!  


                Lemon Blueberry Quick Bread

                1/3 cup butter, melted

                1 cup sugar

                3 Tablespoons lemon juice

                2 large eggs, room temperature

                1 1/2 cups all purpose flour

                1 teaspoon baking powder

                1/2 teaspoon salt 

                1/2 cup 2% milk

                1 cup fresh or frozen blueberries

                1/2 cup chopped nuts

                2 Tablespoons grated lemon zest


                Glaze: 

                2 Tablespoons lemon juice

                1/4 cup sugar


                1. Preheat oven to 350 degrees. 
                2. In a large bowl, beat butter, sugar, lemon juice, and eggs.  In another bowl, combine flour, baking powder, and salt. Stir into egg mixture alternatively with milk, beating well after each addition.  Fold in blueberries, nuts, and lemon zest. 
                3. Transfer to a greased loaf pan.
                4. Bake 60-70 minutes, or until a toothpick inserted in the center comes out clean. 
                5. Cool for 10 minutes before removing from pan to a wire rack. 
                6. Combine glaze ingredients; drizzle over warm bread.  Cool completely. 


                And if all this has you wishing for more blueberry recipes, we've got you covered.  Check these out: 

                Tuesday, June 22, 2021

                Blueberry Jam

                Around these parts, it's berry-pickin' season. And that means all new recipes for fresh picked berries! With a harvest of fresh blueberries at our disposal, the boys and I set off on our very first jam-making adventure. I surprised even myself at how easy it was - the jam set perfectly and the water bath canning method wasn't as difficult as I expected. As long as you follow the step-by-step instructions, your jam will come out just fine. So don't let jam or jelly recipes intimidate you! This one is a winner!

                Printed water bath canning directions are usually included in each package of pectin, and you can also find the complete instructions online. If you have never used a water bath canning method to can jams or jellies before, I suggest that you read these instructions before you start making your jam recipe.

                Blueberry Jam

                4 pints fresh blueberries

                Zest and juice of 2 lemons

                7 cups sugar

                1/2 teaspoon butter, to reduce foaming (optional)

                1 pouch liquid fruit pectin (3 ounces)

                10 half pint (8 oz.) glass preserving jars with lids and bands

                1 4 oz. glass preserving jar with lid and band

                1. Put half of the berries in an large, deep enamel or stainless cooking pot and crush the berries, making juice.
                2. Stir in the remaining berries, lemon zest, and lemon juice. 
                3. Add the sugar and butter and bring to a full rolling boil, stirring constantly. Pay careful attention to the pot to ensure that it does not boil over.
                4. While the berries are rapidly boiling, quickly add the fruit pectin and stir for exactly one minute.
                5. Remove from heat and ladle into sterilized jars. 
                6. Follow water bath canning directions to complete the canning process. Process Blueberry Jam 10 minutes.
                7. Recipe yields 10 half pint jelly jars plus 1, 4-oz. jar for taste-testing.


                Notes:

                Don't double the recipe. Doubling the recipe will cause the jam to not set.

                Measure the full amount of sugar listed in the recipe using a dry measuring cup. If you want to use less sugar, use a recipe specifically developed for low sugar. If you just use less sugar in a jam recipe, it won't set correctly.

                Use the type and amount of fruit specified. If you want to make a recipe that includes strawberries and blueberries, for example, use a recipe specifically developed for mixed berries. If you just change the fruit content in a jam recipe, it won't set correctly.

                If you do not add butter to reduce foaming, skim and discard the foam from the top of the jam mixture  before adding to sterilized jars.

                This post contains affiliate links.

                Wednesday, July 10, 2019

                Glazed Cherry Breakfast Cake

                We recently gave this new homemade coffee cake recipe a try. With its pretty red and white color scheme, we thought it was a pretty one to make for Fourth of July (but it would also make a pretty cake for your Christmas breakfast table too). We were surprised at how easy it was to make and how delicious it was! Even though you make it from scratch, the recipe is really easy and takes no time at all to make. We ate it as a breakfast pastry, but you could serve it for dessert too.

                And the best part about this breakfast cake? It has cherry filling as the middle layer, so it tastes EVEN BETTER a day or two after you make it! This one didn't stick around our home long at all!


                Glazed Cherry Breakfast Cake

                Cake

                1 cup butter (room temperature)
                1 cup granulated sugar
                1 tsp vanilla
                3 eggs
                2 cups all purpose flour
                1 tsp baking powder
                1 Tbsp milk
                1 can cherry pie filling

                Glaze

                1 cup confectioner's sugar
                2 Tbsp milk
                1/2 tsp vanilla


                1. Preheat oven to 350 degrees. Grease 9 x 13 pan and set aside.
                2. In a large mixing bowl, use a mixer on low speed to cream butter, sugar, and vanilla. 
                3. Add eggs one at a time, beating well after each addition.
                4. Sift together flour and baking powder and mix into to creamed mixture.
                5. Mix in milk.
                6. Spread 3/4 of mixture into greased pan. 
                7. Spoon cherry pie filling on top of mixture and spread evenly on top.
                8. Drop remaining mixture by spoonfuls on top of cherry pie filling.
                9. Bake for 50 minutes.
                10. Remove the pan from the oven and place it on a wire rack to cool completely.
                11. Meanwhile, prepare the glaze. Place the confectioner's sugar, milk, and vanilla in a small bowl and stir until smooth.
                12. Pour the glaze over the top of the hot cake in the pan, spreading it to the sides with a spoon.
                Look how pretty it comes out!


                Notes:

                If you don't particularly like cherries or if you'd like to try a different flavor, this recipe is easy to change by simply choosing a different flavor of pie filling! Try blueberry, apple, raspberry, apricot, strawberry, or peach!

                Or you could always substitute our baked apples, which is one of our most popular (and easy) recipes on the blog.

                If you are a fan of cherries, make sure to check out these other cherry recipes too!


                Enjoy!

                This post contains affiliate links.

                Tuesday, March 5, 2019

                It's Now or Never Quick Bread

                You might be thinking this is a weird name for a baked good, but it's actually the perfect thing to call it. Why? Well, because most recipes are named after their main ingredients.

                How This Recipe Got Its Weird Name

                But, the way this recipe works is that you determine the main ingredient based on what you have right now that you need to use up. You can use any type of fruit or nuts or baking chips as the main ingredient in this recipe.

                You know how you sometimes go to the grocery store and you buy a pint of blueberries because they were on sale? No? Well, I tend to do this because they are my son Aidyn's favorite fruit.

                Well, this week, those same blueberries were still staring at me from the refrigerator at the end of the week, and I hadn't done a darn thing with them. Then, I remembered this recipe . . . .


                But spring time is upon us and that is a wonderful time for you to save this recipe too! Before you know it, we'll all be inundated with fresh fruits from roadside stands, farmers' markets, berry picking farms, and if we're lucky, maybe even from our own gardens.

                It's hard to resist! We've waited all year for our favorite fruits to come back into season, and this recipe is the perfect thing to make with them when you've got a few pieces of fruit sitting in the crisper drawer in your refrigerator and you're not sure that fruit will make it another few days.

                So, that's the story behind the name - it's now or never - get it? Even though Elvis was talking about his love, your fruit also won't wait. :-)


                It works with whatever you  happen to have on hand. That's the beauty of the recipe!

                It's Now or Never Quick Bread


                2 bananas (overripe)
                1/3 cup butter, melted
                3/4 cup granulated sugar
                1 egg, beaten
                1 tsp vanilla
                1 tsp baking soda
                1 tsp cinnamon
                pinch of salt
                1 1/2 cups all purpose flour
                2 cups of chopped fruit, nuts, or baking chips (2 cups total, can be a mixture - do not include melons)

                1. Spray a 9 x 5 loaf pan with cooking spray and set aside. Preheat oven to 350 degrees.
                2. Mash bananas and mix with melted butter in a large mixing bowl.
                3. Add sugar, egg, and vanilla. Mix together.
                4. Add baking soda, salt, and cinnamon. Mix together.
                5. Add flour and mix.
                6. Fold in mixture of chopped fruits, chopped nuts, and baking chips. (This mixture may vary each time you make the recipe.)
                7. Pour batter into greased loaf pan and bake for 1 hour or until a toothpick inserted into center comes out clean.
                8. Cool for 5 minutes in pan and then turn out onto a wire rack to cool completely.


                Notes:

                I usually save extra overripe bananas in a gallon-sized Ziploc bag in my freezer. That way, I always have them on hand for baked goods like this.

                If the fruits you choose are particularly juicy and the bread doesn't want to hold together, it will still make an excellent "fruit crumble" topping for ice cream.


                30 Sweet Quick Breads That You Can Make With This Recipe


                So now that you have the basic recipe, you can see where you could make all different kinds of quick breads. The possibilities are endless! Here are some interesting combinations to get you started:

                1. Blueberry and pecan
                2. Blueberry and apple
                3. Blueberry and peach
                4. Blueberry and raspberry
                5. Strawberry and peach
                6. Strawberry, blueberry, and blackberry
                7. Blackberry and walnut
                8. Raspberry and pecan
                9. Peach and almond
                10. Apricot and coconut
                11. Apricot and walnut
                12. Pineapple and walnut
                13. Pineapple and strawberry
                14. Pineapple and coconut
                15. Pineapple and cherry
                16. Apple and walnut
                17. Apple and raisin
                18. Cranberry and orange
                19. Cranberry and almond
                20. Cherry and almond
                21. Pear and walnut
                22. Strawberry and chocolate chips
                23. Strawberry and peanut butter chips
                24. Blueberry and white chocolate chips
                25. Raspberry and white chocolate chips
                26. Peach and white chocolate chips
                27. Pineapple, coconut, and white chocolate chips
                28. Apple, raisin, and cinnamon chips
                29. Cranberry, orange, and cinnamon chips
                30. Cherry, almond, and dark chocolate chips

                How to Freeze Quick Bread For Later

                If you don't want to eat your quick bread right away, you can freeze it. Make sure to cool it completely, then you can wrap it securely in aluminum foil and label it with the name and date. Freeze it for up to 3 months and thaw completely before serving.


                If you like quick breads, you might want to take a peek at these other popular Harris Sisters' recipes:


                This post contains affiliate links.

                Thursday, February 15, 2018

                Blueberry Monkey Bread

                Do your children have a favorite food? My son Aidyn absolutely LOVES blueberries. So, when blueberries were on sale at the grocery store last week, I grabbed a carton but I didn't really have a plan for them.

                Once I got them home, we put them to very good use in this quick and easy breakfast recipe. I'm sure many of you have made monkey bread before. Our family tradition is to make Gorilla Bread (like Monkey Bread, but a little fancier) for Christmas morning breakfast, so the boys were already familiar with how to make it.

                Harris Sisters GirlTalk: Blueberry Monkey Bread

                Blueberry Monkey Bread


                2 cans refrigerated biscuits (8 count)
                1 pint fresh blueberries
                1 cup granulated sugar, divided
                1 tsp ground cinnamon
                1/4 cup brown sugar
                1/2 cup (1 stick) butter
                2 tsp vanilla extract


                1. Preheat oven to 350 degrees. Spray bundt pan with nonstick cooking spray and set aside.
                2. Cut each biscuit into 4 pieces. (You will have a total of 64 cut pieces.)
                3. Pour 1/2 cup sugar and 1 tsp cinnamon into a gallon size ziploc bag. Working in batches, place the biscuit pieces in the bag and shake to coat with the cinnamon and sugar mixture. Transfer the coated pieces to the greased bundt pan.
                4. Layer blueberries on top and in between the biscuit pieces in the bundt pan. Pour any remaining sugar mixture over the top of the biscuits and place any remaining blueberries on top.
                5. In a microwave safe cup or bowl, melt the butter. Add the remaining granulated sugar, brown sugar, and vanilla. Stir to incorporate.
                6. Pour the butter mixture evenly over the biscuits and blueberries in the pan.
                7. Bake on the middle rack of the preheated oven for 40-45 minutes, until the top is browned and the biscuits in the center of the pan feel firm to the touch. 
                8. Remove from oven and place on a cooling rack for 10 minutes. Then invert onto a large plate. The berries and syrup will be hot. Allow to cool slightly before serving. Serve warm.

                Here's what it looks like before you bake it:

                Harris Sisters GirlTalk: Blueberry Monkey Bread


                And then through the magic of your oven, it turns into this!

                Harris Sisters GirlTalk: Blueberry Monkey Bread

                Harris Sisters GirlTalk: Blueberry Monkey Bread


                Notes:
                If you have a blueberry lover in your family, I think they will love this recipe too! (And I'll tell you a secret - it's just as easy to make as regular Monkey Bread - it just looks like you spent a lot of time on it!) 

                So what does that make this recipe? That's right! It makes it the perfect recipe to bring along to a breakfast or brunch, nobody would ever know that you didn't spend a whole lot of time making the syrup for this. You can keep that info all to yourself! Ha!

                If you ARE interested in making a simple Blueberry Syrup for waffles, pancakes, French toast, etc., here's the go-to recipe for that. Approved by Aidyn and so simple, he's learned how to make it all by himself!

                Thursday, October 19, 2017

                Baked Apple Pancake

                We recently gave this breakfast casserole a try, and we were impressed! Not only was it easy to make, but it was also a welcome warm breakfast for a chilly fall morning.

                What makes this so easy is that you mix everything up and then put it in a casserole dish to bake. So while it might taste like apple pancakes, you don't have to make them one by one. Give this recipe a try - you'll be happy to add it to your fall breakfast rotation.

                Harris Sisters GirlTalk: Baked Apple Pancake

                Baked Apple Pancake

                6 medium apples, peeled and sliced
                1/4 cup lemon juice
                1 tsp cinnamon
                3/4 cup confectioner's sugar
                12 Tbsp butter, melted and cooled, divided
                6 eggs
                1/2 tsp salt
                1 cup all-purpose flour
                1 cup milk
                1 tsp vanilla


                1. Preheat oven to 425 degrees. Spray a 3 quart casserole dish with cooking spray. Set aside.
                2. Place apple slices in a skillet with lemon juice. Toss with cinnamon and confectioner's sugar. Add 8 Tablespoons butter. Cook on low-medium heat, stirring, for 4 minutes until apples are tender.
                3. Add flour, salt, eggs, milk, vanilla, and remaining butter to a mixing bowl. Beat with an electric mixer until all ingredients are incorporated.
                4. Spread apples evenly in bottom of casserole dish. Pour batter over top.
                5. Bake about 20-25 minutes, until no moist spots are left in the batter.
                6. Remove from oven and serve by flipping portions onto plates and sprinkling with confectioner's sugar. Serve warm.
                Harris Sisters GirlTalk: Baked Apple Pancake

                Harris Sisters GirlTalk: Baked Apple Pancake

                Your family will really love this breakfast treat - it's almost like having apple pie for breakfast! (And who can resist that?) If you're looking for other tried and true fall breakfast recipes, give these a try:

                Thursday, June 29, 2017

                Strawberry Oatmeal Crumble Bars

                This recipe was one that we tried for our recent Girls' Weekend. While we ate it for breakfast, it was so yummy that you could easily top it with ice cream and have it for dessert!

                This breakfast bar recipe was easy to make and is certainly a keeper. Give it a try for yourself!

                Harris Sisters GirlTalk: Strawberry Oatmeal Crumble Bars

                Strawberry Oatmeal Crumble Bars


                Base and Crumble Topping

                1 cup all-purpose flour
                3/4 cup old-fashioned oats (not quick oats or instant oats)
                1/2 cup granulated sugar
                1/4 cup packed brown sugar
                1/2 teaspoon cinnamon
                1/4 teaspoon salt
                1/2 cup unsalted butter, melted
                1 large egg yolk
                1 tablespoon packed brown sugar, additional for topping

                Strawberry Filling

                2 cup strawberries, fresh or frozen
                1 tablespoon lemon juice
                1/4 cup granulated sugar
                2 teaspoons cornstarch


                1. Preheat the oven to 350 degrees. Spray an 8 x 8 baking pan non-stick cooking spray.
                2. In a medium bowl, whisk together the flour, oatmeal, 1/2 cup granulated sugar, 1/4 cup brown sugar, cinnamon, and salt. 
                3. Gently stir in the melted butter and egg yolk. 
                4. Remove 1 cup of the mixture. Set aside.
                5. Press the remaining mixture into the bottom of the prepared pan. 
                6. In a medium bowl, mix together all the ingredients for the strawberry filling. Spoon over top of the base oatmeal mixture in the pan. 
                7. To the reserved 1 cup of oatmeal mixture, stir in the 1 additional tablespoon of brown sugar. Crumble the mixture evenly over top of the strawberry layer. 
                8. Bake in the preheated oven for about 40-45 minutes or until you see the top turning golden brown. Note: If you used frozen berries, adjust the bake time to 50-55 minutes. 
                9. Allow to cool fully to room temperature (at least 3 hours) before cutting into the bars. 

                Notes:
                Store any leftovers in the refrigerator in an airtight container.

                You may substitute blueberries, blackberries, or raspberries for strawberries depending on your preference and what fruit is in season.

                This one came out a beautiful red color!

                Harris Sisters GirlTalk: Strawberry Oatmeal Crumble Bars


                Friday, April 29, 2016

                Homemade No Butter Waffles

                I love this recipe. It truly is a "pantry" recipe, meaning that you are likely to have every ingredient you need to make it already on hand (which makes it the perfect recipe to make on the weekends even before you've had a chance to do your weekly grocery shopping).

                AND - the bonus for this recipe is that it doesn't call for butter. So, if you have a dairy allergy, are dairy intolerant, or simply don't have any on hand, you're still good to go with this recipe. I have substituted Almond milk for the milk in this recipe with success. So keep that in mind if you fall into any of the non-dairy categories.


                No Butter Waffles


                2 1/2 cups all purpose flour
                4 tsp baking powder
                1/2 tsp salt
                2 tsp granulated sugar
                2 large eggs, beaten
                2 cups milk
                3/4 cup vegetable oil
                1 tsp vanilla extract


                1. In a large mixing bowl, mix together dry ingredients. 
                2. Add eggs, milk, oil, and vanilla, and stir to incorporate. Mix until batter is mostly smooth and without lumps.
                3. Heat waffle iron. 
                4. When iron is heated, pour batter onto the center of waffle iron until it spreads approximately 1/2 - 1/4 inch away from the edges. This will prevent the batter from seeping out of the sides of the waffle iron as the waffles cook.
                5. Remove the waffle from the iron when indicator light turns on. Continue in the same manner until you have used all of the batter.
                6. Serve waffles warm with toppings of choice. Makes 5 Belgian waffles.


                Delicious waffle toppings:
                Powdered Sugar
                Fresh Fruit
                Maple Syrup

                You Might Also Be Interested In