Showing posts with label appetizers and snacks. Show all posts

Saturday, November 15, 2025

25 Vintage Holiday Recipes Straight from Grandma’s Cookbook

There’s just something special about those old-fashioned holiday recipes that have been passed down through generations, the ones written inside the pages of Grandma’s favorite cookbook in her own handwriting. This Vintage Holiday Recipe Roundup celebrates those timeless classics that bring warmth and nostalgia to every Christmas table. 

The holiday season is packed full of nostalgia. Here’s a list of The Harris Sisters favorite vintage recipes to help keep some of those old-fashioned holiday traditions alive. If you’re planning a Retro-Themed Christmas Party, make sure to add some of these Christmas goodies to the menu. Others on the list are sure to please at your next holiday gathering. So dust off your mixing bowls and get ready to bring a little vintage magic back to your kitchen this season.


Appetizers & Snacks

Every great holiday gathering starts with something to nibble on, and these vintage appetizers and snacks are just the thing to get the party started. From cheese balls rolled in chopped pecans to crispy sausage balls, these recipes are just like Grandma used to make.

Classic Cheeseball Recipe


Chex Mix

Swiss & Gruyere Fondue

Classic Cheese Ball

Cucumber Finger Sandwiches

Stuffed Mushrooms

Sausage Balls


Beverages

Whether you’re serving up a cozy cup of holiday wassail or a festive punch bowl brimming with cheer, these nostalgic beverages are sure to warm hearts and hands alike. Each sip feels like a taste of Christmas past, perfect for gathering around the fire or toasting with family and friends.

Champagne Punch

Champagne Punch

Non-Alcoholic Party Punch

Holiday Wassail

Non-Alcoholic Holiday Wassail

Homemade Eggnog


Side Dishes

The secret to a memorable holiday feast is in the sides, and these vintage favorites are true comfort food classics. From delicious cornbread and creamy sweet potatoes to cranberry sauce and savory stuffing, these side dishes bring warmth, tradition, and a touch of home to every holiday table.

Sweet Potato Casserole


Grandma’s Bread Stuffing

Sweet Potato Casserole

Cranberry Sauce

Old-Fashioned Cornbread


Desserts

No holiday meal is complete without a few sweet treats, and Grandma’s dessert recipes never disappoint. Think buttery cookies decorated with sprinkles, custard pies, and old-fashioned cakes that make the whole house smell like Christmas. These desserts are pure nostalgia, simple, homemade, and made with love.

Grandma Elizabeth's Coconut Custard Pie


Grandma Elizabeth’s Cobbler

Peanut Butter Balls

Grandma Elizabeth’s Coconut Custard Pie

Grandma Elizabeth’s Applesauce Cake

Coconut Cake

Grandma Elizabeth’s Magic Fruit Cake

No Bake Choc Oat Cookies

Old-Fashioned Thumbprint Cookies

Grandma Elizabeth’s Oatmeal Cake

Butter Cookies with Sprinkles

Jello Mold

Orange Balls


There’s a reason Grandma’s recipes never go out of style. They’re made with simple ingredients, a little patience, and a whole lot of love. As you stir, bake, and taste your way through these vintage holiday favorites, we hope they bring back sweet memories and help you create new ones around your own table. After all, the best part of any recipe isn’t just the flavor, it’s the traditions that get passed along with every bite.

Thursday, October 9, 2025

The Best Halloween Treats and Recipes in One Roundup

Growing up, Halloween wasn’t just about the candy. To us, it was about making your own homemade costumes from what you could find around the house, wearing your costume to school for a full day of celebration, and the occasional Raisin Creme Pie plunked into the bottom of your goodie bag on Halloween night.

While Halloween celebrations may have grown bigger, that just means more reasons to whip up tasty treats and celebrate. So The Harris Sisters are stirring up a little magic in the kitchen.


This year, we’ve pulled together some of our favorite Halloween-inspired recipes from past posts that our readers loved most. Think of it as our own little recipe spell book that's full of comforting flavors, nostalgic bites, and a touch of whimsy that’ll take you back to the good old days while keeping things fun for today’s celebrations.

Whether you’re planning a party spread, packing up treats for the kiddos, or just looking to indulge in a cozy night at home, this roundup is full of inspiration. Click through the links, revisit some of our tried-and-true favorites, and maybe discover a new tradition to add to your Halloween lineup.

Spooky Sweets 

Let's start out with the real star of Halloween - the sugary sweets! Sure to impress, these cakes, cookies, and bars will fly off your party table like a witch into the night.

Halloween Butter Cookies with Sprinkles

Halloween M&M Cookie Bars - These chewy cookie bars are the best and they're so festive with Halloween colored M&Ms.

Halloween Butter Cookies with Sprinkles - This vintage butter cookie recipe can be made for any holiday but when you add Halloween cookie cutters and sprinkles, they come out awfully cute for spooky season.

Chocolate Peanut Butter Fudge Cake - This decadent dessert is a real showstopper and you can decorate it with Reese's Pieces or Halloween M&Ms for a Halloween party.

Oreo Dirt Cake - Make this recipe into a graveyard by preparing it in a larger baking dish with decorated cookies, gummy worms, and pumpkin candy!

Pumpkin Bread - One of our most visited recipes, this pumpkin bread does not disappoint and has all the flavors of the fall season.

Pumpkin White Chocolate Chip Cookies - This recipe is perfect for all you folks out there who love pumpkin spice flavor this time of year.

Pumpkin Crunch Cake - Another favorite for pumpkin lovers!

Earthquake Cake - The perfect black and white cake for a disaster-themed party.

Haunting Hors D'oeuvres

Add a pop of pumpkin orange magic to your party table with these appetizers and dips. They're the  perfect color for the Halloween season!

Pimento Cheese Pinwheels


Buffalo Chicken Dip - A fan favorite, this spicy chicken dip comes together in no time flat. Serve with your favorite tortilla chips. (And don't forget that sometimes you can find ghost shaped tortilla chips near Halloween!)

Pineapple Marmalade Brie - The pineapple marmalade gives this appetizer its orange hue for Halloween parties. If you're feeling really fancy, cut the puff pastry dough in strips and wrap the brie like a mummy before you bake it. Add some olives or small pieces of red peppers from your canape tray for eyes if you're feeling fancy!

Classic Cheese Ball - This vintage recipe is straight from our Aunt Gladys' kitchen, so you know it's a winner. We usually make it at Christmas, but the orange color is perfect for Halloween parties too.

Queso Dip - This queso is a healthier version, using real cheese and evaporated milk. It's just as easy to make as the Velveeta kind so give this one a try.

Baked Pimento Cheese Pinwheels - These cute little pimento cheese pinwheel sandwiches won't last long on your party table. Made with homemade pimento cheese and baked to perfection, they're sure to please!

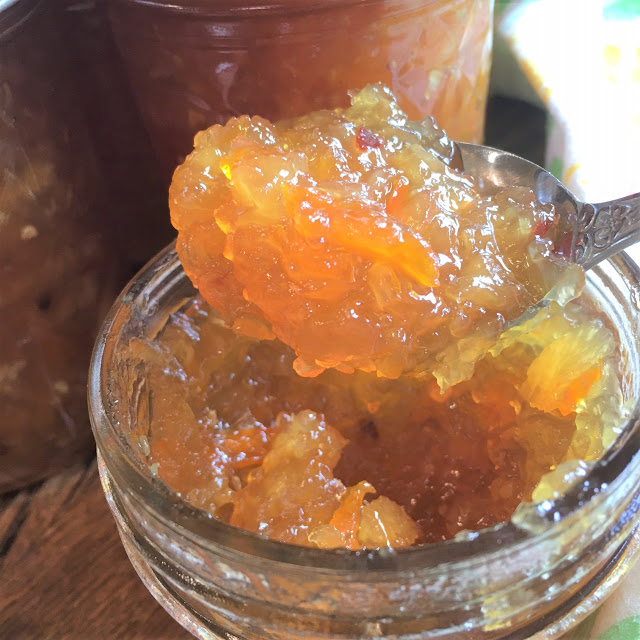
Pineapple Habanero Pepper Jelly - Serve this orange pepper jelly as an appetizer with cream cheese on crackers or alongside your appetizer cheese tray as a complement to Havarti, gouda, fontina, or goat cheese.


Bewitching Beverages

What's brewing in your cauldron? Whip up some of these magic potions for your Halloween party. 

Halloween Witch's Brew


Crockpot Witch's Brew - This recipe makes an entire cauldron (crockpot) of spiced apple cider, so it's perfect to serve up at your next Halloween party.

Non-Alcoholic Party Punch - This vintage punch recipe is a fan-favorite and is perfect for Halloween parties if you make it purple or orange!

Happy Hallo-WINE! - Which Halloween candy pairs better with a Moscato? Which pairs better with a Cabernet? We've tasted 5 wines with 11 types of candy for you and provided our thoughts on the pairings so that you have all the details!


As we wrap up this little collection of recipes, it’s hard not to notice how much Halloween has grown since the good old days. What used to be an evening of trick-or-treating and a few homemade goodies has turned into full-blown celebrations, complete with over-the-top decorations, themed parties, and enough candy to fill a cauldron. 

But no matter how elaborate the holiday has become, the heart of it is still the same: gathering with the people you love, making memories, and sharing a few sweet treats along the way. We hope these recipes bring a touch of nostalgia to your kitchen while adding a little extra sparkle to your celebrations this year.

Saturday, May 31, 2025

If You Give a Kid a Crockpot: Pizza Fondue

Over the next several weeks, we'll be bringing you recipes for beginning cooks designed to teach basic cooking skills. So be on the lookout for all the recipes in the series. Today's recipe is part of the Cooking Challenge series.

This crockpot Pizza Fondue recipe will provide an easy weeknight meal when paired fresh chopped veggies, pepperoni, and cubed Italian bread dippers. And, really, what's not to like? It's a pizza in a crockpot (or fondue pot if you have one)!


Pizza Fondue

1 Tbsp olive oil
3 cloves garlic, minced
24 oz. jar of marinara sauce
1 tsp dried basil
3 cups mozzarella cheese, shredded
1 cup cheddar cheese, shredded
1 cup grated Parmesan cheese
1 Tbsp cornstarch

For serving:
Cubed Italian or French bread 
Fresh veggies (broccoli, carrots, sliced mushrooms)
Pepperoni

  1. Add olive oil, garlic, marinara sauce, and basil to a crockpot.
  2. Add mozzarella cheese, cheddar cheese, Parmesan cheese, and cornstarch to a gallon-sized Ziploc bag, seal, and shake. Add cheese mixture to the marinara sauce in several batches and stir to incorporate.
  3. Set heat on high, and cover for 30 minutes. Turn down to low and cook for another 45 minutes, stirring every 15 minutes. Set heat to warm when ready to serve.
  4. While the fondue is cooking, cut fresh bread and vegetables for serving. 

You Can Get with This or You Can Get with That (Recipe Substitutions):

  • Substitute garlic powder or jarred minced garlic for fresh minced garlic.
  • If you do not have a fondue set, use regular forks instead of fondue forks for dippers. 
  • If you have a fondue pot, make steps 1 and 2 in a pot on the stove. Once cheese has completely melted, transfer to a fondue pot to keep warm and serve.


This Is How We Do It (Kitchen Skills You'll Learn in This Recipe):

  • Chopping vegetables
  • Measuring ingredients
  • Reading and following a recipe
  • Setting a timer
  • Using a crockpot


If You Give a Kid a Cooking Challenge

This recipe is part of the three-part If You Give a Kid a Cooking Challenge recipe series. These recipes are designed to: 

  • be easier to make
  • have a minimal number of ingredients (minus pantry staples like oil and spices)
  • be quick to prep 
  • make enough for one person to have leftovers for a few days
Make sure to visit the main post to see all of the recipes in the series.

Wednesday, November 20, 2024

Crockpot BBQ Sriracha Meatballs

If you have a potluck or a party coming up, and you're in need of an easy appetizer recipe, look no further than this crockpot BBQ meatball recipe. With just four ingredients (many of which you may already have in your pantry), this recipe will come together in no time at all.

These marinated meatballs have just a bit of a kick from Sriracha sauce but the secret ingredient is grape jelly!


Crockpot BBQ Sriracha Meatballs

28 oz. fully cooked frozen meatballs

18 oz. bottle of BBQ sauce 

½ cup grape jelly

1 Tbsp. Sriracha

Chopped green onions or chives for garnish (optional)

  1. Add frozen meatballs to a slow cooker.
  2. Pour remaining ingredients on top of meatballs and stir until evenly coated.
  3. Cook on high for 2 hours or low for 3-4 hours, or until meatballs are heated through.
  4. Turn the slow cooker to warm until ready to serve.
  5. When ready to serve, garnish with chopped green onions or chives if desired.

Other Favorite Appetizer Recipes to Try

Round out your party table with these tried and true Harris Sisters' recipes:


Wednesday, October 9, 2024

Sausage Balls

This is the Sausage Ball recipe that The Harris Sisters family made growing up. If you look up "Sausage Balls Recipe" today, you'll find many different variations of this savory appetizer recipe, including ingredients like pimento cheese, cream cheese, onions, and all sorts of spices. 

But the recipe we used was made with only these three simple ingredients: Bisquick, cheddar cheese, and sausage, and those sausage balls were a hit every time.

We usually made this recipe at Christmas time, but this Southern snack food is also perfect for game day, wedding or baby showers, or breakfast or brunch potlucks.


Sausage Balls

3 scant cups Original Bisquick Pancake and Baking Mix*

1 pound pork sausage* at room temperature

16 ounces sharp cheddar cheese, shredded* (4 cups)


  1. Combine all ingredients in a large mixing bowl then mix by hand* until all ingredients are evenly combined.
  2. Roll dough into 1 1/2 inch balls and place one inch apart on a baking sheet lined with parchment paper.
  3. Bake at 350 degrees for 20-25 minutes or until lightly browned on the bottom.
  4. Serve sausage balls warm or at room temperature.

Notes:


To measure a scant cup of flour, scoop the flour into the cup using a spoon. Scant means almost a full cup, but not quite. Do not use the cup to scoop the flour and level it as you would normally do with baking, or you will use too much flour for this recipe.

We use Jimmy Dean Hot Sausage.

Make sure to shred your own cheese for this recipe versus using bagged cheese. Bagged cheese is drier than freshly shredded cheese and will contribute to a drier sausage ball.

The dough for this recipe is very stiff, which may make mixing it difficult to do with a spoon. You may have the most success kneading the dough with your hands as you would with bread dough.

The original back-of-box recipe (shown below) also includes the addition of Parmesan cheese, milk, and herbs, as well as sauces for dipping. We have never included those in our recipe. However, if after mixing your dough, it seems dry, you may want to add a splash of milk to help incorporate the ingredients.

Recipe makes approximately 4 dozen sausage balls.


Friday, September 6, 2024

Caprese Skewers

This recipe is one of the easiest appetizers you'll ever make, and if you have an abundance of cherry tomatoes and basil still overflowing in your garden, then it's perfect to make right now! With just three ingredients, you'll be able to put these together in no time!


Caprese Skewers

24 grape or cherry tomatoes

12 marinated mini mozzarella balls

12 large basil leaves

12 mini skewers

Olive oil (optional)

Balsamic vinegar reduction* (optional, recipe follows)

Salt & pepper (optional)

  1. Thread two tomatoes, one mozzarella ball, and one basil leaf onto each mini skewer, alternating ingredients.
  2. If using unmarinated mozzarella balls, consider drizzling with olive oil and balsamic vinegar reduction and sprinkling with salt and pepper.
  3. For best results, assemble up to 4 hours prior to serving. Store in the refrigerator.


Notes:

  • We used marinated mozzarella balls so that we could skip the additional step of drizzling with olive oil and balsamic reduction and sprinkling with salt and pepper.
  • We used large basil leaves, so only used one per skewer. If you are using small basil leaves, you may want to use two per skewer.
  • One recipe yields 12 appetizer skewers. Double the recipe for a larger crowd.
  • Because of their beautiful red, white, and green color, these also make a great (and quick!) appetizer to bring to Christmas parties. If you're wondering where you can find fresh basil in December, most grocery stores carry fresh herbs in produce section.

How to Reduce Balsamic Vinegar

If you want to use Balsamic Vinegar Reduction for your recipe, complete this step first and allow to cool while you assemble your Caprese Skewers. Here's how to reduce Balsamic Vinegar if you are using unmarinated mozzarella balls. 

  1. Pour 1 cup of balsamic vinegar into a small saucepan over medium-low heat.
  2. Cook, stirring occasionally, until vinegar has reduced to about half a cup (this will take about 15 minutes or so). Vinegar will be the consistency of a thin maple syrup.
  3. Allow balsamic reduction to cool before drizzling over your Caprese Skewers (it will thicken as it cools).

Monday, February 20, 2023

Apple Rose Tarts | How to Make Puff Pastry Apple Roses

Whether you're throwing a wedding shower, baby shower, tea party, or Mother's Day celebration, wow your guests with these tiny glazed apple rose tarts. Perfect for serving alongside your other party appetizers, these individual mini desserts look adorable served in tea cups.


Apple Rose Tarts

2 sheets frozen puff pastry dough

2 medium pink or red apples like Pink Lady or Fuji

juice from half a lemon

4 Tbsp. strawberry preserves

1 Tbsp. water

powdered sugar for dusting


  1. Thaw puff pastry sheets at room temperature.
  2. Preheat oven to 350°F. Grease a 12-cup muffin tin. Set aside.
  3. Remove core from apples. Using a mandoline slicer, slice apples as thin as possible. (The thinner the apples, the more pliable they will be, which will prevent them from breaking when rolling.)
  4. Place apple slices into a medium, microwave-safe bowl. Fill bowl with enough water to cover apple slices. Mix in lemon juice to prevent apples from browning. Heat bowl of apples for about 1-2 minutes in the microwave or until apples are soft and pliable.
  5. Lightly flour a pastry board. Place puff pastry sheets on board and slice each sheet into six equal strips.
  6. In a small bowl, add strawberry preserves and 1 Tbsp. water. Stir together and then heat in the microwave for about 20 seconds, or until warm and easy to spread. Spread a thin layer of  preserve mixture on one side of each strip of dough.
  7. Line apple slices on the upper half of each strip of dough, so that they are sticking out partially, with the skin part of the slices sticking out above the dough. (You don't want too much of the apple sticking out above the dough, otherwise this part of the apple will overcook in the oven. You just want about 1/3 sticking out.) Overlap the apple slices when lining them on the strip of dough. Fold up the bottom half of the dough.
  8. Starting at one end, carefully roll up the strip of dough, forming a tight spiral. Stretch the end of the dough and pinch to close. Place into greased muffin tin. Repeat with remaining dough.
  9. Place muffin pan into the lower half of the oven. (This will prevent the apples from browning too fast.) Bake for about 40 minutes or until puff pastry is fully cooked.
  10. Dust apple roses with powdered sugar right before serving.

If you're planning a party, make sure to check out these other recipes for finger foods:

Monday, January 30, 2023

Cucumber Tea Sandwiches

A favorite among tea parties, garden parties, Mother's Day brunches, baby showers, and bridal showers, Cucumber Tea Sandwiches are the perfect small bite. These savory appetizers are a tasty addition to your party table. 


Cucumber Tea Sandwiches

1 cucumber, peeled and thinly sliced

1 (8 ounce) package cream cheese, softened

¼ cup mayonnaise

¼ teaspoon garlic powder

¼ teaspoon onion powder

1 loaf sliced white bread, crusts removed

1 pinch lemon pepper (optional)


  1. Place cucumber slices between 2 paper towels set in a colander. Allow liquid to drain, about 10 minutes.
  2. Mix cream cheese, mayonnaise, garlic powder, and onion powder in a bowl until smooth.
  3. Spread cream cheese mixture evenly on one side of each bread slice.
  4. Divide cucumber slices over half of the bread slices. If desired, sprinkle lemon pepper on cucumber.
  5. Stack the other half of the bread slices spread-side down over cucumber to make sandwiches; slice into triangles.


How far in advance can you make Cucumber Tea Sandwiches?

You should only make Cucumber Tea Sandwiches on the same day you will be serving and eating them. And ideally, you should not make them more than an hour or two earlier when possible.

The danger is that the inside of the bread will get soggy and the outside will become dry. (And nobody wants that.)

If you'd like to get a jump on your party prep, you can make the spread a day beforehand and store it in the refrigerator. And then assemble the sandwiches right before plating and serving. Easy peasy!

If you're planning a party soon, make sure to check out these other appetizer and beverage recipes:

Tuesday, January 24, 2023

Gouda and Tomato Tea Sandwiches

These simple tea sandwiches are perfect for any upcoming parties you might be planning so make sure to save this recipe for your next bridal shower, baby shower, tea party, cocktail party, or brunch. It only takes 7 ingredients to make these savory little appetizer sandwiches. You can make the topping the night before and then assemble the sandwiches right before serving.


Gouda and Tomato Tea Sandwiches

2 Italian baguettes

2 garlic cloves

1/2 cup mayonnaise

4 oz. Gouda, finely grated

7 oz. Mozzarella cheese, finely grated

3 small tomatoes, sliced into wedges

Fresh Dill, Cilantro, or Parsley (for garnish)

  1. Preheat oven to 350˚F.
  2. Slice bread on diagonal about 1/2" thick and place slices in a single layer on a greased baking sheet.
  3. Finely grate cheeses and place in a medium bowl.
  4. Press garlic into the bowl and stir in approximately 1/2 cup mayonnaise. (Add 1 Tbsp. at a time until you have a spreadable consistency.) Mix the spread together until well combined.
  5. Bake bread at 350˚F for about 7-10 minutes or until edges are beginning to turn golden. Remove from oven. 
  6. While bread is still warm, top each slice of bread with spread. Top with tomato wedge and garnish with fresh herbs of choice.


If you're planning a party soon, make sure to check out these other party appetizer recipes:


Wednesday, January 18, 2023

Baked Pimento Cheese Pinwheels

Pimento cheese is a true Southern delicacy. And this savory appetizer recipe takes it to the next level by encasing it in pastry. These Baked Pimento Cheese Pinwheels are a delicious, fun, and easy-to-eat appetizer that you'll love to serve at your next party. 


Baked Pimento Cheese Pinwheels

2 cans Pillsbury Crescent Rolls

2 cups shredded extra sharp cheddar cheese

8 ounces cream cheese, softened

1/2 cup mayonnaise

1/4 teaspoon garlic powder

1/4 teaspoon cayenne pepper

1/4 teaspoon onion powder

1 (4 ounce) jar diced pimentos, drained

salt and black pepper, to taste


  1. Line two large baking sheets with parchment paper. Set aside.
  2. Place the extra sharp cheddar cheese, cream cheese, mayonnaise, garlic powder, cayenne pepper, onion powder, and pimentos into a large mixing bowl. 
  3. Use a mixer to beat at medium speed, until thoroughly combined. Season to taste with salt and pepper.
  4. Unroll the crescent rolls, keeping the perforated sections together. Gently pinch the perforations so they stay together.
  5. Spread pimento cheese evenly on top. Carefully roll the crescent roll to create a roll. 
  6. Set in refrigerator for 30 minutes for easier slicing. 
  7. Gently slice the roll into 1-inch long sections using a sharp knife. 
  8. Place onto the prepared baking sheets, making sure to not crowd the rolls or they will stick to each other while baking.
  9. Bake at 350℉ for 15-20 minutes until golden brown.
  10. Allow to cool for about 5 minutes then remove from the pan.

Notes: 

The softer the dough is, the more these pinwheels spread during baking. Refrigerating in step 6 helps with this.

Crescent roll dough won't slice particularly evenly, even after refrigerating. (You won't have perfect circles of dough.) However, they will even out while baking.

How to Serve Pimento Cheese


If you don't want to make fancy pants baked pinwheel appetizers with this pimento cheese recipe, you could easily just make the pimento cheese portion of the recipe (steps 1-3) and serve it:

  • as a dip with crackers, veggies, or chips 
  • on regular sandwiches, finger (tea-sized) sandwiches, or grilled sandwiches
  • as a filling for a quesadilla
  • as a burger topping
  • as a topping for cooked veggies or baked potatoes
  • as a topping for French fries
  • mixed into grits 
  • mixed into macaroni and cheese


If you're throwing a party soon, check out these other appetizer recipes:

Friday, January 6, 2023

Buffalo Chicken Dip

This Buffalo Chicken Dip recipe is a classic appetizer that you'll only need 5 ingredients to make. So easy! The combination of hot sauce, chicken, cheese, and ranch flavors mix together in a dip that's served hot and makes the perfect party food for a crowd.

You can make this simple recipe in your oven or in the crock pot (we've included instructions for both ways). It's the best game day appetizer!


Buffalo Chicken Dip

2, 12.5 oz. cans shredded cooked chicken, drained

1, 8 oz. package of cream cheese, softened

1/2 cup buffalo wing sauce

1/2 cup ranch dressing

1/2 cup blue cheese crumbles


  1. Preheat oven to 350°F. 
  2. Mix all ingredients in a large bowl. Spoon into 1-quart baking dish.
  3. Bake 20 minutes or until mixture is heated through. Serve warm.

Notes:

If you would like to make this recipe in the crock pot instead, mix together all ingredients and cook on low in the crock pot for 2 hours, stirring a few times while cooking. (Unless doubling the recipe, this would work best with a 1.5 quart crock pot.)

If you are not a fan of blue cheese, you can substitute shredded cheddar cheese or shredded colby jack cheese instead. 

You can sprinkle the finished dip with green onions, if desired. 

What to Serve Buffalo Chicken Dip With:

  • Tortilla chips
  • Fritos Scoops
  • Potato chips
  • Pita chips
  • Pretzels
  • Crackers
  • Toasted baguette slices
  • Breadsticks
  • Celery sticks
  • Carrot sticks
  • Bell pepper strips

Other Favorite Appetizer Recipes:

Monday, December 12, 2022

How to Make Ol' Roy Puppy Chow for a Christmas Vacation Party

Our family recently hosted a Christmas Vacation-themed party, and one menu item that we knew we had to include was Puppy Chow. You may also know these as Muddy Buddies. But of course, when it hit our party table, we labeled it Ol' Roy Puppy Chow. 

This was to pay homage to the scene in the movie where Cousin Eddie fills his entire shopping cart with nothing but dog food and then when Clark casually adds a package of lightbulbs, they get obliterated with a GIANT bag of . . . . you guessed it . . . Ol' Roy!

Harris Sister Misty brought this no-bake sweet treat to our party, and it was a hit. And, of course, she served it in a big stainless steel dog bowl to add to the effect. So, we recommend that too!


Cousin Eddie's Ol' Roy Puppy Chow

9 cups crispy rice cereal (Chex or Crispix)
1/2 cup peanut butter
1 cup semi-sweet chocolate chips
1 1/2 cups confectioners sugar

  1. In a saucepan over low heat, melt the chocolate. Add peanut butter and mix until smooth. Remove from heat.
  2. Place the cereal in a large bowl and pour the chocolate peanut butter mixture over the cereal. Stir GENTLY with a spatula until coated. Make sure you don’t break up the cereal, you want it to stay in whole pieces.
  3. Pour powdered sugar into a large Ziploc bag, add coated cereal, seal the bag, and shake until well coated. 
  4. Spread the puppy chow in a single layer so it can cool and not stick together. Let sit until the chocolate is hard.
  5. Store in an airtight container.

Notes:

After the puppy chow is dry, you can put it in a large airtight container and store on the counter for up to 2 weeks. 

If your kitchen is warm, you can store the puppy chow in the refrigerator to make sure the chocolate doesn’t melt.

You can also put puppy chow into decorative Christmas tins or bags to give to friends, family, and neighbors for the holidays. It makes an easy homemade holiday gift, and it's one that the kiddos can help you make!

Monday, October 3, 2022

Ghost Pepper Jelly

If you've got a hot pepper lover in your group, you're going to love this small batch recipe for Ghost Pepper Jelly! My sister-in-law grows ghost peppers in her garden and gifted me with some of her overflow peppers, so I whipped up a batch of this jelly for my husband, who loves spicy foods. It was a winner.

This recipe follows water bath canning instructions. Printed water bath canning directions are usually included in each package of pectin, and you can also find the complete instructions online. If you have never used a water bath canning method to can jams or jellies before, you'll want to read these instructions before you start making your Ghost Pepper Jelly recipe.

Tips for Working with Ghost Peppers in the Kitchen

If you haven't handled ghost peppers in the kitchen before, keep in mind these must-follow rules when cooking with ghost peppers:

  1. Wear protective gear (disposable gloves, face mask, and glasses or goggles).
  2. After handling (even with gloves), wash your hands thoroughly. I use Dawn dishwashing detergent to ensure that any oils that may have made their way onto the skin are absorbed and washed away.
  3. Label your final jelly clearly when finished and before gifting so that they don't inadvertently get mixed in the refrigerator with similar-looking (but less hot) jellies.


Ghost Pepper Jelly

1/2 pound ghost peppers, chopped (about 20-30 ghost peppers)

4 cups granulated sugar

1 1/4 cups apple cider vinegar

1/4 cup lime juice

1 teaspoon salt

3 oz. liquid fruit pectin

8 drops red food coloring, if desired (if you don't use food coloring, your jelly will be yellow in color)

4 half pint (8 oz.) glass preserving jars with lids and bands

1 4 oz. glass preserving jar with lid and band

  1. Finely chop the ghost peppers and add them to a large pot.
  2. Add sugar, vinegar, lime juice, and salt.
  3. Bring to a boil, then reduce heat to low and simmer for about 10 minutes.
  4. Strain out the ghost peppers and return the mixture to the pot.
  5. Return heat to high and bring liquid to a boil. Stir in pectin and boil for exactly one minute, stirring constantly. Remove from heat.
  6. If using food coloring, add it now and stir.
  7. Remove any foam with a spoon.
  8. Ladle the hot liquid into sterilized jars and screw on the lids.
  9. Follow water bath canning directions to complete the canning process. Process Ghost Pepper Jelly 10 minutes.
  10. Recipe yields 4 half pint jelly jars plus 1, 4-oz. jar for taste-testing.


Notes:

Jam and jelly recipes are finicky, so these types of things can cause your recipe not to set:
  • Doubling the recipe.
  • Measuring less than the full amount of sugar listed in the recipe or using a sugar substitute. If you want to use less sugar, use a recipe specifically developed for low sugar.

Straining the ghost peppers out in step 4 makes it a jelly. If you leave the ghost peppers in, you'll be creating a ghost pepper jam.

Serve this spicy jelly:
  • as an appetizer with cream cheese on crackers.
  • as a glaze for chicken, steak, fish, or pork
  • slathered on biscuits, peasant bread, or cornbread, fresh from the oven

Or if you make a few batches of this jelly and know quite a few people who appreciate spicy foods, you can always package these jars as gifts. Because of the Ghost Pepper name, they'd be perfect as party favors for a Halloween party, and the pretty red color also makes them a great Christmas gift.

This post contains affiliate links.

Friday, September 9, 2022

Habanero Pepper Jelly

Our family loves pepper jelly. We serve it as an appetizer with cream cheese and crackers. It's easy to make, and it's a great homemade holiday gift too. This year we made it with an abundance of habanero peppers fresh from my sister-in-law's garden.

Printed water bath canning directions are usually included in each package of pectin, and you can also find the complete instructions online. If you have never used a water bath canning method to can jams or jellies before, make sure to read these instructions before you start your Habanero Pepper Jelly recipe.

Tips for Working with Habanero Peppers in the Kitchen

If you haven't handled habanero peppers in the kitchen before, keep in mind these must-follow rules when cooking with habanero peppers:

  1. Wear disposable gloves.
  2. After handling (even with gloves), wash your hands thoroughly. I use Dawn dishwashing detergent to ensure that any oils that may have made their way onto the skin are absorbed and washed away.
  3. Do not touch your eyes after handling these peppers.


Habanero Pepper Jelly

3 cups of seeded and finely diced red bell peppers (about 4 peppers)

1 cup of seeded and finely diced habanero peppers (about 20-30 habaneros)

1 cup apple cider vinegar

1.75 ounce package of powdered pectin

5 cups granulated sugar

1/2 teaspoon butter, to reduce foaming (optional)

half pint (8 oz.) glass preserving jars with lids and bands

  1. In a large pot, combine diced peppers and vinegar.
  2. Stir pectin into mixture and add butter. Bring to a full rolling boil, stirring constantly. Pay careful attention to the pot to ensure that it does not boil over.
  3. Add sugar to mixture. Return to a full rolling boil and boil for exactly one minute, stirring constantly.
  4. Remove from heat.
  5. Skim off any foam with a metal spoon and ladle into sterilized jars. 
  6. Follow water bath canning directions to complete the canning process. Process Habanero Pepper Jelly for 10 minutes.
  7. Recipe yields 7 half pint jelly jars.


Notes:

Jam and jelly recipes are finicky, so these types of things can cause your recipe not to set:
  • Doubling the recipe.
  • Measuring less than the full amount of sugar listed in the recipe or using a sugar substitute. If you want to use less sugar, use a recipe specifically developed for low sugar.
Serve Habanero Pepper Jelly:
  • as an appetizer with cream cheese on crackers
  • as a glaze over pork chops while grilling
  • as a glaze for cocktail meatballs
  • on biscuits, peasant bread, or cornbread, fresh from the oven
  • as a sauce for hot wings
  • instead of your usual topping on baked brie
  • as a glaze on baked ham
  • as a dipping sauce with chicken tenders


This post contains affiliate links.

Friday, August 19, 2022

Pineapple Habanero Pepper Jelly

Right now, it's harvest season for peppers. If you've got a pepper lover in your group, you're going to love this recipe for Pineapple Habanero Jelly! My sister-in-law grows habanero peppers in her garden and gave me some of her habanero peppers. So, I made a batch of this jelly, which is sweet with the smallest kick of heat (so it's not too hot for even the kids in your group).

If you have never used a water bath canning method to can jams or jellies before, you'll want to read the complete instructions online before you start making your Pineapple Habanero Pepper Jelly.

Tips for Working with Habanero Peppers in the Kitchen

If you haven't handled habanero peppers in the kitchen before, keep in mind these must-follow rules when cooking with habanero peppers:

  1. Wear disposable gloves.
  2. After handling (even with gloves), wash your hands thoroughly. I use Dawn dishwashing detergent to ensure that any oils that may have made their way onto the skin are absorbed and washed away.
  3. Do not touch your eyes after handling these peppers.


Pineapple Habanero Pepper Jelly

3 cups finely chopped fresh pineapple, well drained (from 2 large fresh pineapples)
5 cups granulated sugar
1 cup apple cider vinegar
1 cup finely chopped golden delicious apple (from 1 large apple)
1 cup finely chopped orange bell pepper (from 1 large pepper)
3 orange habanero peppers, seeded and finely chopped
1 teaspoon crushed red pepper flakes
1 teaspoon butter
3 ounces liquid fruit pectin
2 tablespoons lemon juice
6 half pint (8 oz.) glass preserving jars with lids and bands
4 oz. glass preserving jar with lid and band

  1. Place the finely chopped fresh pineapple in a strainer set over a bowl. Press on the pineapple with the back of a spoon to release as much of the juice as possible. Allow the pineapple to drain while you're prepping the other ingredients.
  2. Combine the sugar, vinegar, apple, bell pepper, habanero, red pepper flakes, butter, and exactly 3 cups of the well-drained pineapple in a large pot. 
  3. Stir until sugar is dissolved. Bring the mixture to a full rolling boil and cook for 10 minutes. Watch the pot carefully and lower the heat a bit if the bubbling jelly rises near the top.
  4. Add pectin and lemon juice and bring the mixture back to a rolling boil. Cook for exactly 1 minute, stirring frequently.
  5. Remove pot from heat and skim off any foam on the surface. Ladle jelly into sterilized jars.
  6. Follow water bath canning directions to complete the canning process.  Process Pineapple Habanero Pepper Jelly 10 minutes. 
  7. Recipe yields 6 half pint jelly jars plus 1, 4-oz. jelly jar for taste-testing.


Notes:

When you purchase your fresh pineapple for the recipe, make sure to purchase very large pineapples. If the pineapples are on the smaller side, purchase more than two to ensure that you have 3 cups of chopped pineapple after the pineapple is peeled and cored. You can also substitute canned pineapple for this recipe. 

Jam and jelly recipes are finicky, so these types of things can cause your recipe not to set:
  • Doubling the recipe.
  • Measuring less than the full amount of sugar listed in the recipe or using a sugar substitute. If you want to use less sugar, use a recipe specifically developed for low sugar.
  • It is important to only add 3 cups of well-drained pineapple to this recipe. Don't try to add more than 3 cups or the recipe will not set correctly.
  • It is important to drain the pineapple well for the recipe to set correctly.
Serve this jelly:
  • as an appetizer with cream cheese on crackers or alongside your appetizer cheese tray as a complement to Havarti, gouda, fontina, or goat cheese.
  • as a topper for your baked brie. (If you've made our Pineapple Marmalade Brie before, this jelly would be very similar to the topping in that recipe.)
  • as a marinade, glaze, or sauce for chicken, fish, or pork.
  • as a sauce for meatballs in the crockpot.
  • slathered on warm cornbread or peasant bread, fresh from the oven.
This post contains affiliate links.

Wednesday, June 1, 2022

Vegetable Pancakes

Now that warmer months are upon us and fresh veggies are in season, I thought I'd share a vegetable pancake recipe that features a few different types of vegetables. These can either be straight from your own garden or fresh from the Farmers Market or local produce stand. However you come by your fresh veggies, you'll be glad you decided to make this savory veggie pancake recipe. 

And if you've got picky eaters at home, it's also a tasty way to get more vegetables into their diet. Vegetable pancakes are great for breakfast, lunch, a side dish for dinner, a vegetarian main dish, or even a party appetizer (because of their small size).


Vegetable Pancakes

3 large zucchini, grated and thoroughly drained

2 cups broccoli, grated

6 large carrots, grated

1 onion, diced and sautéed

1, 15 oz. can corn kernels, divided

4 large eggs, beaten

1 tsp. salt

1/2 tsp. pepper

1 tsp. garlic powder

1 cup breadcrumbs

1/2 cup flour

1/2 tsp. baking powder

oil for pan

green onions, thinly sliced (for serving)

sour cream (for serving)

sriracha sauce (for serving, if desired)

Grate & Drain Zucchini

  1. Grate zucchini, sprinkle with 1 teaspoon salt and set in a fine mesh strainer. Place a bowl or plate on top of the zucchini and weigh it down to help it release its liquid. 
  2. Let it sit for at least 30 minutes - 1 hour. After it has drained, wrap it in a clean kitchen towel or a piece of cheesecloth, squeeze to release the remaining liquid, and set aside.

Mix Pancake Batter & Cook Pancakes

  1. In a large mixing bowl, mix together flour, baking powder, pepper, garlic powder, and breadcrumbs. Add zucchini, broccoli, carrots, onion, and 1 cup of corn, and toss to combine.  Make sure to break up the zucchini and coat everything with flour mixture. (Set aside remaining corn for step 8.)
  2. Crack eggs into a small bowl, beat, and pour over the vegetable mixture. Mix to thoroughly combine.
  3. Heat a skillet over medium heat and add enough oil to lightly coat the bottom of the pan.
  4. Using a scoop, drop the vegetable mixture into the hot pan, and flatten with the bottom of the scoop form a patty.
  5. Cook for 2-3 minutes on each side, turning down the heat if they begin to brown too quickly.
  6. Remove from pan to drain on a cooling rack placed over a cookie sheet.
  7. Repeat process with remaining vegetable mixture, adding more oil if the pan becomes too dry.
  8. When final pancake has been cooked, roast remaining corn in pan for 1-2 minutes, or until kernels are lightly browned.
  9. Serve pancakes garnished with sour cream, green onions, and roasted corn. If you'd like your savory veggie cakes spicy, serve topped with a drizzle of sriracha sauce.

Pancake Cooking Tips

  • Use only enough oil to create a crisp, browned crust.
  • Avoid crowding the pan. Leave at least 1 inch of cooking space between pancakes.
  • Wait until first side has browned before turning. Check bottoms of pancakes before turning.
  • Turn each pancake only once.


Notes:

You can use a regular box grater to grate your vegetables, but if you use a food processor, you can cut your prep time for this recipe considerably.

Zucchini is a very watery vegetable, so take care to drain it well so that your pancakes don't turn out soggy.

This is the scoop that I used for this recipe. A small ice cream scoop would work too!

You'll notice that step 6 says to drain them on a cooling rack placed over a cookie sheet. Placing them on a paper towel on a plate will cause them to create steam and lose some of the crispy texture. 

If you'd rather bake these than fry them, bake them at 350 degrees for 20 – 25 minutes. The finished pancakes won't be quite as crispy. 

This post contains affiliate links.

                Monday, November 15, 2021

                Easy Brazilian Cheese Bread

                This Easy Brazilian Cheese Bread recipe is inspired by the savory pastry from Brazil, pão de queijo. With main ingredients like extra-sharp cheddar and Pecorino Romano cheeses, it's made to be enjoyed warm as a snack, an appetizer, or with your favorite meal. 

                These rolls have crunchy outsides, chewy insides, and a yummy, cheesy flavor. Because you combine the ingredients in a blender and pulse until smooth, it's an easy recipe to make. (And one your kids will enjoy helping with!)

                As an added bonus, it's also a gluten-free recipe because it uses tapioca flour.


                Brazilian Cheese Bread

                1 cup whole milk

                1 cup shredded extra-sharp cheddar cheese

                1 cup grated Pecorino Romano cheese

                1/3 cup olive oil

                2 eggs

                1 tsp salt

                2 cups tapioca flour


                1. Preheat oven to 375 degrees. Spray a 12-cup muffin tin with cooking spray. Set aside.
                2. Add milk, cheeses, oil, eggs, salt, and tapioca flour to blender, making sure to add tapioca flour last. Process on high speed for 30 seconds.
                3. Use a rubber spatula to scrape down sides of blender. Replace lid and process on high speed until smooth, about another 30 seconds.
                4. Pour batter evenly into muffin cups, filling each cup about 3/4 full
                5. Bake in oven until rolls are golden brown and puffed, 25-30 minutes.
                6. Remove from oven and place on cooling rack. Let rolls cool on cooling rack in muffin tin for 5 minutes.
                7. Run butter knife around edges of rolls to loosen from muffin tin and transfer to cooling rack. Serve warm.

                Notes:

                You can change the types of cheeses in this bread if you'd like to change the flavor, but there isn't really a good substitute for the tapioca flour. Tapioca flour provides the crispy crust and chewy texture of the Brazilian cheese bread, which is what makes it unique. This is the reason there isn't a good substitute.

                Tuesday, October 20, 2020

                Happy Hallo-WINE!!

                Just in time for Halloween, The Harris Sisters have yet another Covid-19-friendly Halloween option for you to try.  How about a virtual or socially distanced wine and Halloween candy pairing this year?- for the over-21 crowd, that is...  On our recent Girls' Weekend getaway trip, we did just that.  We sampled a mix of five wines with an even bigger selection of popular Halloween candy, and we offer our feedback on the pairings below.    Read on for all the details on these surprising and sometimes frightful combinations.  


                Getting Started


                Whether you are looking to pair a few candies with one good bottle of wine, or like we did, try several different combinations, your first step is finding a good list to provide you with great wine and candy matches.  Use our notes below to try the pairs that we tried and see how you like them.  

                We paired 5 wines with 11 different types of candy. Here's the full list of supplies you'll need. (Substitutions for wines are listed with each review.):

                Wines We Used 

                • Cabernet Sauvignon
                • Chardonnay
                • Moscato
                • Prosecco
                • Red Table Wine

                Candy We Used

                • Almond Joy
                • Butterfingers
                • Candy Corn
                • Hershey's Milk Chocolate Bars
                • Kit Kat
                • Nerds 
                • Reese's Peanut Butter Cups
                • Skittles
                • Snickers
                • Starburst
                • Twix

                Sweet White Wine Pairings


                For this pairing, we chose to use Moscato as our wine, but you could also choose a varietal like Malvasia or Riesling, depending on your preference.   This wine is said to pair well with Candy Corn, Skittles, Starburst, and Hershey's Milk Chocolate.   After sampling all these pairings, we all agreed that Starburst and Moscato, as well as Hershey's Milk Chocolate and Moscato, make excellent pairs.  We agreed less on the other two pairings.  Misty liked the Candy Corn when paired with Moscato.  Donna did not, and I was completely undecided after the tasting, so the jury is still out on that one. And both Donna and I agreed that Skittles and Moscato make a tasty pair.  Misty was less sold on this combination, but we all agreed that it could definitely depend on which flavor(s) of Skittles you are pairing with your wine. 


                Rich White Wine Pairings


                We chose to use Chardonnay for the rich white wine pairing, but you could also use Marsanne or Viognier instead.  This time, we sampled Candy Corn, Hershey's Milk Chocolate, and Butterfinger with our Chardonnay.   And this time we were completely in agreement.  The Harris Sisters give both the Butterfinger and Hershey's Milk Chocolate a thumb's up when paired with Chardonnay.  And we gave the Candy Corn pairing a resounding MEH- this was neither great nor awful- just somewhere in between.


                Sparkling Wine Pairings


                For these pairings, we used Prosecco, but you could certainly also choose a Sparkling Rose or Champagne instead.  I should preface this particular review by saying that Harris Sister Misty is not a fan of sparkling wine in general.  Having said that, she was also not a fan of any of these pairings.  We sampled the Prosecco with Candy Corn, Nerds, Kit Kat, and Almond Joy.  And both Donna and I enjoyed all of those pairings.  But the pair of Almond Joy and Prosecco was a surprise in that it topped both of our lists, and I personally would not have predicted that one.  Trust me though, it was a winner!  


                Medium Red Wine Pairings


                We chose a Red Table Wine for this pairing, but most Red Blends or a Merlot would work here as well.  The medium reds are said to pair well with Kit Kat, Snickers, and Hershey's Milk Chocolate.  We all agreed that Snickers and Kit Kat paired extremely well with the Red Table Wine.  We were more divided on the Hershey's Milk Chocolate pair.  While Donna and I enjoyed it together, Misty did not.  But both Donna and Misty pointed out that I eat Kit Kat wrong.  I didn't know there was a right way.  They both break off one bar and eat from that.  I don't break it.  I just bite it across the top.  Let me tell you, they were deeply disturbed.  


                Bold Red Wine Pairings


                For this final set of pairings, we used Cabernet Sauvignon, but you could also try a Malbec or Syrah if you prefer.  We paired the Cab with Snickers, Reese's, and Twix.  Harris Sister Misty did not enjoy any of these pairings, but she also typically does not enjoy bold red wines.  Both Donna and I agreed that the Snickers and Reese's paired with the Cab were among the best pairings of the night.  However, the Twix definitely did not measure up.  On a related note, Misty and Donna were once again disturbed to learn that I don't love Reese's.  In fact, I would say I really don't like it at all.  I would never seek out a Reese's; however, when paired with the Cab, it was off the charts good.  Maybe that's what it's been missing for me all this time.  


                So there you have it.  The Harris Sisters are nothing if not committed to in-depth research involving wine and candy.  Feel free to call on us if you decide to host your own pairing, and from all of us to all of you, Happy Hallo-WINE! 

                You Might Also Be Interested In