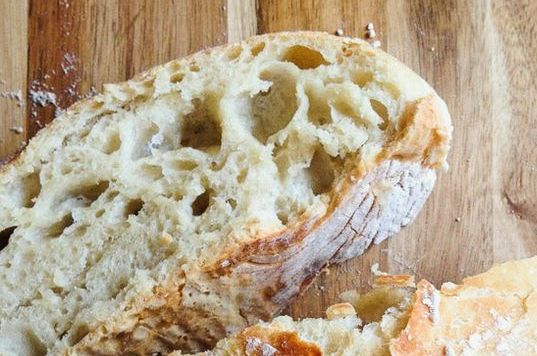
This recipe is a real winner. I find most often when I mention making homemade bread to someone, it sparks images of days of yore, churning one's own butter, etc., etc., followed promptly by some exclamation of "Ain't nobody got time fo' dat!"
Well, this recipe is definitely one you'll want to keep around, if for no other reason than to APPEAR as though you spent hours in the kitchen when you really didn't.
The trick is that it's a no knead bread - so much of the work of traditional bread making is cut out right there. AND, since it's peasant bread, you really don't have to put a lot of work into shaping the dough to having finished bread rounds that look pretty good. Even if they're not perfect, hey, that's the beauty of peasant bread.
You might also recognize this by more familiar terms nowadays of artisan or artisanal bread - those are just schmancy terms for bread that is made (or crafted) in small batches. And this certainly qualifies. So feel free to also call it that when you're serving it - after all, doesn't it sound SO MUCH MORE difficult to make artisan bread? Exactly.
2 1/4 tsp dry yeast (this equals one whole package)
2 cups warm water
1 Tbsp granulated sugar
2 tsp salt
4 cups all purpose flour
1 egg white for topping (if desired)
- Mix yeast and warm water in a large mixing bowl. Let sit for 10 minutes.
- After 10 minutes, add sugar, salt, and flour. Mix only until ingredients are completely incorporated. Do not knead. Let rise until doubled (45-90 minutes).
- Using floured hands, divide dough into two rounds and place onto a greased cookie sheet.
- If desired, brush tops of bread rounds with egg white for a shiny crust.
- Let rise until doubled again (45-90 minutes).
- Bake at 425 degrees for 10 minutes. Then, reduce heat to 375 degrees and cook an additional 15 minutes or until golden brown.
Notes
The "dough" for this bread isn't really like any other bread dough you might be familiar with. In fact, it's really sticky and not something that you'd really want to knead at all. It's not as runny as a batter, but definitely not as thick as a regular bread dough, so keep that in mind when making this recipe. It will look like this once you've mixed all the ingredients together.
Because this dough is so sticky, you'll want to make sure your hands are thoroughly floured or oiled before trying to divide the dough onto baking sheets. Alternately, you could divide it with your mixing spoon and sort of ease it out of the bowl onto the sheets. It should naturally form a circle when you do this. This is a loaf that I did using that method.
The longer you allow the dough to rise during each rising period, the higher your bread will rise.
To serve this rustic bread, you can slice it or tear off pieces - your choice.
This bread makes an excellent companion to dipping sauces made of olive oil and spices or olive oil and balsamic vinegar.
Or, serve with your favorite jams and jellies for a breakfast treat.


Could I cook this in a Dutch oven?
ReplyDeleteI was wondering the same thing. wonder if they would go taller
DeleteI have never tried baking it that way, but it's worth a shot!
Deletewhy do directions say to preheat oven before dividing dough, when you need to let it rise again for 45-90 minutes before baking?
ReplyDeleteSorry about that! Looks like I typed the steps out of order when typing the blog post. Thank you for catching that and I hope you enjoy the recipe!
DeleteMine did not rise very high but the taste was great and it had a nice crispy crust. Would make again
ReplyDelete