Showing posts with label canning and preserving. Show all posts

Thursday, September 18, 2025

Blackberry Jelly

There’s just something about September that feels like the perfect time to bring out the mason jars, dust off the canning pot, and savor the last fruits of summer. For us, nothing says changing seasons quite like the sweetness of fresh blackberries. This Blackberry Jelly recipe is simple, nostalgic, and just the right way to hold onto those end-of-summer flavors while welcoming crisp autumn mornings. Spread it on a warm biscuit, drizzle it over pancakes, or tuck it away as a thoughtful homemade gift. 

This jelly recipe specifically calls back to The Harris Sisters' childhood when we would pick blackberries on our great-grandparents' farm. When I started growing a little blackberry patch in our backyard, I knew exactly what I wanted to make with our first harvest. And I'm sharing that recipe with you today.

If you have never used a water bath canning method to can jams or jellies before, you'll want to read the complete instructions online before you start making your Blackberry Jelly. 

Blackberry Jelly for Canning

To Make Juice

4 cups blackberries

4 cups water

To Make Jelly

3 3/4 cups of juice

1.75 oz powdered pectin

4 1/2 cups sugar

1/2 Tbsp butter (optional)

6-8 half pint (8 oz.) glass preserving jars with lids and bands

1 piece of food grade cheese cloth

  1. Make Juice: Wash the blackberries and put them in a large pot with the water. Mash the fruit and cook for 20 minutes on medium-medium/high heat, stirring occasionally to make sure the fruit doesn't stick to the bottom.
  2. Line a colander with cheesecloth and strain out the juice. Save the juice and discard the seeds and skins.
  3. Make Jelly: Put the juice, pectin, and butter (if you are using it) back into the large pot. Bring it to a full rolling boil on high heat, stirring constantly. 
  4. Add all of the sugar and return to a boil. Boil for exactly 1 minute, stirring constantly. Remove from heat. Skim foam if necessary.
  5. Ladle hot jam into hot jars, leaving 1/4-inch head space. 
  6. Follow water bath canning directions to complete the canning process. Process Blackberry Jelly 10 minutes. 
  7. Recipe yields 6-8 half pint jelly jars. (I ended up with 7.)


Notes:

I used hand-picked blackberries for this recipe, but you can use wild or store-bought blackberries too. Just make sure your measurements are the same when you start.

If you want to separate making juice and making jelly onto different days, refrigerate the strained juice until you are ready to make the jelly. It will take a little longer to bring the mixture to a boil because you are starting with refrigerated liquid in Step 3.

Jam and jelly recipes are finicky, so these types of things can cause your recipe not to set:
  • Doubling the recipe.
  • Measuring less than the full amount of sugar listed in the recipe or using a sugar substitute. If you want to use less sugar, use a recipe specifically developed for low sugar. 

As the seasons shift and September brings its cooler mornings, there’s something special about capturing the taste of summer in a jar. This Blackberry Jelly is more than just a recipe, it’s a sweet reminder of Southern traditions, simple pleasures, and the comfort of homemade goodness. Whether you’re enjoying it now or tucking jars away for holiday gifts, we hope this jelly brings a little Southern sweetness to your table all season long. 


Friday, October 18, 2024

Cherry Vanilla Jam

Who has cherry lovers in their family? We have them on both sides of our family so this homemade cherry jam recipe was a real hit! Today we're sharing our quick and easy cherry jam recipe that's a beautiful deep red color (so it's perfect for Christmas gift-giving).

This particular recipe is a mix of cherry and vanilla flavors, and it tastes delicious slathered on a warm, buttered biscuit. (And, here's another secret about this recipe, it's made it with frozen cherries, which means NO extra time pitting cherries and no stained hands!)

If you have never used a water bath canning method to can jams or jellies before, you'll want to read the complete instructions online before you start making your Cherry Vanilla Jam.


Cherry Vanilla Jam

3 pound bag frozen mixed cherries

2 tablespoons lemon juice

2, 1.75-ounce packages pectin 

1 tablespoon vanilla 

6 cups sugar

9 half pint (8 oz.) glass preserving jars with lids and bands

1 4 oz. glass preserving jar with lid and band


  1. Pulse cherries in a food processor and then place prepared fruit into an 8 quart pot. 
  2. Add lemon juice, pectin, and vanilla and stir. 
  3. Bring mixture to a full rolling boil that cannot be stirred down, over high heat, stirring constantly.
  4. Add sugar, stirring to dissolve. Return mixture to a full rolling boil. Boil hard exactly 1 minute, stirring constantly. Remove from heat. Skim foam if necessary.
  5. Ladle hot jam into hot jars, leaving 1/4-inch head space. 
  6. Follow water bath canning directions to complete the canning process. Process Cherry Vanilla Jam 10 minutes. 
  7. Recipe yields 9 half pint jelly jars plus 1, 4-oz. jar for taste-testing.


Notes:

Jam and jelly recipes are finicky, so these types of things can cause your recipe not to set:
  • Doubling the recipe.
  • Measuring less than the full amount of sugar listed in the recipe or using a sugar substitute. If you want to use less sugar, use a recipe specifically developed for low sugar. 

Other Jam & Jelly Recipes You Might Enjoy:

This post contains affiliate links.

Sunday, September 17, 2023

Apple Scrap Jelly

Today we're bringing you the third and final recipe in our series on apples. Don't forget to grab the first and second apple themed recipes for Spiced Apple Pie Jam and Homemade Applesauce too. 

At the beginning of our series, we discussed how the fall season brings orchard visits. This is why we launched our three-part series featuring apple recipes to help answer the question that comes after the visit: "What do we do with ALL THESE APPLES?!?" 

And with all the peeling and coring that you'll be doing when you make the apple recipes, you’ll be happy to know there is something you can make with all those scraps: Apple Scrap Jelly! In this recipe, you'll basically simmer the peels and cores to extract the juice from them and then use that juice to create jelly.

If you have never used a water bath canning method to can jams or jellies before, you'll want to read the complete instructions online before you start making your Apple Scrap Jelly.

Apple Scrap Jelly

Peels and cores from 12-15 apples (left over from making applesauce, baked apples, apple butter, or other apple recipes)

12 cups water

apple juice (optional)

4 cups sugar

8 Tbsp bottled lemon juice

4 Tbsp pectin

1-2 drops of red food coloring (optional)

6 half pint (8 oz.) glass preserving jars with lids and bands

1 4 oz. glass preserving jar with lid and band

  1. Place apple scraps and water in a large stainless steel pot. Simmer uncovered for approximately 30 minutes and reduce down to 8 cups of liquid.
  2. Strain reduced liquid through a cheesecloth-lined colander and measure out 8 cups. (Top off with apple juice to get to 8 cups, if necessary.)
  3. Whisk in 1/2 Tbsp pectin per cup of liquid. (Amounts for 8 cups of liquid are given in ingredients list above.) 
  4. Bring mixture to a full rolling boil that cannot be stirred down, making sure that you get the mixture to 220 degrees, stirring constantly. (This may take 20-30 minutes.)
  5. For every cup of strained liquid, add 1/2 cup of sugar and 1 Tbsp lemon juice. (Amount for 8 cups of liquid is given in ingredients list above.) 
  6. Return mixture to a full rolling boil. Boil hard 1 minute, stirring constantly. Remove from heat. Skim foam if necessary.
  7. If desired, add 1-2 drops of red food coloring and stir to incorporate. 
  8. Ladle hot jelly into hot jars, leaving 1/4-inch head space. 
  9. Follow water bath canning directions to complete the canning process. Process Apple Scrap Jelly 10 minutes. 
  10. Recipe (beginning with 8 cups of reduced apple liquid) yields 6 half pint jelly jars plus 1 4-oz. jar for taste testing.

Notes:

Because you are using the peels for this recipe, I would recommend using organic apples. That way, you are sure that you're not including pesticides in your finished product. 

For all of our apple recipes, an apple peeler / corer / slicer will make quick work of prepping the apples.

This recipe is written with a "starting point" of 8 cups of reduced apple liquid. That's because if you start with much more than that, you may have issues with your jelly setting up. If you try the recipe and decide you'd like to make A LOT more of it, I would recommend making it in separate batches to ensure success. 

We made two batches - the ones shown in the photos were a "Mixed Apple Jelly" made from a few different varieties of apples. And then we made another batch from exclusively Pink Lady apples and that turned out a pretty light pink color without the addition of any food coloring at all.

Depending on the varieties of apples you use, your jelly liquid may already be a pink color by step 5. So, you may not need (or may choose to omit) the food coloring in step 6. This is why it is listed as an optional ingredient.

Jam and jelly recipes are finicky, so these types of things can cause your recipe not to set:
  • Doubling the recipe.
  • Measuring less than the full amount of sugar listed in the recipe or using a sugar substitute. If you want to use less sugar, use a recipe specifically developed for low sugar. 

This post contains affiliate links.

Saturday, September 9, 2023

Homemade Applesauce for Canning

Today we're bringing you the second recipe in our series on apples. If you missed the first apple themed recipe for Spiced Apple Pie Jam, make sure to grab that one too. 

This homemade applesauce recipe will make you wonder why you haven't always made it from scratch. You really just add all of the ingredients into a big pot, cook it down, and blend it up. That's it. You can either store it in the refrigerator if you're going to eat it within a few days, or can it for a longer shelf life.

If you have never used a water bath canning method to can jams or jellies before, you'll want to read the complete instructions online before you start canning your Homemade Applesauce.


Homemade Applesauce for Canning

6 lb apples, peeled, cored, and quartered

2/3 cup sugar

1/2 cup water

1/2 cup bottled lemon juice

1 Tbsp cinnamon, more or less to taste (optional)

4 pint (16 oz.) glass preserving jars with lids and bands

  1. Combine all ingredients in a 6 quart stainless steel pot. Cook over medium-low heat for 25 minutes or until apples are very tender, stirring occasionally.
  2. Mash apple mixture with a potato masher (for chunky applesauce) or blend with an immersion blender (for smooth applesauce).
  3. Ladle hot applesauce into hot jars, leaving 1/2 inch of head space.
  4. Follow water bath canning directions to complete the canning process. Process Applesauce 20 minutes. 
  5. Recipe yields 4 pint jars.

What Recipes Can I Make with Applesauce?

These Harris Sisters' favorites all include applesauce as an ingredient. Make sure to check them out:


Notes:

For all of our apple recipes, an apple peeler / corer / slicer will make quick work of prepping the apples.

This recipe can be doubled and can also be easily adapted to personal tastes. For example, if you are using sweet apples, you may want to use less sugar. Or, you may want to adjust the amount of cinnamon to taste or add different spices (such as nutmeg or allspice). 

When we made this, we made a big batch. We made 1/2 chunky with less cinnamon and 1/2 smooth with lots of cinnamon.

This post contains affiliate links.

    Monday, September 4, 2023

    Spiced Apple Pie Jam

    As we *just* start to head into the fall season, that means apple-picking is upon us! And here's the perfect recipe for all those fresh-from-the-orchard apples. 

    You know how sometimes you think you want to make a trip to a you-pick apple orchard - It's such a fun fall activity! But then your very next thought is, "What do I actually DO with all those apples?1?" Well, we've got you covered! We'll be bringing you a series of posts all featuring apples over the next several weeks, so be on the lookout for all the recipes in the series. Today's recipe is part one of the series.

    This particular jam is a mix of fresh apples and the same spices that you might find in apple pie. It's yummy spread on toast or a biscuit, but it's also quite tasty swirled into your oatmeal for breakfast!

    If you have never used a water bath canning method to can jams or jellies before, you'll want to read the complete instructions online before you start making your Spiced Apple Pie Jam.

    Spiced Apple Pie Jam

    6 cups diced peeled apples (about 6 apples)

    2 cups apple juice or apple cider

    2 Tbsp. bottled lemon juice

    3 Tbsp. powdered pectin

    1 tsp ground cinnamon

    1/2 tsp ground allspice

    1/4 tsp ground nutmeg

    2 cups sugar

    5 half pint (8 oz.) glass preserving jars with lids and bands

    1. Bring apples, apple juice, and lemon juice to a boil in a 6 quart stainless steel pot. Reduce heat and simmer uncovered for 10 minutes or until apples are soft, stirring occasionally.
    2. Whisk in pectin and spices. Bring mixture to a full rolling boil that cannot be stirred down, over high heat, stirring constantly.
    3. Add sugar, stirring to dissolve. Return mixture to a full rolling boil. Boil hard 1 minute, stirring constantly. Remove from heat. Skim foam if necessary.
    4. Ladle hot jam into hot jars, leaving 1/4-inch head space. 
    5. Follow water bath canning directions to complete the canning process. Process Spiced Apple Pie Jam 10 minutes. 
    6. Recipe yields 5 half pint jelly jars.


    Notes:

    For all of our apple recipes, an apple peeler / corer / slicer will make quick work of prepping the apples.

    Jam and jelly recipes are finicky, so these types of things can cause your recipe not to set:
    • Doubling the recipe.
    • Measuring less than the full amount of sugar listed in the recipe or using a sugar substitute. If you want to use less sugar, use a recipe specifically developed for low sugar. 
    Go ahead and make plans to head off to a you-pick apple orchard near you to load up on some fresh apples!


    If you're an apple lover (but not a home canner), we are kicking off the series with these other bonus Harris Sisters' apple recipes to get everyone started:

    And stop by these other jelly and jam recipes too:

    And make sure to check back in the coming weeks for follow-up recipes with the apple theme!

    This post contains affiliate links.

    Monday, November 14, 2022

    Spiced Christmas Jam

    'Tis the season for fresh cranberries to hit grocery store shelves near you. And since they're so readily available, here's a quick and easy jam recipe that also makes a lot of jars at once (so it's perfect for Christmas gift-giving).

    This particular recipe is a mix of strawberries, cranberries, and spices, and it tastes so good slathered on a warm biscuit, fresh from the oven. (And, here's another secret about this recipe, you can make it with frozen cranberries and it will taste just as good!)

    If you have never used a water bath canning method to can jams or jellies before, you'll want to read the complete instructions online before you start making your Spiced Christmas Jam.


    Spiced Christmas Jam

    40 ounces frozen unsweetened strawberries

    1 pound fresh or frozen cranberries

    5 pounds sugar

    2  liquid fruit pectin packets, 3 ounces each

    1 teaspoon ground cinnamon

    1 teaspoon ground ginger

    1/4 teaspoon ground allspice

    1/4 teaspoon ground cloves

    15 half pint (8 oz.) glass preserving jars with lids and bands

    1. Pulse strawberries and cranberries in a food processor and then place prepared fruit into an 8 quart pot. Add sugar and spices and stir. Bring to a full rolling boil; boil for 1 minute, stir.
    2. Remove from the heat; stir in the liquid pectin and return to a full rolling boil. Boil for exactly 1 minute, stirring constantly. 
    3. Remove from the heat. Skim off any foam with a spoon.
    4. Ladle the jam mixture into sterilized jars.
    5. Follow water bath canning directions to complete the canning process.  Process Spiced Christmas jam 10 minutes. 
    6. Recipe yields 15 half pint jelly jars.


    Notes:

    Jam and jelly recipes are finicky, so these types of things can cause your recipe not to set:
    • Doubling the recipe.
    • Measuring less than the full amount of sugar listed in the recipe or using a sugar substitute. If you want to use less sugar, use a recipe specifically developed for low sugar. 

    This post contains affiliate links.

    Monday, October 3, 2022

    Ghost Pepper Jelly

    If you've got a hot pepper lover in your group, you're going to love this small batch recipe for Ghost Pepper Jelly! My sister-in-law grows ghost peppers in her garden and gifted me with some of her overflow peppers, so I whipped up a batch of this jelly for my husband, who loves spicy foods. It was a winner.

    This recipe follows water bath canning instructions. Printed water bath canning directions are usually included in each package of pectin, and you can also find the complete instructions online. If you have never used a water bath canning method to can jams or jellies before, you'll want to read these instructions before you start making your Ghost Pepper Jelly recipe.

    Tips for Working with Ghost Peppers in the Kitchen

    If you haven't handled ghost peppers in the kitchen before, keep in mind these must-follow rules when cooking with ghost peppers:

    1. Wear protective gear (disposable gloves, face mask, and glasses or goggles).
    2. After handling (even with gloves), wash your hands thoroughly. I use Dawn dishwashing detergent to ensure that any oils that may have made their way onto the skin are absorbed and washed away.
    3. Label your final jelly clearly when finished and before gifting so that they don't inadvertently get mixed in the refrigerator with similar-looking (but less hot) jellies.


    Ghost Pepper Jelly

    1/2 pound ghost peppers, chopped (about 20-30 ghost peppers)

    4 cups granulated sugar

    1 1/4 cups apple cider vinegar

    1/4 cup lime juice

    1 teaspoon salt

    3 oz. liquid fruit pectin

    8 drops red food coloring, if desired (if you don't use food coloring, your jelly will be yellow in color)

    4 half pint (8 oz.) glass preserving jars with lids and bands

    1 4 oz. glass preserving jar with lid and band

    1. Finely chop the ghost peppers and add them to a large pot.
    2. Add sugar, vinegar, lime juice, and salt.
    3. Bring to a boil, then reduce heat to low and simmer for about 10 minutes.
    4. Strain out the ghost peppers and return the mixture to the pot.
    5. Return heat to high and bring liquid to a boil. Stir in pectin and boil for exactly one minute, stirring constantly. Remove from heat.
    6. If using food coloring, add it now and stir.
    7. Remove any foam with a spoon.
    8. Ladle the hot liquid into sterilized jars and screw on the lids.
    9. Follow water bath canning directions to complete the canning process. Process Ghost Pepper Jelly 10 minutes.
    10. Recipe yields 4 half pint jelly jars plus 1, 4-oz. jar for taste-testing.


    Notes:

    Jam and jelly recipes are finicky, so these types of things can cause your recipe not to set:
    • Doubling the recipe.
    • Measuring less than the full amount of sugar listed in the recipe or using a sugar substitute. If you want to use less sugar, use a recipe specifically developed for low sugar.

    Straining the ghost peppers out in step 4 makes it a jelly. If you leave the ghost peppers in, you'll be creating a ghost pepper jam.

    Serve this spicy jelly:
    • as an appetizer with cream cheese on crackers.
    • as a glaze for chicken, steak, fish, or pork
    • slathered on biscuits, peasant bread, or cornbread, fresh from the oven

    Or if you make a few batches of this jelly and know quite a few people who appreciate spicy foods, you can always package these jars as gifts. Because of the Ghost Pepper name, they'd be perfect as party favors for a Halloween party, and the pretty red color also makes them a great Christmas gift.

    This post contains affiliate links.

    Friday, September 9, 2022

    Habanero Pepper Jelly

    Our family loves pepper jelly. We serve it as an appetizer with cream cheese and crackers. It's easy to make, and it's a great homemade holiday gift too. This year we made it with an abundance of habanero peppers fresh from my sister-in-law's garden.

    Printed water bath canning directions are usually included in each package of pectin, and you can also find the complete instructions online. If you have never used a water bath canning method to can jams or jellies before, make sure to read these instructions before you start your Habanero Pepper Jelly recipe.

    Tips for Working with Habanero Peppers in the Kitchen

    If you haven't handled habanero peppers in the kitchen before, keep in mind these must-follow rules when cooking with habanero peppers:

    1. Wear disposable gloves.
    2. After handling (even with gloves), wash your hands thoroughly. I use Dawn dishwashing detergent to ensure that any oils that may have made their way onto the skin are absorbed and washed away.
    3. Do not touch your eyes after handling these peppers.


    Habanero Pepper Jelly

    3 cups of seeded and finely diced red bell peppers (about 4 peppers)

    1 cup of seeded and finely diced habanero peppers (about 20-30 habaneros)

    1 cup apple cider vinegar

    1.75 ounce package of powdered pectin

    5 cups granulated sugar

    1/2 teaspoon butter, to reduce foaming (optional)

    half pint (8 oz.) glass preserving jars with lids and bands

    1. In a large pot, combine diced peppers and vinegar.
    2. Stir pectin into mixture and add butter. Bring to a full rolling boil, stirring constantly. Pay careful attention to the pot to ensure that it does not boil over.
    3. Add sugar to mixture. Return to a full rolling boil and boil for exactly one minute, stirring constantly.
    4. Remove from heat.
    5. Skim off any foam with a metal spoon and ladle into sterilized jars. 
    6. Follow water bath canning directions to complete the canning process. Process Habanero Pepper Jelly for 10 minutes.
    7. Recipe yields 7 half pint jelly jars.


    Notes:

    Jam and jelly recipes are finicky, so these types of things can cause your recipe not to set:
    • Doubling the recipe.
    • Measuring less than the full amount of sugar listed in the recipe or using a sugar substitute. If you want to use less sugar, use a recipe specifically developed for low sugar.
    Serve Habanero Pepper Jelly:
    • as an appetizer with cream cheese on crackers
    • as a glaze over pork chops while grilling
    • as a glaze for cocktail meatballs
    • on biscuits, peasant bread, or cornbread, fresh from the oven
    • as a sauce for hot wings
    • instead of your usual topping on baked brie
    • as a glaze on baked ham
    • as a dipping sauce with chicken tenders


    This post contains affiliate links.

    Friday, August 19, 2022

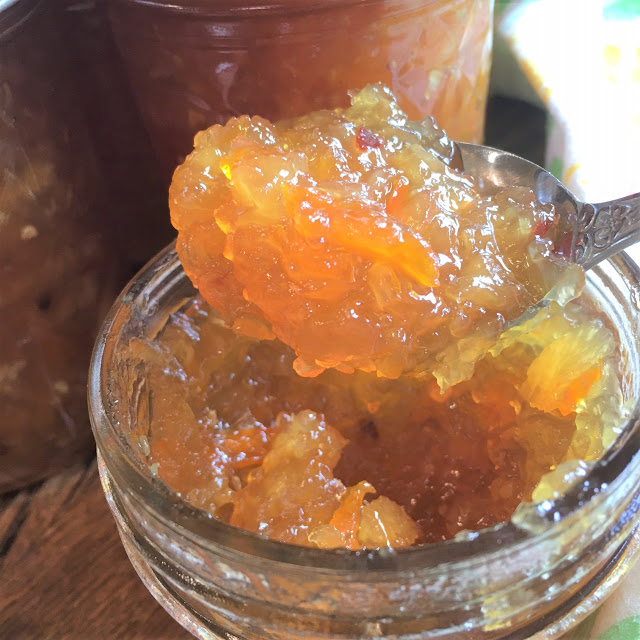
    Pineapple Habanero Pepper Jelly

    Right now, it's harvest season for peppers. If you've got a pepper lover in your group, you're going to love this recipe for Pineapple Habanero Jelly! My sister-in-law grows habanero peppers in her garden and gave me some of her habanero peppers. So, I made a batch of this jelly, which is sweet with the smallest kick of heat (so it's not too hot for even the kids in your group).

    If you have never used a water bath canning method to can jams or jellies before, you'll want to read the complete instructions online before you start making your Pineapple Habanero Pepper Jelly.

    Tips for Working with Habanero Peppers in the Kitchen

    If you haven't handled habanero peppers in the kitchen before, keep in mind these must-follow rules when cooking with habanero peppers:

    1. Wear disposable gloves.
    2. After handling (even with gloves), wash your hands thoroughly. I use Dawn dishwashing detergent to ensure that any oils that may have made their way onto the skin are absorbed and washed away.
    3. Do not touch your eyes after handling these peppers.


    Pineapple Habanero Pepper Jelly

    3 cups finely chopped fresh pineapple, well drained (from 2 large fresh pineapples)
    5 cups granulated sugar
    1 cup apple cider vinegar
    1 cup finely chopped golden delicious apple (from 1 large apple)
    1 cup finely chopped orange bell pepper (from 1 large pepper)
    3 orange habanero peppers, seeded and finely chopped
    1 teaspoon crushed red pepper flakes
    1 teaspoon butter
    3 ounces liquid fruit pectin
    2 tablespoons lemon juice
    6 half pint (8 oz.) glass preserving jars with lids and bands
    4 oz. glass preserving jar with lid and band

    1. Place the finely chopped fresh pineapple in a strainer set over a bowl. Press on the pineapple with the back of a spoon to release as much of the juice as possible. Allow the pineapple to drain while you're prepping the other ingredients.
    2. Combine the sugar, vinegar, apple, bell pepper, habanero, red pepper flakes, butter, and exactly 3 cups of the well-drained pineapple in a large pot. 
    3. Stir until sugar is dissolved. Bring the mixture to a full rolling boil and cook for 10 minutes. Watch the pot carefully and lower the heat a bit if the bubbling jelly rises near the top.
    4. Add pectin and lemon juice and bring the mixture back to a rolling boil. Cook for exactly 1 minute, stirring frequently.
    5. Remove pot from heat and skim off any foam on the surface. Ladle jelly into sterilized jars.
    6. Follow water bath canning directions to complete the canning process.  Process Pineapple Habanero Pepper Jelly 10 minutes. 
    7. Recipe yields 6 half pint jelly jars plus 1, 4-oz. jelly jar for taste-testing.


    Notes:

    When you purchase your fresh pineapple for the recipe, make sure to purchase very large pineapples. If the pineapples are on the smaller side, purchase more than two to ensure that you have 3 cups of chopped pineapple after the pineapple is peeled and cored. You can also substitute canned pineapple for this recipe. 

    Jam and jelly recipes are finicky, so these types of things can cause your recipe not to set:
    • Doubling the recipe.
    • Measuring less than the full amount of sugar listed in the recipe or using a sugar substitute. If you want to use less sugar, use a recipe specifically developed for low sugar.
    • It is important to only add 3 cups of well-drained pineapple to this recipe. Don't try to add more than 3 cups or the recipe will not set correctly.
    • It is important to drain the pineapple well for the recipe to set correctly.
    Serve this jelly:
    • as an appetizer with cream cheese on crackers or alongside your appetizer cheese tray as a complement to Havarti, gouda, fontina, or goat cheese.
    • as a topper for your baked brie. (If you've made our Pineapple Marmalade Brie before, this jelly would be very similar to the topping in that recipe.)
    • as a marinade, glaze, or sauce for chicken, fish, or pork.
    • as a sauce for meatballs in the crockpot.
    • slathered on warm cornbread or peasant bread, fresh from the oven.
    This post contains affiliate links.

    Tuesday, June 22, 2021

    Blueberry Jam

    Around these parts, it's berry-pickin' season. And that means all new recipes for fresh picked berries! With a harvest of fresh blueberries at our disposal, the boys and I set off on our very first jam-making adventure. I surprised even myself at how easy it was - the jam set perfectly and the water bath canning method wasn't as difficult as I expected. As long as you follow the step-by-step instructions, your jam will come out just fine. So don't let jam or jelly recipes intimidate you! This one is a winner!

    Printed water bath canning directions are usually included in each package of pectin, and you can also find the complete instructions online. If you have never used a water bath canning method to can jams or jellies before, I suggest that you read these instructions before you start making your jam recipe.

    Blueberry Jam

    4 pints fresh blueberries

    Zest and juice of 2 lemons

    7 cups sugar

    1/2 teaspoon butter, to reduce foaming (optional)

    1 pouch liquid fruit pectin (3 ounces)

    10 half pint (8 oz.) glass preserving jars with lids and bands

    1 4 oz. glass preserving jar with lid and band

    1. Put half of the berries in an large, deep enamel or stainless cooking pot and crush the berries, making juice.
    2. Stir in the remaining berries, lemon zest, and lemon juice. 
    3. Add the sugar and butter and bring to a full rolling boil, stirring constantly. Pay careful attention to the pot to ensure that it does not boil over.
    4. While the berries are rapidly boiling, quickly add the fruit pectin and stir for exactly one minute.
    5. Remove from heat and ladle into sterilized jars. 
    6. Follow water bath canning directions to complete the canning process. Process Blueberry Jam 10 minutes.
    7. Recipe yields 10 half pint jelly jars plus 1, 4-oz. jar for taste-testing.


    Notes:

    Don't double the recipe. Doubling the recipe will cause the jam to not set.

    Measure the full amount of sugar listed in the recipe using a dry measuring cup. If you want to use less sugar, use a recipe specifically developed for low sugar. If you just use less sugar in a jam recipe, it won't set correctly.

    Use the type and amount of fruit specified. If you want to make a recipe that includes strawberries and blueberries, for example, use a recipe specifically developed for mixed berries. If you just change the fruit content in a jam recipe, it won't set correctly.

    If you do not add butter to reduce foaming, skim and discard the foam from the top of the jam mixture  before adding to sterilized jars.

    This post contains affiliate links.

    Wednesday, April 17, 2013

    Martha Stewart's Strawberry Preserves Recipe

    It's finally strawberry season.  YAY!!  And if you are a strawberry lover like I am, then I don't think you will find an easier strawberry preserves recipe than this one.  It only calls for 3 ingredients, and 2 simple steps.  Can't get much easier than that.  Thank you, Martha Stewart.  I may even be able to pull this one off!


    Ingredients

    • 2 pounds strawberries, hulled
    • 1 tablespoon plus 1/2 teaspoon, freshly squeezed lemon juice
    • 1 cup sugar

    Directions

    1. Put strawberries and lemon juice in a large saucepan. Cook, stirring occasionally, over low heat until juices are released, about 40 minutes. Stir in sugar.
    2. Bring to a boil over medium heat. Cook, stirring occasionally, until mixture registers 210 degrees.on a candy thermometer, about 15 minutes. Let cool completely; skim foam from surface with a spoon. Preserves can be refrigerated in an airtight container, up to 2 months.


      Yield: 2 1/2 cups

      Recipe courtesy of www.MarthaStewart.com.  

    You Might Also Be Interested In