Showing posts with label vegetarian. Show all posts

Saturday, January 31, 2026

Lentil Minestrone Soup

Every now and then, I come across a soup recipe that reminds me of the way our grandmother cooked: simple ingredients, slow comfort, and a whole lot of heart stirred in. This one-pot Lentil Minestrone Soup fits right into our Southern recipe book. It’s the kind of soup you ladle into big bowls on a chilly evening, when you want something wholesome and made with the everyday staples you already have on hand. Nothing fancy here! It's just honest flavor, cozy warmth, and the kind of meal that makes you feel cared for from the inside out.

So grab your favorite cooking pot and get ready for week five of our January Soup Series. We're ladling up a big bowl of hearty, homestyle Lentil Minestrone Soup.


Lentil Minestrone Soup

1 medium onion, diced

2 carrots, diced

2 celery ribs, finely chopped

4 cloves garlic, minced

2 Tbsp olive oil

1 tsp Italian seasoning

1 tsp salt

1/2 tsp pepper

5 cups vegetable broth

2 cups water

28 oz can crushed tomatoes

1 cup dried lentils, sorted and rinsed

2 dried bay leaves

1 cup uncooked elbow macaroni

15 oz can cannellini beans, drained and rinsed

2 cups fresh spinach, chopped

  1. Peel and dice onion and carrots. Finely chop celery. Peel garlic and mince. Set aside.
  2. Heat a large pot to medium high heat with 2 Tbsp olive oil. Once oil is hot, add onion, carrots, and celery and sauté until vegetables are tender, approximately 7 minutes.
  3. Add minced garlic, Italian seasoning, salt, and pepper and cook 1 additional minute, stirring constantly.
  4. Add broth, water, and crushed tomatoes, then stir in dried lentils and bay leaves and bring mixture to a boil.
  5. Once soup is boiling, reduce heat to a simmer, cover, and cook for 25 minutes.
  6. Remove lid and increase heat to medium. Add uncooked pasta and cannellini beans and cook until pasta is tender, approximately 10 minutes. Remove bay leaves.
  7. Stir in chopped fresh spinach to wilt before serving.
Notes:

Minestrone soup is a classic Italian dish that is versatile and hearty. This version adds lentils to increase the protein but still keeps with the traditional recipe. If you would like to add meat to the recipe, some good options might be: ground beef, meatballs, shredded chicken, Italian sausage, hamburger meat, or ground turkey.

Serve this soup with a crusty bread and garnish with your choice of parsley, red pepper flakes, or Parmesan cheese to add extra flavor.


And just like that, we’ve ladled up the final bowl in our five-part January Soup Series. Ending on this cozy Lentil Minestrone feels just right—simple, nourishing, and full of the kind of comfort that carries you through the season. I hope these recipes have brought a little extra warmth to your kitchen this month and maybe even inspired a few new favorites. Thanks for simmering along with us—here’s to many more pots of goodness in the months ahead.

Wednesday, January 21, 2026

Tuscan White Bean Soup

This Tuscan White Bean Soup is perfect for a cool day. It makes a hearty and yummy meal.  Serve with warm bread for the perfect pairing. The creaminess of this soup comes from blending part of the soup and then adding the blended content back to the remaining soup. No actual cream involved. So this one is not only delicious but also low in fat. It's loaded with veggies too, but blending it makes it easy to disguise that for the kiddos who are always turning their noses up to veggie loaded soups. And once they try it, they will be sold on it. All the veggies can be your little secret. 

As we roll into week four of our January Soup Series, we’re keeping things cozy, comforting, and family-friendly with bowls that warm you from the inside out. If you’ve been cooking along with us this month, this recipe is another delicious reminder that good soup has a way of turning ordinary days into something special.


Tuscan White Bean Soup

            3 15 oz cans cannellini beans, drained and rinsed

            1 yellow onion, finely chopped

            4 cloves garlic, minced

            2 Tbsp olive oil

            2 large carrots, peeled and chopped

            1 stalk celery, diced

            1/3 cup white wine (I use pinot grigio)

            2 cups chopped kale, finely chopped, stems removed

            3 - 4 cups vegetable broth

            1 Tbsp tomato paste

            1 tsp salt

            1/4 tsp black pepper

            1/4 tsp red pepper

            1/4 tsp Italian seasoning

            2 bay leaves

            1 tsp dried thyme

            1/2 tsp dried oregano


  1. Sauté onion in a large pot with olive oil.
  2. Once it starts to brown slightly, add garlic, celery and carrots.  Sauté an additional 10 minutes to allow veggies to soften and brown.  The browning adds to the flavor!  
  3. Add white wine and sauté until most of the liquid evaporates, about 5 minutes. 
  4. Add all remaining ingredients (except kale) and stir well. 
  5. Bring to a boil, then cover and reduce heat to low.  Simmer for 15 minutes. 
  6. Discard bay leaves.  Then transfer 2 1/2 - 3 cups of soup to a blender.  Blend until smooth.
  7. Transfer back to the pot and stir well to combine. 
  8. Add in the kale and let simmer for a few minutes to allow kale to wilt. 
  9. Taste and adjust flavors as desired.  
  10. Serve warm; add a hearty bread to make the perfect meal.  Enjoy!


We hope this Tuscan White Bean Soup finds its way into your regular winter rotation and brings a little extra comfort to your table. A pot of soup simmering on the stove has a way of filling the house with warmth and calling everyone to gather close and sit a spell. Thank you for cooking along with us during our January Soup Series, and be sure to come back next week as we wrap things up with our final soup recipe. We can’t wait to share one more bowl of hearty soup with you.

Wednesday, January 14, 2026

Baked Potato Soup

Some suppers just feel like home, and a pot of Baked Potato Soup simmering on the stove is one of them. There’s nothing fancy about it, just good, simple comfort food. Creamy potatoes, a little butter, a touch of milk, and all the fixin’s that make it taste like love in a bowl.

This is the kind of soup that’ll chase off the chill and bring everyone running to the kitchen. It’s hearty enough for a meal, easy enough for a weeknight, and somehow still feels special every single time. So grab your favorite ladle and cozy up. Week three of our January Soup Series is serving up pure Southern comfort with this rich, creamy Baked Potato Soup.


Baked Potato Soup

5 large Russet potatoes

1/2 cup butter

1/2 cup flour

6 cups milk

3/4 tsp salt

1/2 tsp pepper

4 green onions, chopped and divided

1 1/2 cup shredded cheddar cheese, divided

8 oz sour cream


  1. Wash, prick, and bake potatoes for 1 hour at 400 degrees F, or until done.
  2. Let cool completely. Cut in half lengthwise and scoop out pulp in chunks and set aside. Discard skins.
  3. Melt butter in a large pot over low heat. Add flour and cook until smooth, stirring constantly. Cook and stir for additional 1 minute.
  4. Gradually add milk and cook over medium heat, stirring constantly until mixture is thickened and bubbly.
  5. Add potato pulp, salt, pepper, 2 green onions, and 1 cup of cheese. Cook until thoroughly heated  through and cheese is melted. If potato chunks are larger than you would like, use a potato masher to mash them to desired size now.
  6. Stir in sour cream, stirring until melted.
  7. Garnish with remaining green onions and shredded cheese.
Notes:

This recipe is easy to double, and makes a budget-friendly meal.

The soup will thicken as it cools.

Our family enjoys this as a vegetarian recipe, but you can garnish with bacon bits, if desired.


Whether you’re sharing this Baked Potato Soup around the family table or tucking into a bowl after a long day, we hope this recipe brings a little warmth to your week. Be sure to stop back by next week as our January Soup Series continues with another delicious recipe to keep those winter nights extra cozy.

Wednesday, January 7, 2026

Creamy Mushroom and Rice Soup

Winter is still in full swing, and what better way to chase away the chill than with a warm, hearty bowl of soup? Our January Soup Series continues this week with another comforting recipe that’s perfect for slow nights, cozy kitchens, and full hearts. This Creamy Mushroom and Rice Soup is one of those simple recipes that fills the kitchen with the delicious smell homemade soup and reminds us of suppers shared around Mama and Daddy’s old wooden table - can't beat that feeling!

Hearty but not heavy, it’s the kind of soup that feels like a hug after a long day. It's rich with tender mushrooms, perfectly cooked rice, and just enough creaminess to make every spoonful satisfying. Whether you serve it as a cozy weeknight dinner or as part of a weekend gathering with friends, this dish brings that old-fashioned comfort we all long for.

Ready to bring a little of that comfort to your own kitchen? You don’t need anything fancy, just a few pantry staples, a handful of mushrooms, and a little time to let everything simmer low and slow. 

Let’s get cooking! Here’s how to make our favorite Mushroom and Rice Soup, the perfect cozy companion for chilly winter evenings.

Creamy Mushroom & Rice Soup

1 Tbsp olive oil

1 lb mushrooms of your choice, sliced

1 cup celery, chopped

1 cup carrots, chopped

1 medium shallot, chopped

1/4 cup all purpose flour

salt and pepper, to taste

1/3 cup white wine

1 tsp dried thyme

4 cups vegetable broth

1 cup instant or quick-cooking rice

3/4 cup sour cream

2 Tbsp fresh parsley, chopped


  1. Heat olive oil in a large pot over medium heat.
  2. Add mushrooms, celery, carrots, and shallot. Cook, stirring often, until softened (about 5-7 minutes).
  3. Stir in flour, salt, pepper. Cook for 2 minutes, stirring constantly.
  4. Add white wine and thyme. Increase heat to medium high and cook another 2 minutes.
  5. Add vegetable broth and bring to a boil. Add rice and reduce heat to a simmer. Cover and cook until rice is tender (about 5-7 minutes, checking that rice is done before proceeding to next step).
  6. Stir in sour cream and parsley until incorporated.

Notes: 

Use whatever mushrooms are your favorite for this recipe or whatever ones are on sale at your grocery store when you plan to make it. I have used a mix of mushrooms in this recipe before, and I find that often makes for the best flavor.

If you want to use non-instant rice, cook 1 cup according to package directions and stir it into soup along with sour cream and parsley.

As written, the recipe serves 4, but I often double or triple this recipe and make a big batch at once.


There’s just something special about recipes like this, the kind that fill your home with warmth and remind you to slow down and savor the simple things. Whether you’re enjoying it on a quiet evening or sharing it with loved ones around the table, this Creamy Mushroom and Rice Soup is a little taste of comfort in every bite.

If you make it, we’d love to hear how it turns out! Leave us a comment, share a photo, or tag us on social media because just like a good soup, joy is always better when it’s shared.

And don’t forget to stop by next week when we’ll be sharing another soup recipe to keep you warm and cozy all month long. 

Wednesday, December 31, 2025

Black-Eyed Peas and Collard Green Soup

January will be here tomorrow and that just calls for a big pot simmering on the stove. After all the hustle and bustle of the holidays, The Harris Sisters love nothing more than slowing down, cozying up, and letting the comforting smell of homemade soup fill the kitchen. This year, we’re starting a little tradition of our own: sharing one favorite soup recipe each week throughout January. Think of it as our way of bringing a little warmth (and a whole lot of flavor) to these chilly winter days.

We’re kicking things off with a Southern classic that’s close to our hearts Black-Eyed Peas and Collard Greens served up as soup! Around here, black-eyed peas and collards are more than just ingredients; they’re symbols of luck, prosperity, and good health and that makes them the perfect way to start a brand-new year. This soup has all the cozy, savory goodness of the traditional New Year’s Day meal, just in a bowl that’ll warm you from the inside out.

So grab your favorite pot, pull out those soup bowls, and join us each week as we share more recipes made for gathering, sharing, and savoring. Here’s to good food, good luck, and plenty of cozy moments all month long.


Black-Eyed Peas and Collard Green Soup

1 Tbsp olive oil

1 medium onion, diced

8 cloves garlic, minced

8 cups vegetable broth

2 15 oz. cans black-eyed peas, rinsed and drained

2 15 oz. cans navy beans, rinsed and drained

2 15 oz. cans unseasoned collard greens, undrained

1/4 tsp black pepper

1 tsp Lawry's seasoned salt

1 tsp Cajun seasoning

1/2 tsp red pepper flakes

1/8 tsp cayenne pepper

1/2 tsp Liquid Smoke

1 Tbsp hot sauce

8 oz. dry ditalini pasta


  1. Add olive oil, celery, carrots, and onions to a stockpot on the stove over medium-low heat and cook until the vegetables are soft and fragrant. Add the garlic, cook, and stir one more minute.
  2. Add broth, tomatoes, beans, collard greens, and spices and stir together.
  3. Bring mixture to a boil, then cover and reduce heat to low. Let simmer, covered for an hour to allow flavors to develop and mingle. 
  4. Cook ditalini pasta according to package directions and add cooked pasta to soup the last 15 minutes of cooking.
Notes:

Can substitute 1 cup of rice instead of pasta. Cook according to package directions and add in final step.

If you would like to add meat to this recipe, you can add 1 pound of andouille sausage, sliced and cut into pieces. Cook with vegetables in step 1 until sausage has browned before proceeding to step 2.

If you have young kiddos, this is a fun soup to serve around Halloween and call it Swamp Soup!


So whether you’re hoping for a little extra luck in the new year or just craving something hearty to warm you up, this soup’s got you covered. It’s the kind of recipe that feels like home with its simple ingredients, slow-simmered flavor, and plenty of love in every spoonful. So grab your apron, turn up some good music, and let’s get cooking. There’s a bowl of comfort waiting at the end of this pot!

And don’t forget to tune in next week because we’ll be sharing another soup to keep you cozy all month long. Trust us, you won’t want to miss it!

Monday, July 21, 2025

If You Give a Kid a Cooking Pot: One Pot Taco Soup

Over the next several weeks, we'll be bringing you recipes for beginning cooks designed to teach basic cooking skills. So be on the lookout for all the recipes in the series. Today's recipe is part of the Cooking Challenge series.

With only one pot needed to make this soup, it's an easy-to-make dinner!

As written, the recipe is a healthy, high protein meal that makes a BIG pot of soup. This is a great one for beginner cooks because you can get dinner on the table in 30 minutes and have plenty of leftovers for later in the week or to freeze for later.


One Pot Taco Soup

Soup Ingredients

1 Tbsp. olive oil

1 large onion, diced

6 cloves garlic, minced

1 15 oz. can light red kidney beans, undrained

1 15 oz. can dark red kidney beans, undrained

1 15 oz. can canneloni beans, undrained

1 15 oz. can chili beans, undrained,

1 15 oz. can black beans, undrained

1 15 oz. can pinto beans, undrained

1 15 oz. can corn, undrained

1 15 oz. can Rotel, undrained

2 15 oz. cans diced tomatoes, undrained

1 28 oz. can tomato puree

4 cups water

1 1/2 1 oz. packets Taco Seasoning Mix, or 4 1/2 Tbsp. homemade taco seasoning mix

1 oz. packet Hidden Valley Ranch Seasoning, or 3 Tbsp. homemade ranch dressing mix

1 1/2 pound ground beef (optional)

Garnishes

green onions, chopped

fresh cilantro, chopped

jalapenos, sliced for serving

avocados, peeled and diced

sour cream

hot sauce

shredded cheese

  1. Heat olive oil in a large 8-quart pot over medium heat. Saute onion until soft and translucent. If adding ground beef, brown it along with onions, about 5-6 minutes. Drain grease before proceeding with the rest of the recipe as written.
  2. Add the minced garlic and stir until fragrant, about 30 seconds.
  3. Add tomatoes and spices, stirring to combine.
  4. Add remaining soup ingredients, and stir to combine.
  5. Bring to a boil, reduce heat to low, and simmer covered for 25 minutes.
  6. Serve topped with garnishes of your choice (optional).

You Can Get with This or You Can Get with That (Ingredient Substitutions):

  • If interested in making a smaller quantity of soup, use only 3 cans of beans, tomato puree (omitting diced tomatoes), and 1 packet of Taco Seasoning Mix.
  • Substitute garlic powder or jarred minced garlic for fresh minced garlic.
  • All garnishes are optional.


This Is How We Do It (Kitchen Skills You'll Learn in This Recipe):

  • Boiling vs. simmering
  • Browning ground meat (optional)
  • Chopping vegetables
  • Measuring ingredients
  • Reading and following a recipe
  • Sauteing vegetables
  • Setting a timer
  • Using a can opener


Mama Said Knock You Out (Prep Ahead for Easy Dinners):

You can either freeze taco soup before cooking, or you can cook it first and then freeze to reheat later. (This works well with leftovers.) Either way, the flavors in the soup will remain the same. Taco soup can be stored in the freezer for 4-6 months.


If You Give a Kid a Cooking Challenge

This recipe is part of the three-part If You Give a Kid a Cooking Challenge recipe series. These recipes are designed to: 

  • be easier to make
  • have a minimal number of ingredients (minus pantry staples like oil and spices)
  • be quick to prep 
  • make enough for one person to have leftovers for a few days
Make sure to visit the main post to see all of the recipes in the series.

    Wednesday, June 18, 2025

    If You Give a Kid a Crockpot: 15 Bean Soup

    Over the next several weeks, we'll be bringing you recipes for beginning cooks designed to teach basic cooking skills. So be on the lookout for all the recipes in the series. Today's recipe is part of the Cooking Challenge series.

    There’s nothing more cozy than a bowl of hearty soup, and this 15 Bean Soup fits the bill. Easy to make in your crock pot, this simple dump and go recipe makes the perfect meal for a chilly day. Make sure to save this recipe for later - it's sure to hit the spot!


    Crockpot 15 Bean Soup

    20 oz. bag 15 bean blend, sorted and rinsed, seasoning packet discarded

    1 medium onion, diced

    6 cloves garlic, minced

    4 carrots, sliced into rounds (approx. 2 cups)

    4 stalks celery, chopped (approx. 1 cup)

    1 tsp cracked pepper coarsely ground

    2 tsp dried thyme

    2 bay leaves

    1/4 cup soy sauce

    6 cups vegetable broth

    14.5 oz. can diced tomatoes

    meat of choice (optional)

    1. Wash the sorted dry beans. Place them into a pot and cover with 8 cups of water. Let them soak 8 hours or overnight. Drain and set aside.
    2. Combine beans, onion, garlic, carrots, celery, black pepper, thyme, bay leaves, soy sauce, vegetable broth, and diced tomatoes in slow cooker. 
    3. Mix well and cook on low for 8-10 hours.
    4. Remove bay leaves from soup and discard. 
    5. Serve soup with a side of bread or cornbread.


    How to Quick Soak Beans

    If you don’t have time to soak the beans in advance, you can rinse them, place them in a large pot, cover with cold water, and bring to a boil over high heat. Boil the beans uncovered for 5 minutes. Remove the pot from the heat, cover, and then let the beans soak in the hot water for 1 hour. Drain the beans in a colander, rinse them under cold water, and proceed with steps 2-4 of the recipe.

    You Can Get with This or You Can Get with That (Ingredient Substitutions):

    As written, the 15 Bean Soup recipe is gluten free, vegetarian, and vegan, but this recipe is easy to change to suit your needs. If you don't want to make this as a vegetarian soup, you can add these types of meat to this recipe with the ingredients in step 2:

    • 1 pound cooked and drained ground beef or turkey
    • 1 pound cooked and drained sausage or kielbasa
    • 2 cups cooked and diced ham 
    • 2 cups cooked and shredded chicken or turkey

    Since you only need a small amount of meat to add to the soup, this recipe is a good way to use up  leftover turkey or ham around holidays like Easter or Thanksgiving. If you're adding extra meat to the soup, you may want to add an extra 2 cups of broth.


    This Is How We Do It (Kitchen Skills You'll Learn in This Recipe):

    • Browning ground meat (optional)
    • Chopping vegetables
    • Measuring ingredients
    • Reading and following a recipe
    • Setting a timer
    • Soaking beans
    • Using a crockpot
    • Washing and sorting dry beans

    If You Give a Kid a Cooking Challenge

    This recipe is part of the three-part If You Give a Kid a Cooking Challenge recipe series. These recipes are designed to: 

    • be easier to make
    • have a minimal number of ingredients (minus pantry staples like oil and spices)
    • be quick to prep 
    • make enough for one person to have leftovers for a few days
    Make sure to visit the main post to see all of the recipes in the series.

      Saturday, May 31, 2025

      If You Give a Kid a Crockpot: Pizza Fondue

      Over the next several weeks, we'll be bringing you recipes for beginning cooks designed to teach basic cooking skills. So be on the lookout for all the recipes in the series. Today's recipe is part of the Cooking Challenge series.

      This crockpot Pizza Fondue recipe will provide an easy weeknight meal when paired fresh chopped veggies, pepperoni, and cubed Italian bread dippers. And, really, what's not to like? It's a pizza in a crockpot (or fondue pot if you have one)!


      Pizza Fondue

      1 Tbsp olive oil
      3 cloves garlic, minced
      24 oz. jar of marinara sauce
      1 tsp dried basil
      3 cups mozzarella cheese, shredded
      1 cup cheddar cheese, shredded
      1 cup grated Parmesan cheese
      1 Tbsp cornstarch

      For serving:
      Cubed Italian or French bread 
      Fresh veggies (broccoli, carrots, sliced mushrooms)
      Pepperoni

      1. Add olive oil, garlic, marinara sauce, and basil to a crockpot.
      2. Add mozzarella cheese, cheddar cheese, Parmesan cheese, and cornstarch to a gallon-sized Ziploc bag, seal, and shake. Add cheese mixture to the marinara sauce in several batches and stir to incorporate.
      3. Set heat on high, and cover for 30 minutes. Turn down to low and cook for another 45 minutes, stirring every 15 minutes. Set heat to warm when ready to serve.
      4. While the fondue is cooking, cut fresh bread and vegetables for serving. 

      You Can Get with This or You Can Get with That (Recipe Substitutions):

      • Substitute garlic powder or jarred minced garlic for fresh minced garlic.
      • If you do not have a fondue set, use regular forks instead of fondue forks for dippers. 
      • If you have a fondue pot, make steps 1 and 2 in a pot on the stove. Once cheese has completely melted, transfer to a fondue pot to keep warm and serve.


      This Is How We Do It (Kitchen Skills You'll Learn in This Recipe):

      • Chopping vegetables
      • Measuring ingredients
      • Reading and following a recipe
      • Setting a timer
      • Using a crockpot


      If You Give a Kid a Cooking Challenge

      This recipe is part of the three-part If You Give a Kid a Cooking Challenge recipe series. These recipes are designed to: 

      • be easier to make
      • have a minimal number of ingredients (minus pantry staples like oil and spices)
      • be quick to prep 
      • make enough for one person to have leftovers for a few days
      Make sure to visit the main post to see all of the recipes in the series.

      Monday, May 26, 2025

      Roasted Corn Orzo Pasta Salad

      As picnic and BBQ season rolls around, I always like to post a new side dish for you guys to try. This one is an easy one to put together and as a bonus, you might have some of the ingredients already growing in your garden (I did). This recipe makes a big batch so that you can feed a large crowd or you can take half to a cookout and keep half at home.


      Roasted Corn Orzo Pasta Salad

      1/2 cup plus 2 Tbsp olive oil

      6 cloves garlic, minced

      2 cups fresh cooked corn

      2 pints cherry tomatoes, halved

      1 lb orzo pasta

      1/2 cup fresh basil, chopped

      2 bunches green onions, sliced

      5 Tbsp red wine vinegar

      3 Tbsp lemon juice

      3 tsp salt (or to taste)

      1 tsp pepper (or to taste)

      1. Cook orzo according to package directions. When pasta is finished cooking, drain and set aside to cool.
      2. While pasta is cooking, add 2 tablespoon of olive oil to a large 5 quart sauté pan. Add garlic and sauté over medium heat for about 3 minutes.
      3. Add corn, 1 teaspoon of salt, and 1 teaspoon of pepper and sauté 8 more minutes. Add pasta to corn and stir to incorporate. Remove from heat and let cool.
      4. While corn is cooling, chop cherry tomatoes, basil, and green onions.
      5. In a small bowl, combine 1/2 cup olive oil, vinegar, and lemon juice.
      6. When corn and pasta mixture has cooled, add tomatoes, basil, and green onions and stir to combine. Pour dressing over salad and toss well.
      7. Refrigerate at least 2 hours before serving.

      Make sure to check out these other favorite Harris Sisters side dishes for your next summer cookout:

      Friday, September 6, 2024

      Caprese Skewers

      This recipe is one of the easiest appetizers you'll ever make, and if you have an abundance of cherry tomatoes and basil still overflowing in your garden, then it's perfect to make right now! With just three ingredients, you'll be able to put these together in no time!


      Caprese Skewers

      24 grape or cherry tomatoes

      12 marinated mini mozzarella balls

      12 large basil leaves

      12 mini skewers

      Olive oil (optional)

      Balsamic vinegar reduction* (optional, recipe follows)

      Salt & pepper (optional)

      1. Thread two tomatoes, one mozzarella ball, and one basil leaf onto each mini skewer, alternating ingredients.
      2. If using unmarinated mozzarella balls, consider drizzling with olive oil and balsamic vinegar reduction and sprinkling with salt and pepper.
      3. For best results, assemble up to 4 hours prior to serving. Store in the refrigerator.


      Notes:

      • We used marinated mozzarella balls so that we could skip the additional step of drizzling with olive oil and balsamic reduction and sprinkling with salt and pepper.
      • We used large basil leaves, so only used one per skewer. If you are using small basil leaves, you may want to use two per skewer.
      • One recipe yields 12 appetizer skewers. Double the recipe for a larger crowd.
      • Because of their beautiful red, white, and green color, these also make a great (and quick!) appetizer to bring to Christmas parties. If you're wondering where you can find fresh basil in December, most grocery stores carry fresh herbs in produce section.

      How to Reduce Balsamic Vinegar

      If you want to use Balsamic Vinegar Reduction for your recipe, complete this step first and allow to cool while you assemble your Caprese Skewers. Here's how to reduce Balsamic Vinegar if you are using unmarinated mozzarella balls. 

      1. Pour 1 cup of balsamic vinegar into a small saucepan over medium-low heat.
      2. Cook, stirring occasionally, until vinegar has reduced to about half a cup (this will take about 15 minutes or so). Vinegar will be the consistency of a thin maple syrup.
      3. Allow balsamic reduction to cool before drizzling over your Caprese Skewers (it will thicken as it cools).

      Sunday, November 5, 2023

      No Roll Press in the Pan Pie Crust

      I'm going to let you in on a little secret. I LOVE pie, but I will do absolutely anything to avoid making a traditional pie crust.

      Why don't you use store bought pie crusts you ask? Well, you'd think that would be the easy solution. And it is probably a go-to for many people. However, if you have food allergies (like I do) or are a vegetarian (like I am), these won't work because so many store-bought pie crusts either contain food allergens or lard.

      So, let me share this easy pie crust recipe that you can use for your next pie. You can cater it to whatever food allergies you might have in your family, if needed. (For example, you can use gluten-free flour, soy-free oil, or dairy-free milk.) And the absolute best part? You make this right in the pie pan, so you don't even have to get out your rolling pin!


      No Roll Press in the Pan Pie Crust

      1 1/2 cups all purpose flour

      1/2 teaspoon salt

      2 Tablespoons sugar

      1/2 cup oil

      2 Tablespoons milk

      1. Add dry ingredients to 9-inch pie plate and mix to incorporate.
      2. Add oil and milk and use a fork to mix together until wet ingredients are incorporated.
      3. Press evenly into bottom and sides of plate and flute edges as desired.

      Baking Instructions:

      1. If pre-baking crust for an unbaked filling, like a cream pie or lemon meringue pie: 
        • Prick the bottom of the crust and bake at 375 degrees for 15 minutes. 
        • Cool crust before adding filling.
      2. If baking the crust along with the pie filling, like with coconut custard pie or Tarheel pie
        • Preheat the oven to the temperature listed in your pie recipe and pre-bake the crust for 5 minutes in the oven before adding pie filling. 
        • Remove the crust from the oven, add pie filling, and cook filled pie at full time listed in recipe.

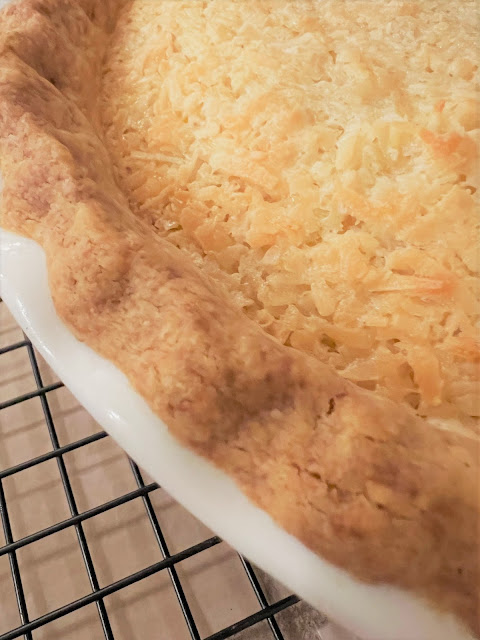
      Here's a photo of what it looks like after the pie crust is baked. It turns out a pretty golden color.

      Coconut Custard Pie


      Notes

      • Pie crust dough should be able to be pressed into the pie pan (up the sides and onto the bottom) and hold its shape.
      • If you find that the pie crust dough is too dry when you're finished mixing, add more milk in small increments to achieve the correct consistency.
      • If you find that the pie crust dough is too wet when you're finished mixing, sprinkle with more flour to achieve the correct consistency.
      • If you omit the sugar, you can use this pie crust for savory dishes, like your favorite quiche recipe.
      This recipe is so easy to make, I enlisted the help of my youngest son, Jaxon, to help me make some of them. This is him fluting the edges of one of the crusts. If my teenager can make this recipe, so can you!


      I hope you enjoy this new recipe! I've got it queued up for all my Thankgiving pies!

      Friday, June 2, 2023

      Rainbow Couscous Salad

      It's picnic and BBQ season! And that means you might be on the lookout for some new side dishes to bring along with you to your next event. This one is a real winner. Because couscous is the main pasta featured, it cooks in 5 minutes and you can't beat that! And this recipe makes a big batch (so plenty to share AND plenty to eat yourself).


      Rainbow Couscous Salad

      3 cups cooked couscous

      1 medium zucchini, halved lengthwise and sliced

      1 15-oz. can corn, drained and rinsed

      1/2 cup plus 2 Tbsp. olive oil, divided

      1/2 tsp. salt

      1/2 cup lemon juice

      3 cloves garlic, minced

      3 cups baby spinach, chopped

      1 15-oz. can chickpeas, drained and rinsed

      1 cup grape tomatoes, halved

      1/3 cup thinly sliced red onion

      6 oz. crumbled feta cheese (optional)

      1. Cook couscous according to package directions. Set aside to cool.
      2. Preheat oven to 400 degrees. In a large baking pan, combine the zucchini, corn, and 2 Tbsp. of olive oil. Sprinkle with salt to taste. Roast for 10 minutes, until just tender. Let cool.
      3. Meanwhile, make the dressing by whisking together 1/2 cup olive oil, 1/2 cup lemon juice, 3 cloves garlic, and 1/2 tsp salt.
      4. In a very large bowl, combine spinach, couscous, chickpeas, tomatoes, red onion, and zucchini mixture. Toss to combine. 
      5. Add dressing to desired amount and mix. Refrigerate at least 2 hours before serving.
      6. If adding feta cheese, either add and mix in just before serving or serve separately as a topping for each person to add to their serving.

      Notes:

      If you want 3 cups of cooked couscous, you'll need to start with about 1/2 cup uncooked.

      I usually reserve about 1/4 cup of dressing to add the next day if the couscous has absorbed a lot of dressing after being refrigerated - or if you just want more dressing on your salad.

      As a side dish, this recipe serves 12.

      Make sure to check out these other favorite Harris Sisters side dishes for your next summer cookout:

      Friday, May 19, 2023

      Easy Cole Slaw

      Sweet cole slaw is a favorite Southern BBQ side dish. This creamy cole slaw recipe is easy to make, and it's the perfect side dish to bring to your next cookout! 

      Be sure to make this recipe ahead of time and put it in the refrigerator to let it soak up the flavors of the dressing. 


      Easy Cole Slaw

      1/4 cup milk

      1/2 cup mayonnaise

      1/3 cup sugar

      1 1/2 Tbsp white vinegar

      1 tsp salt

      1/4 tsp pepper

      2, 16 oz. bags of cole slaw mix

      1/4 cup almond slivers (optional)


      1. Whisk together the milk, mayonnaise, sugar, vinegar, salt, and pepper in a small bowl.
      2. Pour the dressing over the coleslaw mix and almond slivers in a large bowl. Mix well.
      3. Cover and refrigerate at least 4 hours or overnight. Serve chilled.


      Notes:


      As you mix this, you may think this seems "dry," but water will release from the cole slaw mix as it sets. So make sure to give it a good stir before you are ready to serve it up.

      This particular recipe has the added crunch of almond slivers, but you can leave those out if you'd like a more traditional Southern cole slaw. 

      This recipe serves 8-10 as a side dish, so it's perfect to bring to your next cookout, party, backyard  barbecue, or pot luck to serve a big crowd!


      Check out these other tried and true Harris Sisters' recipes for your upcoming summertime parties:

        Monday, February 20, 2023

        Apple Rose Tarts | How to Make Puff Pastry Apple Roses

        Whether you're throwing a wedding shower, baby shower, tea party, or Mother's Day celebration, wow your guests with these tiny glazed apple rose tarts. Perfect for serving alongside your other party appetizers, these individual mini desserts look adorable served in tea cups.


        Apple Rose Tarts

        2 sheets frozen puff pastry dough

        2 medium pink or red apples like Pink Lady or Fuji

        juice from half a lemon

        4 Tbsp. strawberry preserves

        1 Tbsp. water

        powdered sugar for dusting


        1. Thaw puff pastry sheets at room temperature.
        2. Preheat oven to 350°F. Grease a 12-cup muffin tin. Set aside.
        3. Remove core from apples. Using a mandoline slicer, slice apples as thin as possible. (The thinner the apples, the more pliable they will be, which will prevent them from breaking when rolling.)
        4. Place apple slices into a medium, microwave-safe bowl. Fill bowl with enough water to cover apple slices. Mix in lemon juice to prevent apples from browning. Heat bowl of apples for about 1-2 minutes in the microwave or until apples are soft and pliable.
        5. Lightly flour a pastry board. Place puff pastry sheets on board and slice each sheet into six equal strips.
        6. In a small bowl, add strawberry preserves and 1 Tbsp. water. Stir together and then heat in the microwave for about 20 seconds, or until warm and easy to spread. Spread a thin layer of  preserve mixture on one side of each strip of dough.
        7. Line apple slices on the upper half of each strip of dough, so that they are sticking out partially, with the skin part of the slices sticking out above the dough. (You don't want too much of the apple sticking out above the dough, otherwise this part of the apple will overcook in the oven. You just want about 1/3 sticking out.) Overlap the apple slices when lining them on the strip of dough. Fold up the bottom half of the dough.
        8. Starting at one end, carefully roll up the strip of dough, forming a tight spiral. Stretch the end of the dough and pinch to close. Place into greased muffin tin. Repeat with remaining dough.
        9. Place muffin pan into the lower half of the oven. (This will prevent the apples from browning too fast.) Bake for about 40 minutes or until puff pastry is fully cooked.
        10. Dust apple roses with powdered sugar right before serving.

        If you're planning a party, make sure to check out these other recipes for finger foods:

        Monday, January 30, 2023

        Cucumber Tea Sandwiches

        A favorite among tea parties, garden parties, Mother's Day brunches, baby showers, and bridal showers, Cucumber Tea Sandwiches are the perfect small bite. These savory appetizers are a tasty addition to your party table. 


        Cucumber Tea Sandwiches

        1 cucumber, peeled and thinly sliced

        1 (8 ounce) package cream cheese, softened

        ¼ cup mayonnaise

        ¼ teaspoon garlic powder

        ¼ teaspoon onion powder

        1 loaf sliced white bread, crusts removed

        1 pinch lemon pepper (optional)


        1. Place cucumber slices between 2 paper towels set in a colander. Allow liquid to drain, about 10 minutes.
        2. Mix cream cheese, mayonnaise, garlic powder, and onion powder in a bowl until smooth.
        3. Spread cream cheese mixture evenly on one side of each bread slice.
        4. Divide cucumber slices over half of the bread slices. If desired, sprinkle lemon pepper on cucumber.
        5. Stack the other half of the bread slices spread-side down over cucumber to make sandwiches; slice into triangles.


        How far in advance can you make Cucumber Tea Sandwiches?

        You should only make Cucumber Tea Sandwiches on the same day you will be serving and eating them. And ideally, you should not make them more than an hour or two earlier when possible.

        The danger is that the inside of the bread will get soggy and the outside will become dry. (And nobody wants that.)

        If you'd like to get a jump on your party prep, you can make the spread a day beforehand and store it in the refrigerator. And then assemble the sandwiches right before plating and serving. Easy peasy!

        If you're planning a party soon, make sure to check out these other appetizer and beverage recipes:

        Tuesday, January 24, 2023

        Gouda and Tomato Tea Sandwiches

        These simple tea sandwiches are perfect for any upcoming parties you might be planning so make sure to save this recipe for your next bridal shower, baby shower, tea party, cocktail party, or brunch. It only takes 7 ingredients to make these savory little appetizer sandwiches. You can make the topping the night before and then assemble the sandwiches right before serving.


        Gouda and Tomato Tea Sandwiches

        2 Italian baguettes

        2 garlic cloves

        1/2 cup mayonnaise

        4 oz. Gouda, finely grated

        7 oz. Mozzarella cheese, finely grated

        3 small tomatoes, sliced into wedges

        Fresh Dill, Cilantro, or Parsley (for garnish)

        1. Preheat oven to 350˚F.
        2. Slice bread on diagonal about 1/2" thick and place slices in a single layer on a greased baking sheet.
        3. Finely grate cheeses and place in a medium bowl.
        4. Press garlic into the bowl and stir in approximately 1/2 cup mayonnaise. (Add 1 Tbsp. at a time until you have a spreadable consistency.) Mix the spread together until well combined.
        5. Bake bread at 350˚F for about 7-10 minutes or until edges are beginning to turn golden. Remove from oven. 
        6. While bread is still warm, top each slice of bread with spread. Top with tomato wedge and garnish with fresh herbs of choice.


        If you're planning a party soon, make sure to check out these other party appetizer recipes:


        Wednesday, January 18, 2023

        Baked Pimento Cheese Pinwheels

        Pimento cheese is a true Southern delicacy. And this savory appetizer recipe takes it to the next level by encasing it in pastry. These Baked Pimento Cheese Pinwheels are a delicious, fun, and easy-to-eat appetizer that you'll love to serve at your next party. 


        Baked Pimento Cheese Pinwheels

        2 cans Pillsbury Crescent Rolls

        2 cups shredded extra sharp cheddar cheese

        8 ounces cream cheese, softened

        1/2 cup mayonnaise

        1/4 teaspoon garlic powder

        1/4 teaspoon cayenne pepper

        1/4 teaspoon onion powder

        1 (4 ounce) jar diced pimentos, drained

        salt and black pepper, to taste


        1. Line two large baking sheets with parchment paper. Set aside.
        2. Place the extra sharp cheddar cheese, cream cheese, mayonnaise, garlic powder, cayenne pepper, onion powder, and pimentos into a large mixing bowl. 
        3. Use a mixer to beat at medium speed, until thoroughly combined. Season to taste with salt and pepper.
        4. Unroll the crescent rolls, keeping the perforated sections together. Gently pinch the perforations so they stay together.
        5. Spread pimento cheese evenly on top. Carefully roll the crescent roll to create a roll. 
        6. Set in refrigerator for 30 minutes for easier slicing. 
        7. Gently slice the roll into 1-inch long sections using a sharp knife. 
        8. Place onto the prepared baking sheets, making sure to not crowd the rolls or they will stick to each other while baking.
        9. Bake at 350℉ for 15-20 minutes until golden brown.
        10. Allow to cool for about 5 minutes then remove from the pan.

        Notes: 

        The softer the dough is, the more these pinwheels spread during baking. Refrigerating in step 6 helps with this.

        Crescent roll dough won't slice particularly evenly, even after refrigerating. (You won't have perfect circles of dough.) However, they will even out while baking.

        How to Serve Pimento Cheese


        If you don't want to make fancy pants baked pinwheel appetizers with this pimento cheese recipe, you could easily just make the pimento cheese portion of the recipe (steps 1-3) and serve it:

        • as a dip with crackers, veggies, or chips 
        • on regular sandwiches, finger (tea-sized) sandwiches, or grilled sandwiches
        • as a filling for a quesadilla
        • as a burger topping
        • as a topping for cooked veggies or baked potatoes
        • as a topping for French fries
        • mixed into grits 
        • mixed into macaroni and cheese


        If you're throwing a party soon, check out these other appetizer recipes:

        Sunday, December 18, 2022

        Vegan Collard Greens

        I wanted to share with you a new recipe for our family's traditional collard greens for our New Year's meal. It's a vegan recipe that's perfect for our family, which includes two vegetarians.

        This recipe is perfect for if you have to consider a variety of dietary needs at your New Year's table. You can serve the traditional meat of ham separately for any meat eaters in your group.

        We pair this Southern-style recipe with Vegan Hoppin' John and Sweet Honey Cornbread to start the new year off right!


        Vegan Collard Greens

        2 bunches fresh collard greens
        olive oil
        1 small yellow onion, diced
        4 cloves garlic, minced
        4 cups vegetable broth 
        1 teaspoon salt
        1/8 - 1/4 teaspoon Liquid Smoke flavoring
        1/2 teaspoon red pepper flakes
        black pepper (to taste)
        balsamic vinegar (for serving, if desired)
        hot sauce (for serving, if desired)

        1. Remove bottom stalks of the collard green leaves and chop or tear into small pieces. 
        2. Fill your sink or a large container with cold water, add chopped collard greens, and soak for at least 10 minutes. (Some people prefer to soak greens overnight.)
        3. Remove the collard greens from the sink, place them in a colander, give them a good rinse, and drain. Complete this step in batches, if needed.
        4. Coat the bottom of a large pot with olive oil.
        5. Sauté onions over medium-low heat until they begin to brown and then add in garlic.
        6. Cook until onions and garlic are fragrant, for another 2-3 minutes.
        7. Add in vegetable broth.
        8. Season broth with salt, Liquid Smoke, red pepper flakes, and black pepper (if desired).
        9. Taste and adjust the seasonings if needed. 
        10. Bring broth to a boil, then reduce to simmer.
        11. Add in the greens, cover, and cook until greens are completely tender, about 1 - 1 1/2 hours.
        12. Check at the 30-minute mark to make sure there is still enough broth in the pot. Add more vegetable broth if needed.
        13. Serve with hot sauce or balsamic vinegar, if desired.


        Notes:

        Make sure you like the taste of the broth when you taste it at step 9, because this is how your greens will taste. Adjust seasonings at this step, if necessary. 

        Remember that the heat from the red pepper flakes will increase as the greens cook and you can always add more heat by serving the collard greens with additional hot sauce.

        Traditions & Superstitions: 

        A long-held tradition in the South, collard greens are often served for New Year’s Day.  According to superstition, if you eat collard greens on New Year’s Day, then you will have financial success for the coming year.

        • collard greens represent green backs (dollars), or cash 
        • black-eyed peas represent coins (this is traditionally served with alongside collard greens on New Year's Day)
        • cornbread represents gold (this is traditionally served with alongside collard greens on New Year's Day)

        Thursday, July 7, 2022

        Portobello Mushroom Burgers

        It's grilling season and these veggie burgers are not only easy-to-make, but they're delicious too. You can marinate them in 15 minutes, and it only takes 8 minutes to grill them. Super simple. 

        Portobellos are a great vegetable to grill and a great burger alternative - they're already the same size as a burger patty. They hold their shape well and become soft once you've cooked them. Of course, the tasty marinade is what makes them so delicious!

        Portobello Mushroom Burgers

        4 large portobello mushroom caps 

        2 Tbsp. olive oil

        3 Tbsp. soy sauce

        2 Tbsp. balsamic vinegar

        2 garlic cloves, minced

        1/2 tsp. pepper

        burger buns (for serving)

        burger toppings (for serving)

        1. Clean the mushroom caps by wiping away any dirt and cutting off the stems with a paring knife. Remove the gills by scraping them off with a spoon. Place in a single layer in a casserole dish.
        2. Whisk together olive oil, soy sauce, balsamic vinegar, garlic, and black pepper in a small bowl. Brush the mixture all over the tops and undersides of the mushroom caps and let them marinate for 15 minutes.
        3. Preheat a grill over medium heat. Place the mushrooms cap-side down and brush the gill side with some of the reserved marinade. Cover and cook for 4 minutes until golden brown grill marks appear. 
        4. Flip the mushroom caps and brush the tops with more marinade. Cover and cook another 4 minutes until the mushrooms have softened and shrunken slightly.  
        5. Build your burger using your favorite toppings and serve immediately.

        Notes:


        Instead of grilling, you can also roast these in the oven at 400 degrees for 12 minutes.

        This recipe is also suitable for your vegan friends, since they can choose which toppings to add to their portobello mushroom burger.

        We eat them as veggie burgers, but you could also serve them as a vegetarian main dish plated alongside other vegetarian side dishes (to be eaten with a knife and fork in place of a meat, for instance).


        Wednesday, June 1, 2022

        Vegetable Pancakes

        Now that warmer months are upon us and fresh veggies are in season, I thought I'd share a vegetable pancake recipe that features a few different types of vegetables. These can either be straight from your own garden or fresh from the Farmers Market or local produce stand. However you come by your fresh veggies, you'll be glad you decided to make this savory veggie pancake recipe. 

        And if you've got picky eaters at home, it's also a tasty way to get more vegetables into their diet. Vegetable pancakes are great for breakfast, lunch, a side dish for dinner, a vegetarian main dish, or even a party appetizer (because of their small size).


        Vegetable Pancakes

        3 large zucchini, grated and thoroughly drained

        2 cups broccoli, grated

        6 large carrots, grated

        1 onion, diced and sautéed

        1, 15 oz. can corn kernels, divided

        4 large eggs, beaten

        1 tsp. salt

        1/2 tsp. pepper

        1 tsp. garlic powder

        1 cup breadcrumbs

        1/2 cup flour

        1/2 tsp. baking powder

        oil for pan

        green onions, thinly sliced (for serving)

        sour cream (for serving)

        sriracha sauce (for serving, if desired)

        Grate & Drain Zucchini

        1. Grate zucchini, sprinkle with 1 teaspoon salt and set in a fine mesh strainer. Place a bowl or plate on top of the zucchini and weigh it down to help it release its liquid. 
        2. Let it sit for at least 30 minutes - 1 hour. After it has drained, wrap it in a clean kitchen towel or a piece of cheesecloth, squeeze to release the remaining liquid, and set aside.

        Mix Pancake Batter & Cook Pancakes

        1. In a large mixing bowl, mix together flour, baking powder, pepper, garlic powder, and breadcrumbs. Add zucchini, broccoli, carrots, onion, and 1 cup of corn, and toss to combine.  Make sure to break up the zucchini and coat everything with flour mixture. (Set aside remaining corn for step 8.)
        2. Crack eggs into a small bowl, beat, and pour over the vegetable mixture. Mix to thoroughly combine.
        3. Heat a skillet over medium heat and add enough oil to lightly coat the bottom of the pan.
        4. Using a scoop, drop the vegetable mixture into the hot pan, and flatten with the bottom of the scoop form a patty.
        5. Cook for 2-3 minutes on each side, turning down the heat if they begin to brown too quickly.
        6. Remove from pan to drain on a cooling rack placed over a cookie sheet.
        7. Repeat process with remaining vegetable mixture, adding more oil if the pan becomes too dry.
        8. When final pancake has been cooked, roast remaining corn in pan for 1-2 minutes, or until kernels are lightly browned.
        9. Serve pancakes garnished with sour cream, green onions, and roasted corn. If you'd like your savory veggie cakes spicy, serve topped with a drizzle of sriracha sauce.

        Pancake Cooking Tips

        • Use only enough oil to create a crisp, browned crust.
        • Avoid crowding the pan. Leave at least 1 inch of cooking space between pancakes.
        • Wait until first side has browned before turning. Check bottoms of pancakes before turning.
        • Turn each pancake only once.


        Notes:

        You can use a regular box grater to grate your vegetables, but if you use a food processor, you can cut your prep time for this recipe considerably.

        Zucchini is a very watery vegetable, so take care to drain it well so that your pancakes don't turn out soggy.

        This is the scoop that I used for this recipe. A small ice cream scoop would work too!

        You'll notice that step 6 says to drain them on a cooling rack placed over a cookie sheet. Placing them on a paper towel on a plate will cause them to create steam and lose some of the crispy texture. 

        If you'd rather bake these than fry them, bake them at 350 degrees for 20 – 25 minutes. The finished pancakes won't be quite as crispy. 

        This post contains affiliate links.

                      You Might Also Be Interested In