Showing posts with label side dishes. Show all posts

Saturday, November 15, 2025

25 Vintage Holiday Recipes Straight from Grandma’s Cookbook

There’s just something special about those old-fashioned holiday recipes that have been passed down through generations, the ones written inside the pages of Grandma’s favorite cookbook in her own handwriting. This Vintage Holiday Recipe Roundup celebrates those timeless classics that bring warmth and nostalgia to every Christmas table. 

The holiday season is packed full of nostalgia. Here’s a list of The Harris Sisters favorite vintage recipes to help keep some of those old-fashioned holiday traditions alive. If you’re planning a Retro-Themed Christmas Party, make sure to add some of these Christmas goodies to the menu. Others on the list are sure to please at your next holiday gathering. So dust off your mixing bowls and get ready to bring a little vintage magic back to your kitchen this season.


Appetizers & Snacks

Every great holiday gathering starts with something to nibble on, and these vintage appetizers and snacks are just the thing to get the party started. From cheese balls rolled in chopped pecans to crispy sausage balls, these recipes are just like Grandma used to make.

Classic Cheeseball Recipe


Chex Mix

Swiss & Gruyere Fondue

Classic Cheese Ball

Cucumber Finger Sandwiches

Stuffed Mushrooms

Sausage Balls


Beverages

Whether you’re serving up a cozy cup of holiday wassail or a festive punch bowl brimming with cheer, these nostalgic beverages are sure to warm hearts and hands alike. Each sip feels like a taste of Christmas past, perfect for gathering around the fire or toasting with family and friends.

Champagne Punch

Champagne Punch

Non-Alcoholic Party Punch

Holiday Wassail

Non-Alcoholic Holiday Wassail

Homemade Eggnog


Side Dishes

The secret to a memorable holiday feast is in the sides, and these vintage favorites are true comfort food classics. From delicious cornbread and creamy sweet potatoes to cranberry sauce and savory stuffing, these side dishes bring warmth, tradition, and a touch of home to every holiday table.

Sweet Potato Casserole


Grandma’s Bread Stuffing

Sweet Potato Casserole

Cranberry Sauce

Old-Fashioned Cornbread


Desserts

No holiday meal is complete without a few sweet treats, and Grandma’s dessert recipes never disappoint. Think buttery cookies decorated with sprinkles, custard pies, and old-fashioned cakes that make the whole house smell like Christmas. These desserts are pure nostalgia, simple, homemade, and made with love.

Grandma Elizabeth's Coconut Custard Pie


Grandma Elizabeth’s Cobbler

Peanut Butter Balls

Grandma Elizabeth’s Coconut Custard Pie

Grandma Elizabeth’s Applesauce Cake

Coconut Cake

Grandma Elizabeth’s Magic Fruit Cake

No Bake Choc Oat Cookies

Old-Fashioned Thumbprint Cookies

Grandma Elizabeth’s Oatmeal Cake

Butter Cookies with Sprinkles

Jello Mold

Orange Balls


There’s a reason Grandma’s recipes never go out of style. They’re made with simple ingredients, a little patience, and a whole lot of love. As you stir, bake, and taste your way through these vintage holiday favorites, we hope they bring back sweet memories and help you create new ones around your own table. After all, the best part of any recipe isn’t just the flavor, it’s the traditions that get passed along with every bite.

Monday, May 26, 2025

Roasted Corn Orzo Pasta Salad

As picnic and BBQ season rolls around, I always like to post a new side dish for you guys to try. This one is an easy one to put together and as a bonus, you might have some of the ingredients already growing in your garden (I did). This recipe makes a big batch so that you can feed a large crowd or you can take half to a cookout and keep half at home.


Roasted Corn Orzo Pasta Salad

1/2 cup plus 2 Tbsp olive oil

6 cloves garlic, minced

2 cups fresh cooked corn

2 pints cherry tomatoes, halved

1 lb orzo pasta

1/2 cup fresh basil, chopped

2 bunches green onions, sliced

5 Tbsp red wine vinegar

3 Tbsp lemon juice

3 tsp salt (or to taste)

1 tsp pepper (or to taste)

  1. Cook orzo according to package directions. When pasta is finished cooking, drain and set aside to cool.
  2. While pasta is cooking, add 2 tablespoon of olive oil to a large 5 quart sauté pan. Add garlic and sauté over medium heat for about 3 minutes.
  3. Add corn, 1 teaspoon of salt, and 1 teaspoon of pepper and sauté 8 more minutes. Add pasta to corn and stir to incorporate. Remove from heat and let cool.
  4. While corn is cooling, chop cherry tomatoes, basil, and green onions.
  5. In a small bowl, combine 1/2 cup olive oil, vinegar, and lemon juice.
  6. When corn and pasta mixture has cooled, add tomatoes, basil, and green onions and stir to combine. Pour dressing over salad and toss well.
  7. Refrigerate at least 2 hours before serving.

Make sure to check out these other favorite Harris Sisters side dishes for your next summer cookout:

Wednesday, November 6, 2024

Grandma's Bread Stuffing (Dressing)

Growing up in the South, we have ALWAYS called our Thanksgiving side dish dressing. We have also always made it in a casserole dish never actually stuffed in the turkey itself. That's why we called it dressing instead of stuffing (because there was no stuffing involved). 

This is the recipe that we used growing up. It's a little different from most Southern recipes in that it doesn't use cornbread as the base, but bread crumbs.


Grandma's Bread Dressing (Stuffing)

4 stalks celery, diced

1 large onion, diced

10 cups crumbled, dried bread (or 2 (12 oz) packages herb seasoned stuffing mix like Pepperidge Farm)*

4 eggs, beaten

2 sticks of butter, divided and melted

4-6 cups broth*

1/4 teaspoon pepper, or to taste

2 teaspoons poultry seasoning, or to taste

  1. Preheat the oven to 350 degrees F. Butter or spray a 9 x 13 baking dish. Set aside.
  2. Saute the onions and celery in a small amount of butter in a pan for a few minutes until onions become transparent. Stir in the pepper and poultry seasoning. Remove from heat and set aside to cool slightly.
  3. Place the crumbled bread or stuffing mix in a large bowl, add the onion and celery mixture and remaining melted butter. Stir and pour two cups of the broth over top. Mix well. Taste and adjust the seasonings. (It should taste like what you want your finished dressing to taste like at this point.)
  4. Add the beaten eggs and mix well. Now you can change the consistency to your preference. If you prefer a wetter dressing, add more broth as needed to reach desired consistency. If you want a fluffy dressing you won’t add as much broth. 
  5. Lightly spoon mixture into the prepared casserole dish, but do not pack.
  6. Bake at 350 degrees F for 35 to 45 minutes. 
    • For a moister stuffing, baked your dish covered with aluminum foil. 
    • For a drier stuffing with a crunchy top, bake uncovered.


Notes:

We use veggie broth to make this a vegetarian recipe, but Grandma's original recipe called for chicken broth. The amounts for the broth are approximate based on the desired moisture level of the final product.

Remember that broth includes salt, which is why the recipe does not include additional salt. Also, poultry seasoning includes pepper (among other herbs), which is why there is noticeably less pepper in the recipe. Make sure to take this into consideration when adjusting your seasonings in step 3.

I usually use actual bread, dried and crumbled for this recipe. I tear dried pieces of bread into small pieces and fill up a gallon-sized Ziploc bag that I store in the freezer. Once the bag is full, I have enough for the recipe. It depends on how small you tear your bread pieces as to how many cups you will end up with in a full gallon-sized Ziploc bag, but you will usually end up with around 10.

If you would like to season your bread crumbs as you go along, you can add your own mix of spices, such as garlic, onion powder, parsley, etc., to the bread crumbs in the Ziploc bag. Make sure to shake the bag to incorporate the spices into the bread crumbs.

If you opt to use 2 (12 oz.) packages of Pepperidge Farm herb seasoned stuffing mix, keep in mind that these are measured by weight (ounces) not volume (cups). Each package will contain between 5-6 cups.

Make Ahead: 

Save time on Thanksgiving day! You can assemble the dressing in the baking dish, then wrap it tightly in plastic wrap and refrigerate it for up to 24 hours before baking. To bake, let the dressing stand at room temperature for 30 minutes. Remove the plastic wrap and proceed with step 6.


Here's a look at the old-fashioned Southern dressing served up alongside some other Harris Sisters Thanksgiving side dish favorites:


Friday, June 2, 2023

Rainbow Couscous Salad

It's picnic and BBQ season! And that means you might be on the lookout for some new side dishes to bring along with you to your next event. This one is a real winner. Because couscous is the main pasta featured, it cooks in 5 minutes and you can't beat that! And this recipe makes a big batch (so plenty to share AND plenty to eat yourself).


Rainbow Couscous Salad

3 cups cooked couscous

1 medium zucchini, halved lengthwise and sliced

1 15-oz. can corn, drained and rinsed

1/2 cup plus 2 Tbsp. olive oil, divided

1/2 tsp. salt

1/2 cup lemon juice

3 cloves garlic, minced

3 cups baby spinach, chopped

1 15-oz. can chickpeas, drained and rinsed

1 cup grape tomatoes, halved

1/3 cup thinly sliced red onion

6 oz. crumbled feta cheese (optional)

  1. Cook couscous according to package directions. Set aside to cool.
  2. Preheat oven to 400 degrees. In a large baking pan, combine the zucchini, corn, and 2 Tbsp. of olive oil. Sprinkle with salt to taste. Roast for 10 minutes, until just tender. Let cool.
  3. Meanwhile, make the dressing by whisking together 1/2 cup olive oil, 1/2 cup lemon juice, 3 cloves garlic, and 1/2 tsp salt.
  4. In a very large bowl, combine spinach, couscous, chickpeas, tomatoes, red onion, and zucchini mixture. Toss to combine. 
  5. Add dressing to desired amount and mix. Refrigerate at least 2 hours before serving.
  6. If adding feta cheese, either add and mix in just before serving or serve separately as a topping for each person to add to their serving.

Notes:

If you want 3 cups of cooked couscous, you'll need to start with about 1/2 cup uncooked.

I usually reserve about 1/4 cup of dressing to add the next day if the couscous has absorbed a lot of dressing after being refrigerated - or if you just want more dressing on your salad.

As a side dish, this recipe serves 12.

Make sure to check out these other favorite Harris Sisters side dishes for your next summer cookout:

Friday, May 19, 2023

Easy Cole Slaw

Sweet cole slaw is a favorite Southern BBQ side dish. This creamy cole slaw recipe is easy to make, and it's the perfect side dish to bring to your next cookout! 

Be sure to make this recipe ahead of time and put it in the refrigerator to let it soak up the flavors of the dressing. 


Easy Cole Slaw

1/4 cup milk

1/2 cup mayonnaise

1/3 cup sugar

1 1/2 Tbsp white vinegar

1 tsp salt

1/4 tsp pepper

2, 16 oz. bags of cole slaw mix

1/4 cup almond slivers (optional)


  1. Whisk together the milk, mayonnaise, sugar, vinegar, salt, and pepper in a small bowl.
  2. Pour the dressing over the coleslaw mix and almond slivers in a large bowl. Mix well.
  3. Cover and refrigerate at least 4 hours or overnight. Serve chilled.


Notes:


As you mix this, you may think this seems "dry," but water will release from the cole slaw mix as it sets. So make sure to give it a good stir before you are ready to serve it up.

This particular recipe has the added crunch of almond slivers, but you can leave those out if you'd like a more traditional Southern cole slaw. 

This recipe serves 8-10 as a side dish, so it's perfect to bring to your next cookout, party, backyard  barbecue, or pot luck to serve a big crowd!


Check out these other tried and true Harris Sisters' recipes for your upcoming summertime parties:

    Sunday, December 18, 2022

    Vegan Collard Greens

    I wanted to share with you a new recipe for our family's traditional collard greens for our New Year's meal. It's a vegan recipe that's perfect for our family, which includes two vegetarians.

    This recipe is perfect for if you have to consider a variety of dietary needs at your New Year's table. You can serve the traditional meat of ham separately for any meat eaters in your group.

    We pair this Southern-style recipe with Vegan Hoppin' John and Sweet Honey Cornbread to start the new year off right!


    Vegan Collard Greens

    2 bunches fresh collard greens
    olive oil
    1 small yellow onion, diced
    4 cloves garlic, minced
    4 cups vegetable broth 
    1 teaspoon salt
    1/8 - 1/4 teaspoon Liquid Smoke flavoring
    1/2 teaspoon red pepper flakes
    black pepper (to taste)
    balsamic vinegar (for serving, if desired)
    hot sauce (for serving, if desired)

    1. Remove bottom stalks of the collard green leaves and chop or tear into small pieces. 
    2. Fill your sink or a large container with cold water, add chopped collard greens, and soak for at least 10 minutes. (Some people prefer to soak greens overnight.)
    3. Remove the collard greens from the sink, place them in a colander, give them a good rinse, and drain. Complete this step in batches, if needed.
    4. Coat the bottom of a large pot with olive oil.
    5. Sauté onions over medium-low heat until they begin to brown and then add in garlic.
    6. Cook until onions and garlic are fragrant, for another 2-3 minutes.
    7. Add in vegetable broth.
    8. Season broth with salt, Liquid Smoke, red pepper flakes, and black pepper (if desired).
    9. Taste and adjust the seasonings if needed. 
    10. Bring broth to a boil, then reduce to simmer.
    11. Add in the greens, cover, and cook until greens are completely tender, about 1 - 1 1/2 hours.
    12. Check at the 30-minute mark to make sure there is still enough broth in the pot. Add more vegetable broth if needed.
    13. Serve with hot sauce or balsamic vinegar, if desired.


    Notes:

    Make sure you like the taste of the broth when you taste it at step 9, because this is how your greens will taste. Adjust seasonings at this step, if necessary. 

    Remember that the heat from the red pepper flakes will increase as the greens cook and you can always add more heat by serving the collard greens with additional hot sauce.

    Traditions & Superstitions: 

    A long-held tradition in the South, collard greens are often served for New Year’s Day.  According to superstition, if you eat collard greens on New Year’s Day, then you will have financial success for the coming year.

    • collard greens represent green backs (dollars), or cash 
    • black-eyed peas represent coins (this is traditionally served with alongside collard greens on New Year's Day)
    • cornbread represents gold (this is traditionally served with alongside collard greens on New Year's Day)

    Wednesday, June 1, 2022

    Vegetable Pancakes

    Now that warmer months are upon us and fresh veggies are in season, I thought I'd share a vegetable pancake recipe that features a few different types of vegetables. These can either be straight from your own garden or fresh from the Farmers Market or local produce stand. However you come by your fresh veggies, you'll be glad you decided to make this savory veggie pancake recipe. 

    And if you've got picky eaters at home, it's also a tasty way to get more vegetables into their diet. Vegetable pancakes are great for breakfast, lunch, a side dish for dinner, a vegetarian main dish, or even a party appetizer (because of their small size).


    Vegetable Pancakes

    3 large zucchini, grated and thoroughly drained

    2 cups broccoli, grated

    6 large carrots, grated

    1 onion, diced and sautéed

    1, 15 oz. can corn kernels, divided

    4 large eggs, beaten

    1 tsp. salt

    1/2 tsp. pepper

    1 tsp. garlic powder

    1 cup breadcrumbs

    1/2 cup flour

    1/2 tsp. baking powder

    oil for pan

    green onions, thinly sliced (for serving)

    sour cream (for serving)

    sriracha sauce (for serving, if desired)

    Grate & Drain Zucchini

    1. Grate zucchini, sprinkle with 1 teaspoon salt and set in a fine mesh strainer. Place a bowl or plate on top of the zucchini and weigh it down to help it release its liquid. 
    2. Let it sit for at least 30 minutes - 1 hour. After it has drained, wrap it in a clean kitchen towel or a piece of cheesecloth, squeeze to release the remaining liquid, and set aside.

    Mix Pancake Batter & Cook Pancakes

    1. In a large mixing bowl, mix together flour, baking powder, pepper, garlic powder, and breadcrumbs. Add zucchini, broccoli, carrots, onion, and 1 cup of corn, and toss to combine.  Make sure to break up the zucchini and coat everything with flour mixture. (Set aside remaining corn for step 8.)
    2. Crack eggs into a small bowl, beat, and pour over the vegetable mixture. Mix to thoroughly combine.
    3. Heat a skillet over medium heat and add enough oil to lightly coat the bottom of the pan.
    4. Using a scoop, drop the vegetable mixture into the hot pan, and flatten with the bottom of the scoop form a patty.
    5. Cook for 2-3 minutes on each side, turning down the heat if they begin to brown too quickly.
    6. Remove from pan to drain on a cooling rack placed over a cookie sheet.
    7. Repeat process with remaining vegetable mixture, adding more oil if the pan becomes too dry.
    8. When final pancake has been cooked, roast remaining corn in pan for 1-2 minutes, or until kernels are lightly browned.
    9. Serve pancakes garnished with sour cream, green onions, and roasted corn. If you'd like your savory veggie cakes spicy, serve topped with a drizzle of sriracha sauce.

    Pancake Cooking Tips

    • Use only enough oil to create a crisp, browned crust.
    • Avoid crowding the pan. Leave at least 1 inch of cooking space between pancakes.
    • Wait until first side has browned before turning. Check bottoms of pancakes before turning.
    • Turn each pancake only once.


    Notes:

    You can use a regular box grater to grate your vegetables, but if you use a food processor, you can cut your prep time for this recipe considerably.

    Zucchini is a very watery vegetable, so take care to drain it well so that your pancakes don't turn out soggy.

    This is the scoop that I used for this recipe. A small ice cream scoop would work too!

    You'll notice that step 6 says to drain them on a cooling rack placed over a cookie sheet. Placing them on a paper towel on a plate will cause them to create steam and lose some of the crispy texture. 

    If you'd rather bake these than fry them, bake them at 350 degrees for 20 – 25 minutes. The finished pancakes won't be quite as crispy. 

    This post contains affiliate links.

                  Wednesday, January 12, 2022

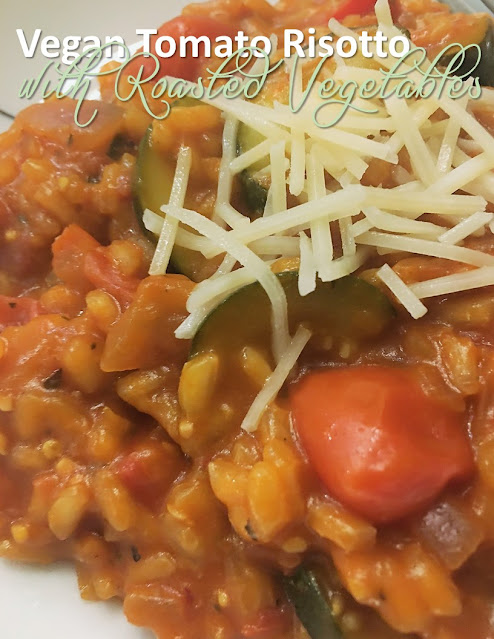
                  Vegan Tomato Risotto with Roasted Vegetables

                  You just can't beat a risotto in the cold winter months. This creamy dish takes a bit longer with preparation, but it always pays off in the end. 

                  I remember the first time I had a tomato-based risotto. I was 29 years old and I was eating dinner in a restaurant with a group of work friends while attending a conference in New Orleans. We somehow ended up in a restaurant that didn't have a single vegetarian dish on the menu. I explained my dilemma to the server, and he spoke with the chef who offered to make me an off-menu creation - a tomato risotto with roasted vegetables.

                  This particular recipe features roasted vegetables and is cooked low and slow with a tomato puree base that results in a main dish that's rich and creamy. And it's the closest I've come to that dish that the New Orleans' chef made for me years ago. While your vegetarian and vegan friends will love it, you can also serve it to your gluten-free friends too. So, it checks a lot of boxes.


                  Vegan Tomato Risotto with Roasted Vegetables


                  Roasted Vegetables

                  1 Tbsp. olive oil

                  10 oz. cherry tomatoes, halved

                  2 medium red bell peppers, chopped

                  1 large zucchini, chopped

                  salt and pepper, to taste

                  Risotto

                  1 Tbsp. olive oil

                  1 large red onion, diced

                  3 garlic cloves, minced

                  1 cup Arborio rice

                  1 Tbsp. balsamic vinegar

                  1 cup of canned tomato puree or plain tomato sauce

                  2 cups vegetable stock, heated to a low simmer and kept warm

                  6.7 oz. sundried tomato pesto, oil drained

                  1 tsp. basil

                  salt and pepper, to taste


                  1. Preheat the oven to 350 degrees and add the olive oil to a large cookie sheet.
                  2. Halve the cherry tomatoes. Chop bell peppers and zucchini into small similar-sized pieces and spread out on the cookie sheet. Add salt and pepper and gently toss together in oil.
                  3. Roast vegetables for 30 minutes.
                  4. Add vegetable stock to a saucepan, bring to a gentle simmer, and keep warm over a low heat.
                  5. Dice onions and add olive oil to a large sauté pan.
                  6. Sauté the onion on a low-medium heat for a few minutes. Add the minced garlic and cook for another minute.
                  7. Stir in the Arborio rice and balsamic vinegar and stir for approximately 30 seconds.
                  8. Alternate adding the tomato puree and warm vegetable stock 1/2-cup at a time. Allow each 1/2-cup of liquid to be absorbed by the rice before adding the next.
                  9. After all liquid is absorbed, add in the sundried tomato pesto and the roasted vegetables. Give everything a stir and cook for a further 5 minutes until everything is cooked through and the rice is done. Make sure to taste the rice at this step to ensure that the rice is cooked to desired doneness. If the rice is still chewy at this step, add in more tomato puree or more vegetable stock 1/2-cup at a time until desired doneness.
                  10. Remove from the heat and stir in the basil, salt, and pepper. 

                  Notes:


                  If you've never made risotto the old-fashioned way before, remember to add in the liquids a half-cup at a time and stir until completely absorbed before adding in the next batch of liquids. This will help the Arborio rice to release its starch and gives the dish its signature creamy texture. 

                  While you might be inclined to crank up the heat to "speed up the process" this will only make the liquid evaporate more quickly, which isn't the goal. The goal is for it to be absorbed into the rice. If it evaporates, you'll be left with crunchy risotto. So, make sure you cook it over low-medium heat.

                  You can substitute 6 sundried tomatoes (diced) for the sundried tomato pesto, if desired.

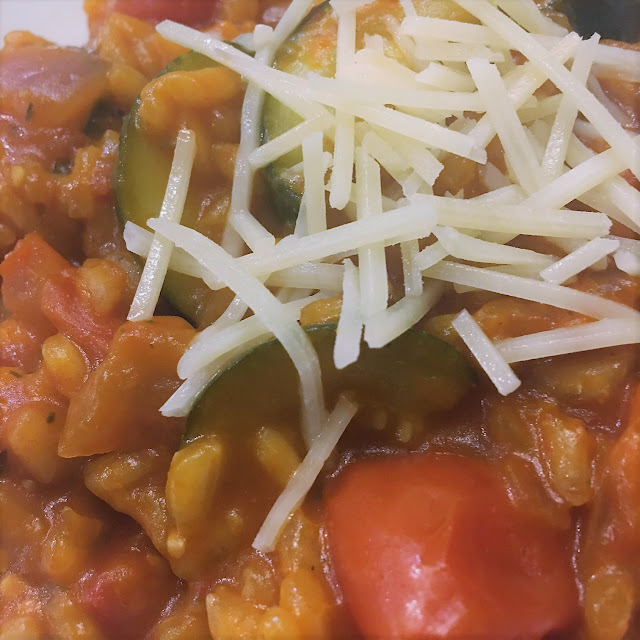
                  Garnish with vegan Parmesan cheese alternative, if desired. If your family is not vegan (we have two vegetarians in our family, but no vegans), then feel free to garnish with Parmesan cheese before serving. 

                  If you're a fan of risotto, take a peek at this recipe too:

                  Thursday, December 16, 2021

                  Vegan Hoppin' John (Black-Eyed Peas and Rice)

                  I wanted to share with you a new recipe for our family's traditional black-eyed peas New Year's meal. It's a vegan recipe that's similar to Hoppin' John, and it was perfect for our family, which includes two vegetarians.

                  Rather than cooking the rice in the same pot with the black-eyed peas, we served the black-eyed peas over a bed of white rice. But, considering Hoppin' John is a recipe that originated in the Carolinas (just like The Harris Sisters!), Carolina Gold rice would be a great addition to this recipe too.


                  Vegan Hoppin' John (Black-Eyed Peas and Rice)

                  16 oz. bag dry black-eyed peas, sorted and rinsed
                  2 Tablespoons olive oil
                  1 large onion, chopped
                  1 red bell pepper, chopped
                  1 rib celery, chopped
                  4 cloves garlic, minced
                  15 oz. can diced tomatoes
                  1 Tablespoon hot sauce
                  1 teaspoon dried oregano
                  1/2 teaspoon black pepper
                  1/8 teaspoon cayenne pepper
                  1 teaspoon salt 
                  1/2 teaspoon Liquid Smoke flavoring
                  cooked rice to serve
                  1. Wash the sorted dry beans. Place them into a pot and cover with at least 2 inches of water. Let them soak 8 hours or overnight. Drain and set aside.
                  2. Add olive oil and onion to a large pot and sauté until it begins to brown. Add the bell pepper, celery, and garlic and cook for another 2 minutes. 
                  3. Then add all ingredients except salt, Liquid Smoke, and cooked rice to the pot, along with enough additional water to cover the beans by one inch. 
                  4. Bring beans to a boil, then reduce to simmer, cover, and cook until beans are completely tender, about 1 1/2-2 hours, adding more water as needed. (Note: water should cook down into a thick sauce, but make sure that beans have enough water to cook in at all times.)
                  5. When they’re tender, add the Liquid Smoke and salt, cook for 15 more minutes.
                  6. Serve over cooked rice with a side of collard greens and cornbread to complete your vegetarian New Year's meal!

                  Notes:

                  If you prefer a spicier dish, you can either increase the amount of hot sauce and cayenne pepper in the recipe or serve with additional hot sauce.

                  If you prefer green bell peppers to red bell peppers, you can substitute them in this recipe.

                  If you want to avoid the "rush" of buying black-eyed peas right before the end of the year, put them on your grocery list for the same week you're buying ingredients to make Christmas goodies. While you're buying ingredients to make Christmas cookies, candies, fudge, etc., swing by the dried beans aisle and pick up a bag of black-eyed peas for your pantry. That way, you'll already have them for when you need them, and you won't have to hunt for them when supplies will be low a few weeks later.

                  Traditions & Superstitions: 

                  Hoppin' John is a Lowcountry dish that is served for New Year’s Day.  According to superstition, if you eat Hoppin' John on New Year’s Day, then you will have good luck for the coming year.

                  • black-eyed peas represent coins
                  • tomatoes represent health
                  • cornbread represents gold (this is traditionally served with alongside black-eyed peas on New Year's Day)
                  • collard greens represent green backs (dollars), or cash (this is traditionally served with alongside black-eyed peas on New Year's Day)
                  • Sometimes, the cook slips a coin into the dish before serving, or serves each dish with a coin underneath.

                  On the day after New Year's Day, leftover Hoppin' John is called Skippin' Jenny, bringing a hope for an even better chance of prosperity in the New Year.

                  Thursday, June 13, 2019

                  Broccoli Quinoa Salad with Honey Lemon Dressing

                  We made this side dish over the weekend and it was really yummy. Trust me when I say that I love potato salads and pasta salads as much as the next girl, but when you're right in the thick of picnic and BBQ season, it seems like you go to an awful lot of events that have the same side dishes over and over again.

                  So, when I found this new recipe for Broccoli Quinoa Salad with a yummy honey lemon dressing, I definitely wanted to give it a try. (PS it's also got apples and walnuts and feta cheese, so what's not to like really?)


                  Broccoli Quinoa Salad with Honey Lemon Dressing


                  Salad

                  1 cup walnut pieces
                  1 1/2 cups cooked quinoa, prepared according to package instructions*
                  1 large Granny Smith apple
                  1 head broccoli
                  4 oz. crumbled feta cheese

                  Dressing

                  1/4 c lemon juice
                  1 Tbsp white wine vinegar
                  1/3 c olive oil
                  1/4 c honey
                  1 Tbsp dried basil*


                  1. Toast walnuts (if desired).
                  2. Core apples and cut into 1/2 inch cubes. Place in a large bowl.
                  3. Chop broccoli into bite sized pieces and add to bowl with apples.
                  4. Add quinoa, walnuts, and feta cheese to bowl and stir to combine.
                  5. Combine lemon juice, white wine vinegar, olive oil, honey, and basil in a small bowl. Whisk thoroughly.
                  6. Add vinaigrette to salad ingredients and toss to coat.
                  7. Chill for at least two hours before serving. 

                  Notes:

                  If you have never made quinoa before, it expands quite a bit during the cooking process. So make sure to follow the package instructions so that you don't end up with a ton of cooked quinoa on your hands!

                  If you want to use fresh basil in your dressing, you can use 1/4 cup. 

                  When you first put the salad together, you might think that the dressing to salad ratio is not correct and that there's too much dressing for your salad. However, once you put the salad in the refrigerator to chill, the quinoa will absorb quite a bit of the dressing!


                  Hope you'll give this yummy salad a try this summer!

                  This post contains affiliate links.

                  Wednesday, April 24, 2019

                  Simple Greek Pasta Salad

                  Warmer weather is here, so that means pasta salads will soon be showing up at picnics, barbecues, potlucks, pool parties, and summer get togethers.

                  They're perfect for many occasions, and this side dish in particular is a real crowd pleaser. This simple Greek pasta salad has a homemade red wine vinaigrette dressing that makes it something special.


                  Simple Greek Pasta Salad


                  12 oz. bow tie pasta, cooked al dente
                  2/3 cup sliced red onion
                  15 cherry tomatoes, halved
                  1 cup cucumber, diced
                  1/2 cup black olives, halved
                  1/3 cup red wine vinegar
                  1/2 cup olive oil
                  2 tsp lemon juice
                  2 tsp minced garlic
                  1 tsp granulated sugar
                  1 tsp oregano
                  1 tsp Italian seasoning
                  3/4 cup crumbled feta cheese
                  salt and pepper, to taste


                  1. Cook pasta according to package directions until al dente. Drain and set aside. While pasta cools, make the dressing.
                  2. In a small bowl, whisk together the vinegar, olive oil, lemon juice, garlic, sugar, oregano, and Italian seasoning.
                  3. Add chopped vegetables to the bowl with the pasta and toss. 
                  4. Pour the dressing over the pasta and vegetables and stir to combine. Refrigerate 3 hours or overnight.
                  5. When ready to serve, add the feta cheese and salt and pepper to taste. Toss the pasta salad again, and drizzle lightly with olive oil and vinegar if the pasta salad seems to have soaked up too much of the dressing.
                  6. Serve cold or at room temperature.

                  This one won't stick around for long!

                  If you're interested in some new side dish recipes to try for your next get together, give one of these a try:


                  Wednesday, June 6, 2018

                  Southern Potato Salad

                  It's cookout season! And I have the perfect Southern potato salad recipe to share with you!

                  Mama made this recipe a lot growing up - and let me tell you, it has taken YEARS for me to pin down some exact measurements on this one.


                  Potato salad is one of those magical old-fashioned family recipes that Mama used to always make by memory. I don't know whether it's even written down anywhere. (If it is, I don't have a copy of it!) 

                  And I have always been able to make a pretty good version of it myself with a pinch of this and a dash of that - until I knew deep down in my soul that it was "right." Some years it would have more eggs; some years it would have more pickles. but it was always the same ingredients and it always generally tasted the same. And the finished product always got rave reviews, so I must have been doing something right!

                  Southern cooking meme

                  But I did figure that perhaps one day I would like to pass an actual recipe for potato salad down to the next generation, so I started measuring my pinches and dashes each time I made it. And I tweaked it and tweaked it until I was sure that it was THE ONE. I'm sharing the "recipe" that I measured out for our annual Memorial Day cookout with you guys today (and it tastes exactly like the potato salad that we always had growing up).

                  If you want a tried and true Southern potato salad that is perfect for cookouts, summer picnics, backyard barbecues, or potlucks, THIS is your recipe. And if you read all the way to the end, I'll even share my own personal tip for making it the easiest and quickest recipe you'll find for potato salad.

                  Southern Potato Salad


                  2 lbs potatoes, peeled and cubed
                  4 eggs, hard boiled and chopped
                  1 medium yellow onion, diced
                  2/3 cup sweet salad cube pickles
                  1/4 cup yellow mustard
                  1 cup mayonnaise
                  3/4 tsp celery seed
                  1/2 tsp salt (plus 1 additional tsp for pot of boiling water)
                  1/4 tsp pepper


                  1. Bring a large pot of water to boil. When the water starts to boil add 1 teaspoon of salt and the cubed potatoes. Cook until you can just mash the potatoes with a fork with little resistance (around 7-10 minutes, but check frequently and make sure to not undercook or overcook). 
                  2. Drain the potatoes in a colander and set aside to cool.
                  3. Place cooled potatoes in a large mixing bowl along with mayonnaise, mustard, onion, pickles, eggs, remaining salt, pepper, and celery seed and mix well.
                  4. Refrigerate for four hours or overnight.
                  5. Serve chilled.


                  Notes:


                  True Southerners use Duke's mayonnaise. We don't receive any compensation for saying that - just a friendly heads up. If you marry into a Southern family, nobody is going to tell you this. You are just expected to know that you really shouldn't put Hellmann's in your potato salad and try to pass it off at your Southern family reunion. It could cause some hard feelings - just sayin'.

                  If you want your potato salad to have a creamier consistency, you can use a potato masher to mash some of the potatoes before mixing in the rest of the ingredients.

                  The longer you refrigerate the potato salad, the more the flavors meld together and the better it tastes! So making it the night before you plan to serve it is really optimal.


                  To make the prep work for this salad even quicker, you can use frozen cubed hash browns instead of peeling and dicing potatoes! (I know, I know . . . died-in-the-wool Southerners everywhere are clutching their pearls.) But sometimes you get in a pinch and you're short on time. This can help you out. You can find them in the frozen food section of your grocery store, and they're already diced for you. If using frozen potatoes, you may not need to cook them the full amount of time, so keep an eye on them.


                  Hope you'll give this old fashioned Southern recipe a try - it will knock your socks off. I promise.

                  Monday, May 21, 2018

                  Get Cooking with Mealime

                  Yall, I have discovered a game changing app/ Website for those of us who are shall-we-say "challenged" in the kitchen.  Or even those of you who struggle to come up with new meal ideas.  It's called Mealime, and it coins itself as the app for simple and healthy meal plans.  This app has literally converted me from someone who knew nothing in the kitchen to someone who is cooking up fabulous and healthy meals for my family every night.  I am so excited to fill my grocery cart with fresh produce and meats each week, and know that they will turn into yummy meals that we all enjoy!  Read on for lots more...


                  So, I discovered this app only after I had tried a couple of meal prep services.  You knows the ones- where you pick your meals for the week and the service then ships you pre-measured ingredients and full instructions for how to complete each meal.  I LOVE these plans.  They are so simple and the recipes are yummy and easy to complete.  However, the prices on some of these services is probably more than I would normally spend if I were just buying my own groceries.  And I have the time to grocery shop so that's not really an issue.  I just needed the step-by-step instructions and a great arsenal of recipe options.  Enter Mealime to the rescue!

                  I literally went from someone who had maybe two go-to meals to having a world of fun and new and different meal plans at my fingertips.  Oh, and these meal plans are an entire meal, not just a main dish or a side that leaves you wondering what to put with it.  It's all pre-planned out and the foods are so different and so good! Not only that, but this app prepares your entire grocery list for you, allowing you to edit it by removing items that you already have in your kitchen or by adding other items to your grocery list that may not be a part of the recipes you have chosen for the week.  So I can still add my coffee, milk, bread, and all the other usual stuff to the shopping list I created in my Mealime app.


                  So, here's how it works.  You log into the Mealime app, and it pulls up hundreds of recipes for you.  You can filter your results if you are looking for or avoiding specific types of foods.  Most recipes take between 30-40 minutes to complete from beginning to end.  And as someone who has tried lots of them over the past month or so, I can vouch that they are all really good. You can click on individual recipes to check them out but once you decide to add one (or more) to your meal plan for the coming week, you simply click on the button that says "Add to Meal Plan."  I usually do this at some point on Sunday afternoon.


                  Once I have all my meals added to my plan for the coming week, the app shows me all of my recipes in my meal plan for the week, as well as a complete grocery list.  I go through the grocery list and then take out items that I already have in my pantry, and add any other items I need to pick up while I'm at the store.  The grocery list in the Mealime app is sorted by produce, bakery, meats/ seafood, dairy/ cheese/ eggs, and so forth which keeps it super easy to navigate through your list while you are shopping.  You simply click on the items on your list to cross them off.  I typically do my grocery shopping on Monday each week.

                  Once I'm ready to prepare one of the meals, I pull my app back up, and click on that meal.  It provides step-by-step instructions on how to complete the recipe.  Mealime gets bonus points from me for making sure that all components of my meal finish cooking at the same time so everything is hot and ready to serve at the end of about 40 minutes.  Once I've finished making one of the meals, I can "favorite" it if I really liked it so I can come back to it again.  I also check it off in the app, that that meal is complete for the week, and it grays it out, showing only the other active meals remaining in my meal plan.

                  Here's a look at some of what I've been cooking up...

                  Shrimp Stirfry

                  Grilled Chicken with Mango and Red Pepper Salad
                  I'm so not kidding.  This app has changed my life!  And I'm sure my family is thankful for this little tool too.  :)  The basic app is free of charge to use.  However, there is an option to upgrade the service to Mealime Pro which unlocks a bunch of additional recipes and allows you to do things like make notes in the app about the recipes you made. Currently, the Pro service costs $5.99 per month or $49.99 for an annual subscription.  So far, I am doing great with just the free app.  There appear to be lots of new recipes added each time I use the app.  I might consider upgrading to Mealime Pro at some point, but for now, I'm cruising along just fine.

                  NY Strip with Homemade Mashed Potatoes and the BEST Wilted Spinach EVER

                  Caprese Salad

                  What else?  Let's see. You can customize your experience by choosing the types of food you like or things that you dislike.  For example, in my app I checked off things like capers, lamb, olives, and tofu for ingredients that I dislike.  I also selected a meal size of 2 servings, which I have found is more than a plenty for me and my husband with some left for our 4 year old to try things as well.  There is also an option for 4 serving meal sizes.  There is a support center and a ton of articles submitted by the online community (which are all housed in the app).  You can also email Mealime directly through the app with any questions you have.  But honestly, it is so easy to use that even a kitchen novice like me can figure it out.  So I will be willing to bet that most of you would find it super easy peasy too.

                  Strip Steak Fajitas on Lettuce Wraps with Homemade Guacamole

                  To find the Mealime app, just go to your App Store and download it to your device.  I actually put the app on my iPad first because I usually use the iPad in the kitchen to reference my recipes.  But I quickly figured out I needed the app on my phone too when I am at the grocery store to reference the grocery lists it creates for me.  As I said, the basic app is free, and totally where I would start with Mealime.  If you decide you love it as much as I do, you might consider upgrading to the Pro version down the road.  You can actually also access all your information, including your recipes, meal plans, grocery lists, and your preferences from Mealime.com.  So if you have a computer or laptop in your kitchen, you can use the website to get cooking too. I hope you will give this tool a try.  It's the best thing I've found lately, and I'm loving it.  

                  Friday, November 11, 2016

                  Barefoot Contessa's Jalapeno Cheddar Cornbread

                  I recently mixed up a batch of this yummy cornbread to take a to a neighborhood get together.  I knew the main course would be a hearty chili, so I thought this might be a nice compliment, and IT WAS!  It was simple to make and turned out to be super moist and super flavorful too.   A winning combination all the way around!

                  Barefoot Contessa's Jalapeno Cheddar Cornbread


                  3 cups all purpose flour
                  1 cup yellow cornmeal
                  1/4 cup sugar
                  2 Tbsp baking powder
                  2 tsp salt
                  2 cups milk
                  3 eggs, lightly beaten
                  2 sticks melted butter
                  8 oz extra sharp cheddar, grated
                  1/3 cup chopped scallions
                  3 Tbsp fresh jalapeno peppers, seeded and minced


                  1. Combine flour, cornmeal, sugar, baking powder, and salt in a large bowl. 
                  2. In a separate bowl, combine milk, eggs, and butter.
                  3. With a wooden spoon, stir the wet ingredients into the dry, until most of the lumps are gone. Do not overmix!
                  4. Mix in 2 cups of cheddar, scallions, and jalapenos.  Set aside at room temperature for 20 minutes.  
                  5. Preheat oven to 350 degrees. Grease 9 X 13 baking pan. 
                  6. Pour batter into prepared pan.  Smooth the top.  Sprinkle remaining cheddar and extra chopped scallions over the top. 
                  7. Bake for 30- 35 minutes, or until toothpick comes out clean. 
                  8. Cool and cut into large squares.


                  Notes: When I recently made this recipe, I omitted the step of sprinkling extra cheddar and scallions over the top of the cornbread.  Instead, I used all the cheese and scallions in the batter itself and it was perfect that way too. 

                  I used closer to 4 Tbsp fresh jalapenos, and it was very nice- not at all hot or too spicy- and I'm not a super spicy type of person. Make your adjustments as you see fit!

                  Saturday, November 5, 2016

                  Sweet Potato Casserole (Without Marshmallows)

                  I have had and loved this recipe for YEARS!  It's a tasty sweet potato casserole that is perfect for this time of year.  And what's more, it's made without marshmallows, which sets it apart from many of its counterparts.   It's warm and sweet and special.  And it turns any meal into something special too.  


                  Sweet Potato Casserole

                  3 cups cooked mashed sweet potatoes
                  2 eggs, beaten
                  1/2 cup brown sugar
                  1/2 cup white granulated sugar
                  1 stick melted butter
                  2 tsp vanilla
                  1/2 cup milk
                  Dash of salt


                  Topping:
                  1/2 cup brown sugar
                  1/2 cup pecans, crushed
                  1/3 cup flour
                  1/4 stick melted butter


                  1. Preheat oven to 325 degrees. Grease bottom of 9 X 13 casserole dish. Set aside.
                  2. In a mixing bowl, combine first eight ingredients, then pour it into your prepared dish.
                  3. Combine topping ingredients and sprinkle over the top.
                  4. Bake for 35 minutes. 

                  Note: 

                  The Harris Sisters have been known to double the topping for this casserole to make it extra sweet, just like us!  Either way, you will love this recipe!


                  Monday, August 22, 2016

                  How to Make Fried Okra

                  Fried okra is a Southern delicacy that you really need to try if you haven't yet. And with Summer bringing in fresh okra from the garden, there's really no excuse for not giving this recipe a go at least once.

                  It's really very simple to make. Just swing by your local Farmers Market and buy a big bag of okra to get started. If you've really never made it before, a handy tip is that you'll want to choose smaller sized okra because they'll be more tender than larger ones.

                  Southern Fried Okra

                  Fried Okra


                  Oil for frying
                  2 lbs fresh okra
                  1 c milk
                  1 c plus 2 Tbsp all purpose flour
                  3/4 c yellow cornmeal
                  4 tsp seasoned salt
                  1 Tbsp cornstarch

                  1. Prepare okra by washing and removing stem ends. Cut remaining pieces in 1/2 inch rounds.
                  2. In a large straight sided skillet, pour oil to a depth of 2 1/2 inches. Heat oil until a candy thermometer reaches 350 degrees.
                  3. In a large bowl combine okra and milk. Let stand for 15 minutes.
                  4. In a medium bowl, whisk together flour, cornmeal, seasoned salt, and cornstarch.
                  5. Working in batches, drain okra and dredge in flour mixture. Use a spider skimmer or a slotted spoon to lower into hot oil. Fry for about 4 minutes or until golden brown.


                  Southern Fried Okra


                  Now that you have fried okra under your belt, you might want to add some other Southern dishes to your repertoire. These are tried and true Harris Sisters recipes that won't disappoint:


                  You Might Also Be Interested In