Showing posts with label main dishes. Show all posts

Wednesday, August 13, 2025

If You Give a Kid a Cooking Pot: One Pot Taco Pasta

Over the next several weeks, we'll be bringing you recipes for beginning cooks designed to teach basic cooking skills. So be on the lookout for all the recipes in the series. Today's recipe is part of the Cooking Challenge series.

This nostalgic dish is a twist on the hamburger helper you used to love as a kid. Just as simple to make, this creamy Taco Pasta with ground beef, vegetables, and cheese is prepared in one pot in less than 30 minutes, making your weeknight dinner easier than ever. 


One Pot Taco Pasta

1 pound ground beef

1 medium onion, diced

15 oz. can tomato sauce

10 oz. can Rotel, undrained

15 oz. can black beans, rinsed and drained

15 oz. can corn, drained

2 cups beef broth

1 packet taco seasoning

8 oz. elbow macaroni, uncooked

1 cup shredded cheddar cheese


  1. In a large saute pan, brown the ground beef over medium high heat, breaking it up with a spoon. Drain off any excess grease.
  2. Dice the onion, add it to the pan and cook until softened, about 3-5 minutes.
  3. Add the tomato sauce, Rotel, black beans, corn, beef broth, and taco seasoning. Stir to combine.
  4. Add the uncooked elbow macaroni, ensuring it’s submerged in the liquid. Add more beef broth or water if needed.
  5. Bring the mixture to a boil, then reduce the heat to low, cover, and simmer for 15 minutes, or until the pasta is cooked through and the liquid has been absorbed into the pasta. Stir occasionally to prevent sticking and test noodles.
  6. Remove from heat and stir in the shredded cheddar cheese until melted.
  7. Let cool for 5 minutes before serving.


You Can Get with This or You Can Get with That (Recipe Substitutions):

  • Substitute ground turkey or chicken instead of ground beef.
  • Substitute chicken broth or veggie broth for the beef broth.
  • Substitute your favorite beans for the black beans.
  • Reduce sodium by choosing a low-sodium taco seasoning.
  • Substitute shell, rotini, or penne pasta for elbow macaroni, just make sure to adjust the amount of broth in the recipe, if needed.
  • Substitute your favorite cheese for the cheddar cheese.
  • Serve with hot sauce, sour cream, or guacamole, if desired.


This Is How We Do It (Kitchen Skills You'll Learn in This Recipe):

  • Boiling vs. simmering
  • Browning ground meat
  • Chopping vegetables
  • Measuring ingredients
  • Reading and following a recipe
  • Setting a timer


Mama Said Knock You Out (Prep Ahead for Easy Dinners):

If you have leftover taco pasta you want to freeze, put the taco pasta into individual airtight containers. It will keep well for up to two months.

When you are ready to serve, take the container out of the freezer and let it thaw in the refrigerator overnight. Reheat in the microwave.


If You Give a Kid a Cooking Challenge

This recipe is part of the three-part If You Give a Kid a Cooking Challenge recipe series. These recipes are designed to: 

  • be easier to make
  • have a minimal number of ingredients (minus pantry staples like oil and spices)
  • be quick to prep 
  • make enough for one person to have leftovers for a few days

Make sure to visit the main post to see all of the recipes in the series.

Monday, August 4, 2025

If You Give a Kid a Casserole Dish: Chicken Cobbler

Over the next several weeks, we'll be bringing you recipes for beginning cooks designed to teach basic cooking skills. So be on the lookout for all the recipes in the series. Today's recipe is part of the Cooking Challenge series.

Chicken Cobbler is a TikTok-famous recipe that presents a new and updated way to make a chicken pot pie by layering a few pantry and freezer staples right in a casserole dish. With just 15 minutes of prep time, this recipe will have a hearty weeknight dinner on the table in no time flat!

Special thanks to Your Barefoot Neighbor on TikTok for the original recipe.


Chicken Cobbler

1/2 cup unsalted butter, melted

3 1/2 - 4 cups shredded, cooked chicken

12 - 20 oz. frozen mixed vegetables

11.36 oz. box Red Lobster Cheddar Bay Biscuit Mix and enclosed seasoning packet

2 cups milk

2 cups chicken broth

10.5 oz. can cream of chicken soup

1 tsp onion powder

1 tsp garlic powder

1/2 tsp pepper


  1. Preheat oven to 375° F. Add butter to 9 X 13 casserole dish and put in oven while preheating. (When butter has melted, remove casserole dish from oven and swirl around until the butter coats the bottom of the dish. Set aside.)
  2. Spread shredded, cooked chicken evenly over the butter in the dish.
  3. Top shredded chicken with the frozen mixed vegetables in an even layer.
  4. In a large mixing bowl, whisk together the Red Lobster Cheddar Bay Biscuit Mix, contents of the enclosed seasoning packet, and milk until just combined.
  5. Pour the biscuit mixture over the frozen mixed vegetable layer, being careful not to mix the layers.
  6. Using the same mixing bowl as before, add the chicken broth, cream of chicken soup, onion powder, garlic powder, and pepper. Whisk until fully combined with no lumps of soup remaining. Carefully pour the soup mixture over the biscuit mixture, being careful not to mix the layers.
  7. Bake uncovered for 60 minutes, or until the crust has risen around the edges, is lightly golden brown, and the liquids are bubbly. Let it sit for at least 10 to 15 minutes before serving.

You Can Get with This or You Can Get with That (Ingredient Substitutions):


4 cups of shredded chicken equals approximately:

  • 2 pounds of chicken breasts cooked and shredded
  • 1 rotisserie chicken, shredded
  • 3 12.5 oz cans shredded cooked chicken, drained

You can substitute:
  • Your favorite frozen vegetables for the frozen vegetables in the recipe (we used mixed peas, carrots, corn, and green beans)
  • Canned mixed vegetables for frozen mixed vegetables.


This Is How We Do It (Kitchen Skills You'll Learn in This Recipe):

  • Measuring ingredients
  • Preheating an oven
  • Reading and following a recipe
  • Setting a timer


Mama Said Knock You Out (Prep Ahead for Easy Dinners):

You can cook the chicken ahead of time for this recipe and assemble the rest of the recipe on a different day.

If cooking chicken breasts ahead of time, add them to a crockpot in a single layer. Cover and cook on low for 6-7 hours or high for 3-4 hours, checking at the earliest time. Use your meat thermometer to be sure the chicken has reached 165 degrees F. Let rest 10 minutes before transferring to a clean bowl or cutting board to shred. 

If you have more than the 4 cups of shredded chicken needed for this recipe after you're finished cooking it, it will last 3-4 days in the refrigerator and can be used in other recipes. If needed, you can let it cool, and then portion it out into freezer bags or reusable plastic containers to freeze for other recipes in the future. Make sure to label and date any food item that you freeze.


If You Give a Kid a Cooking Challenge

This recipe is part of the three-part If You Give a Kid a Cooking Challenge recipe series. These recipes are designed to: 

  • be easier to make
  • have a minimal number of ingredients (minus pantry staples like oil and spices)
  • be quick to prep 
  • make enough for one person to have leftovers for a few days
 Make sure to visit the main post to see all of the recipes in the series.

Thursday, July 31, 2025

If You Give a Kid a Crockpot: Crockpot Pineapple Teriyaki Chicken

Over the next several weeks, we'll be bringing you recipes for beginning cooks designed to teach basic cooking skills. So be on the lookout for all the recipes in the series. Today's recipe is part of the Cooking Challenge series.

Pineapple Teriyaki Chicken in the crockpot is the perfect "set it and forget it meal." It's sweet and savory and makes the perfect busy weeknight meal when served with rice and a side of steamed broccoli or on Hawaiian buns as sliders.


Crockpot Pineapple Teriyaki Chicken

2 lbs boneless, skinless chicken breasts

1/2 cup soy sauce

1/4 cup honey

1/4 cup rice vinegar

2 Tbsp sesame oil

1/4 cup brown sugar

3-4 cloves garlic, minced

1 tsp ground ginger

1/2 Tbsp salt

1/2 Tbsp pepper

1 tsp crushed red pepper (optional)

20 oz can pineapple chunks, drained with juice reserved for sauce

1 Tbsp cornstarch

2 Tbsp cold water


Garnishes (optional)

sesame seeds

green onions, chopped


  1. In a small bowl, whisk together, soy sauce, honey, rice vinegar, sesame oil, brown sugar, garlic, ginger, salt, pepper, red pepper flakes (if using), and 3 Tbsp of reserved pineapple juice. 
  2. Place chicken in crockpot and evenly pour the sauce over top.
  3. Cover and cook on low for 4-5 hours or on high for 2.5-3 hours, until chicken is tender and easily shredded.
  4. During the last 30 minutes of cooking, in a small bowl, whisk together 1 Tbsp cornstarch and 2 Tbsp cold water to make a slurry. 
  5. Stir cornstarch slurry into sauce along with drained pineapple chunks.
  6. Turn the crockpot to high and cook 15-30 minutes until sauce is thickened.
  7. Shred the chicken and stir back into sauce. Serve over rice or on slider buns.

You Can Get with This or You Can Get with That (Recipe Substitutions):

  • Substitute boneless chicken thighs for the boneless chicken breasts.
  • Substitute apple cider vinegar for rice vinegar.
  • Substitute olive oil for the sesame oil. 
  • Substitute garlic powder or jarred minced garlic for fresh minced garlic.

This Is How We Do It (Kitchen Skills You'll Learn in This Recipe):

  • Chopping vegetables
  • Measuring ingredients
  • Reading and following a recipe
  • Setting a timer
  • Shredding chicken
  • Using a crockpot


If You Give a Kid a Cooking Challenge

This recipe is part of the three-part If You Give a Kid a Cooking Challenge recipe series. These recipes are designed to: 

  • be easier to make
  • have a minimal number of ingredients (minus pantry staples like oil and spices)
  • be quick to prep 
  • make enough for one person to have leftovers for a few days
Make sure to visit the main post to see all of the recipes in the series.

Wednesday, July 16, 2025

If You Give a Kid a Casserole Dish: Upside-Down Pizza Casserole

Over the next several weeks, we'll be bringing you recipes for beginning cooks designed to teach basic cooking skills. So be on the lookout for all the recipes in the series. Today's recipe is part of the Cooking Challenge series.

This easy Upside-Down Pizza Casserole will includes all your favorite pizza toppings to make a quick and filling weeknight meal. With the help of a boxed biscuit mix, you'll have dinner on the table in no time flat!


Upside-Down Pizza Casserole

Casserole

1 lb. sausage

1 small onion, diced

1/2 green pepper, diced

2.25 oz. can sliced black olives, drained

24 oz. jar pasta sauce

6 oz. pepperoni

2 cups shredded mozzarella cheese

Crust

11.36 oz. box Red Lobster Cheddar Bay Biscuit Mix

1 1/4 cups water (note this is 1/2 cup more than required per box instructions)

1/2 cup shredded sharp cheddar cheese

Herb Butter Sauce

Seasoning Mix from Red Lobster Cheddar Bay Biscuit Mix

1/4 cup butter, melted


  1. Preheat oven to 425° F. Spray a 9 x 13 casserole dish with cooking spray and set aside.
  2. Dice onion and bell pepper. Sauté in a large skillet until onion is translucent, about 3-5 minutes.
  3. Add sausage and use a spoon to break it into pieces. Cook, stirring occasionally, until no longer pink, about 4 to 6 minutes. Drain excess grease.
  4. Add olives and pasta sauce to the skillet and mix well. Add the mixture to the casserole dish.
  5. Layer the pepperoni evenly over top of the mixture. Then, layer the mozzarella evenly over top of the pepperoni.
  6. Prepare biscuit mix as directed on package instructions, adding an extra 1/2 cup of water to make the mixture more spreadable.
  7. Pour the biscuit mixture over top of the mozzarella cheese layer, and spread evenly using the back of a spoon.
  8. Bake for approximately 30 minutes, until biscuit topping is browned.
  9. While casserole is baking, prepare the Herb Butter Sauce according to package instructions.
  10. Brush Herb Butter Sauce onto casserole when you remove it from the oven. Let cool 10 minutes before serving.


You Can Get with This or You Can Get with That (Recipe Substitutions):

  • Substitute a bag of frozen chopped pepper and onion blend for the fresh chopped onion and peppers to save time on this recipe.
  • Add a can of mushrooms stems and pieces (drained) to include more vegetables in the recipe without adding a lot of prep time.
  • Customize this casserole to your own tastes by adding or omitting your favorite vegetables. If omitting vegetables, suggest serving this casserole with a side salad for a complete meal.
  • Substitute 3 cups Bisquick, 3/4 cup sharp cheddar cheese, 1 tsp garlic powder, and 1 cup milk for crust instead of Red Lobster Cheddar Bay Mix. (For this recipe, can substitute 1/4 cup butter, 1 tsp garlic powder, 1 tsp Italian seasoning for the Herb Butter Sauce.)

This Is How We Do It (Kitchen Skills You'll Learn in This Recipe):

  • Browning ground meat
  • Chopping vegetables
  • Measuring ingredients
  • Preheating an oven
  • Reading and following a recipe
  • Sauteing vegetables
  • Setting a timer


If You Give a Kid a Cooking Challenge

This recipe is part of the three-part If You Give a Kid a Cooking Challenge recipe series. These recipes are designed to: 

  • be easier to make
  • have a minimal number of ingredients (minus pantry staples like oil and spices)
  • be quick to prep 
  • make enough for one person to have leftovers for a few days
Make sure to visit the main post to see all of the recipes in the series.

Monday, July 7, 2025

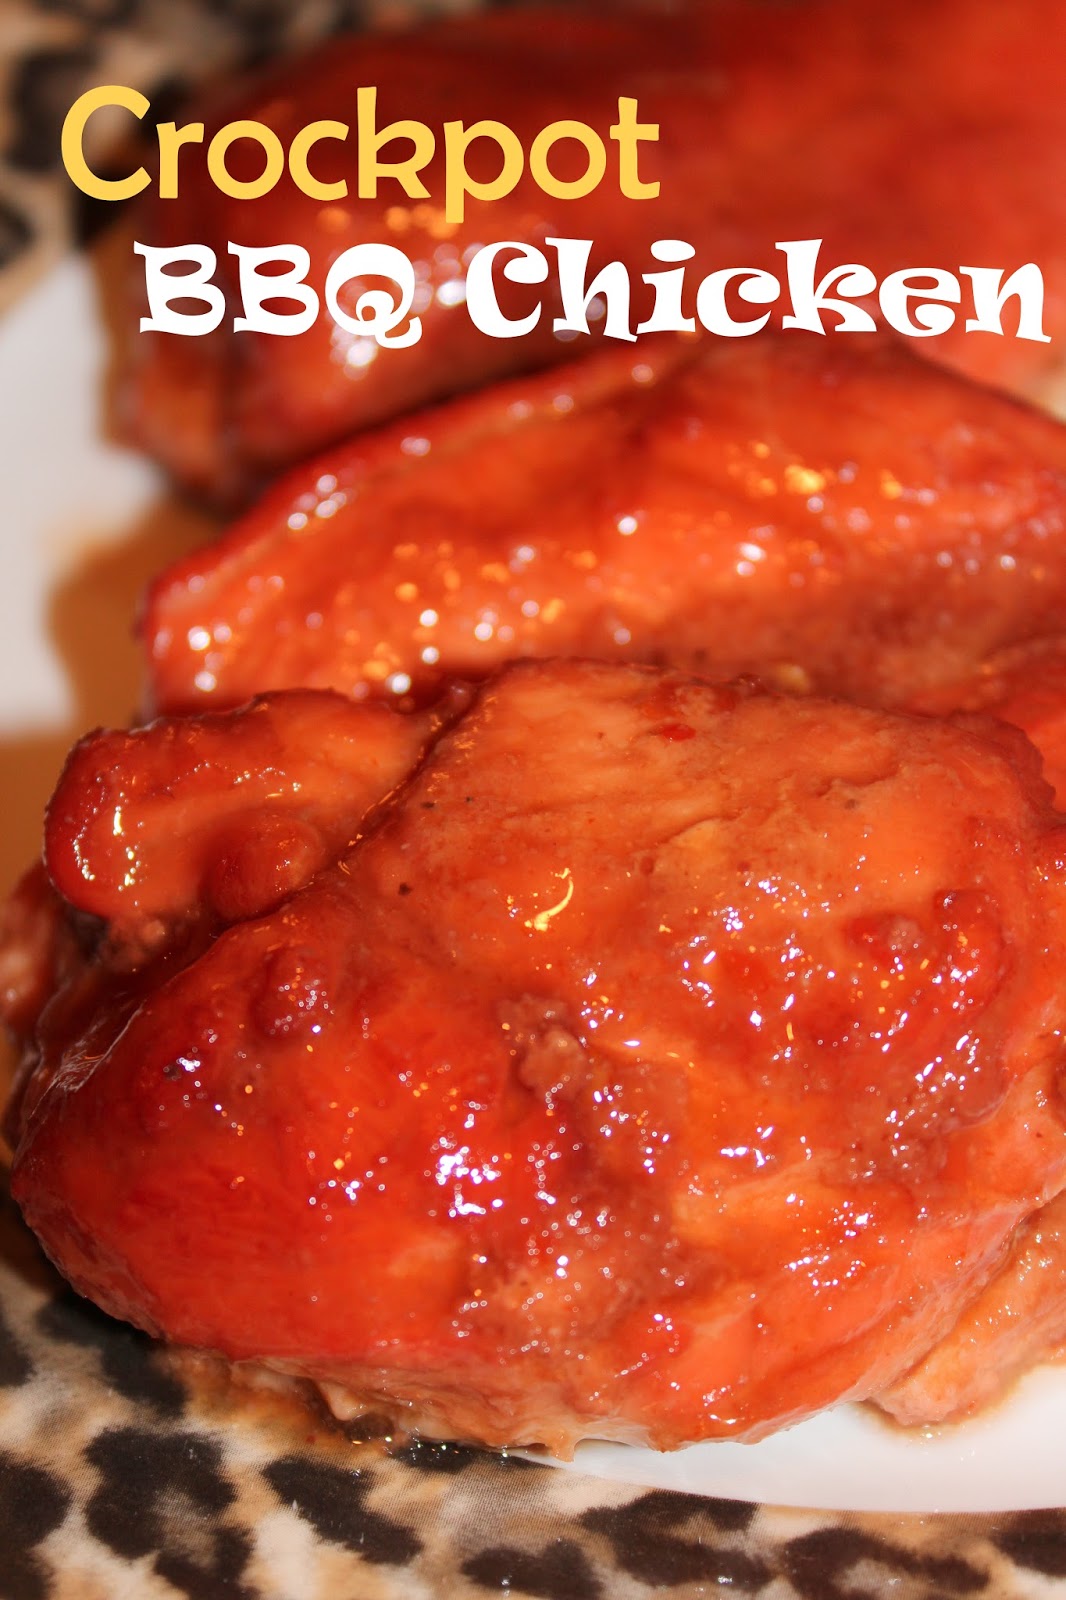
If You Give a Kid a Crockpot: Crockpot Barbecue Chicken

Over the next several weeks, we'll be bringing you recipes for beginning cooks designed to teach basic cooking skills. So be on the lookout for all the recipes in the series. Today's recipe is part of the Cooking Challenge series.

This dump and go crockpot BBQ chicken recipe will provide an easy weeknight meal when paired with steamed veggies and a packet of quick cook rice. Or shred this chicken and serve it pulled-pork-style on buns alongside coleslaw and corn on the cob. With just 5 minutes prep time, what's simpler than that? 


Crockpot Barbecue Chicken

1 18-20 oz. bottle barbecue sauce of choice
1/4 cup vinegar
1 tsp. red pepper flakes
1/4 cup brown sugar
1 tsp. garlic powder
1 can Dr. Pepper
4-6 boneless chicken breasts, thawed
 
  1. In a small bowl, mix together the first 6 ingredients to make the sauce.
  2. Place the chicken into the crockpot. Pour sauce mixture over chicken.
  3. Cook on low heat for 4-5 hours.

You Can Get with This or You Can Get with That (Ingredient Substitutions):

  • Substitute 1 can of Coca-Cola, Pepsi, or root beer for the Dr. Pepper in this recipe


This Is How We Do It (Kitchen Skills You'll Learn in This Recipe):

  • Measuring ingredients
  • Reading a recipe
  • Setting a timer
  • Using a crockpot


If You Give a Kid a Cooking Challenge

This recipe is part of the three-part If You Give a Kid a Cooking Challenge recipe series. These recipes are designed to: 

  • be easier to make
  • have a minimal number of ingredients (minus pantry staples like oil and spices)
  • be quick to prep 
  • make enough for one person to have leftovers for a few days
Make sure to visit the main post to see all of the recipes in the series.

Wednesday, July 2, 2025

If You Give a Kid a Cooking Pot: Easy Two Bean Chili

Over the next several weeks, we'll be bringing you recipes for beginning cooks designed to teach basic cooking skills. So be on the lookout for all the recipes in the series. Today's recipe is part of the Cooking Challenge series.

A package of chili seasoning is the secret to making this one pot meal simple enough to make for a weeknight dinner. With just 15 minutes of prep time, you'll get this quick and easy Two Bean Chili recipe on the table in no time. 

Serve this chili over pasta or with garnishes such as shredded cheese, fresh green onions, and sour cream.


Easy Two Bean Chili

1 lb lean ground beef

1/2 cup green bell pepper, chopped

1/2 cup white onion, chopped

2 15.5 oz cans Mixed Chili Beans (Kidney & Pinto), undrained

14.5 oz can petite diced tomatoes, undrained

15 oz can tomato sauce

1/2 cup water

1 package original chili seasoning

1/2 tsp cumin


  1. Chop bell pepper and onion and set aside.
  2. In a large pot, brown the ground beef over medium high heat.
  3. Add chopped bell pepper and onion. Cook for 3-5 minutes. Drain excess grease (if necessary).
  4. Stir in the remaining ingredients and bring to a boil. Cover and turn heat down to low. Simmer for 20 minutes.

You Can Get with This or You Can Get with That (Recipe Substitutions):

  • Reduce sodium by choosing a low-sodium chili seasoning.
  • Substitute ground chicken or ground turkey for the ground beef.
  • If Mixed Chili Beans are not available, use your favorite type of beans instead. They will not have spices incorporated into the sauce, so you may want to add more cumin to compensate.

This Is How We Do It (Kitchen Skills You'll Learn in This Recipe):

  • Boiling vs. simmering
  • Browning ground meat
  • Chopping vegetables
  • Measuring ingredients
  • Reading and following a recipe
  • Setting a timer


Mama Said Knock You Out (Prep Ahead for Easy Dinners):

If you have leftover chili you want to freeze, put the chili into individual airtight containers. It will keep well for up to three months.

When you are ready to serve, take the container out of the freezer and let it thaw. Reheat in the microwave.


If You Give a Kid a Cooking Challenge

This recipe is part of the three-part If You Give a Kid a Cooking Challenge recipe series. These recipes are designed to: 

  • be easier to make
  • have a minimal number of ingredients (minus pantry staples like oil and spices)
  • be quick to prep 
  • make enough for one person to have leftovers for a few days
Make sure to visit the main post to see all of the recipes in the series.

Monday, June 23, 2025

If You Give a Kid a Casserole Dish: No Peek Chicken and Rice Casserole

Over the next several weeks, we'll be bringing you recipes for beginning cooks designed to teach basic cooking skills. So be on the lookout for all the recipes in the series. Today's recipe is part of the Cooking Challenge series.

This easy one-pan No Peek Chicken recipe only requires 5 minutes of prep time for a meal of creamy rice and chicken. Pair this comfort food with a side of veggies or a salad, and you've got an easy weeknight meal.


No Peek Chicken and Rice Casserole

2 lbs. boneless skinless chicken breasts

2 cups Minute Rice (white or brown)

10.5 oz can cream of mushroom soup

10.5 oz can cream of chicken soup

1 can water (use one of the soup cans)

1 envelope Lipton Onion Soup Mix


  1. Preheat oven to 350° F. Spray a 9 x 13 casserole dish and set aside.
  2. In a medium size bowl, combine two cups of uncooked instant rice, both cans of soup, and a can of water.
  3. Pour the mixture into your casserole dish.
  4. Place the chicken breasts on top of the mixture and sprinkle them with the envelope of onion soup mix.
  5. Tightly cover with foil and bake for 1-1½ hours or until the chicken is cooked through. No peeking! (It takes at least an hour for the rice to fully cook.)
  6. Remove from oven and let rest for 5 minutes before serving.

You Can Get with This or You Can Get with That (Recipe Substitutions):

  • Reduce sodium by choosing a low-sodium cream soups.
  • Substitute either cream soup with your favorite flavor of cream soup.
  • Substitute the Lipton Soup Mix with your favorite blend of spices.
  • If you use thin chicken breasts, you can reduce the cooking time to 1 hour.
  • Add a 10 oz bag of frozen veggies to the mixture in step 2 for an all-in-one meal. Chopped broccoli florets or peas and carrots would be good additions to this casserole. No need to thaw before adding.

This Is How We Do It (Kitchen Skills You'll Learn in This Recipe):

  • Measuring ingredients
  • Preheating an oven
  • Reading and following a recipe
  • Setting a timer

If You Give a Kid a Cooking Challenge

This recipe is part of the three-part If You Give a Kid a Cooking Challenge recipe series. These recipes are designed to: 

  • be easier to make
  • have a minimal number of ingredients (minus pantry staples like oil and spices)
  • be quick to prep 
  • make enough for one person to have leftovers for a few days
Make sure to visit the main post to see all of the recipes in the series.

Monday, June 9, 2025

If You Give a Kid a Cooking Pot: One Pot Chicken and Dumplings

Over the next several weeks, we'll be bringing you recipes for beginning cooks designed to teach basic cooking skills. So be on the lookout for all the recipes in the series. Today's recipe is part of the Cooking Challenge series.

The ultimate comfort food, this Chicken and Dumplings recipe is easy to prep in 15 minutes or less! Fresh veggies and a few pantry shortcuts makes this Southern classic a doable meal for weeknight dinners. 


One Pot Chicken and Dumplings

3 tbsp olive oil

1 yellow onion, chopped

4 carrots, peeled and sliced

4 stalks celery, sliced

4 cloves garlic, minced

1 tsp dried thyme

1 tsp pepper (or to taste)

32 oz chicken broth

2 10.5 oz cans cream of chicken soup

2 soup cans of water

2 cups shredded chicken

Flour

1 can of 8 Pillsbury Grands Biscuits


  1. Heat olive oil in heavy stock pot over medium heat. Add onion, carrots, celery, garlic, thyme, salt, and pepper. Cook for 3-5 minutes, stirring occasionally, until onions are soft.
  2. Add the chicken broth, cream of chicken soup, water, and shredded chicken. Increase heat to high and bring to a boil. Reduce heat to a simmer.
  3. Flour a clean counter and roll out biscuits to desired thinness. Cut with a pizza cutter to
  4. 1-inch squares. Repeat with each biscuit.
  5. Drop biscuit pieces by handfuls into simmering soup pot, stirring after each addition.
  6. Cover and simmer for 20 minutes, stirring occasionally.

You Can Get with This or You Can Get with That (Ingredient Substitutions):

2 cups of shredded chicken equals approximately:

  • 2 chicken breasts cooked and shredded
  • ½ rotisserie chicken, shredded
  • 2 12.5 oz cans shredded cooked chicken, drained

You can substitute:
  • 1 10.5 oz can of peas and carrots, drained or 1 bag of frozen peas and carrots for fresh, chopped carrots and celery
  • 1 can of cream of celery soup for one of the cream of chicken soups

This Is How We Do It (Kitchen Skills You'll Learn in This Recipe):

  • Boiling vs. simmering
  • Chopping vegetables
  • Measuring ingredients
  • Reading and following a recipe
  • Rolling dough
  • Sauteing vegetables
  • Setting a timer


Mama Said Knock You Out (Prep Ahead for Easy Dinners):

You can cook the chicken ahead of time for this recipe and assemble the rest of the recipe on a different day.

If cooking chicken breasts ahead of time, add them to a crockpot in a single layer. Cover and cook on low for 6-7 hours or high for 3-4 hours, checking at the earliest time. Use your meat thermometer to be sure the chicken has reached 165 degrees F. Let rest 10 minutes before transferring to a clean bowl or cutting board to shred. 

If you have more than the 2 cups of shredded chicken needed for this recipe after you're finished cooking it, it will last 3-4 days in the refrigerator and can be used in other recipes. If needed, you can let it cool, and then portion it out into freezer bags or reusable plastic containers to freeze for other recipes in the future. Make sure to label and date any food item that you freeze.


If You Give a Kid a Cooking Challenge

This recipe is part of the three-part If You Give a Kid a Cooking Challenge recipe series. These recipes are designed to: 

  • be easier to make
  • have a minimal number of ingredients (minus pantry staples like oil and spices)
  • be quick to prep 
  • make enough for one person to have leftovers for a few days
Make sure to visit the main post to see all of the recipes in the series.

Thursday, June 5, 2025

If You Give a Kid a Casserole Dish: Loaf Pan Lasagna

Over the next several weeks, we'll be bringing you recipes for beginning cooks designed to teach basic cooking skills. So be on the lookout for all the recipes in the series. Today's recipe is part of the Cooking Challenge series.

This recipe is a classic meat lasagna recipe but with directions adjusted to bake in a loaf pan so that you are making just the right amount for two people. If you double the recipe, you can easily skip that suggestion and assemble it in a casserole dish instead. 

With a 25 minute prep time, this recipe comes together in no time flat and is the perfect small batch pasta dish. Pair this lasagna with garlic bread and a side salad, and you've got a quick weeknight meal.


Loaf Pan Lasagna for Two

1 Tbsp olive oil

1/2 small yellow onion, finely chopped (about 1/3 cup)

1 clove garlic, minced

8 oz lean ground beef

1 Tbsp Italian seasoning

12 oz. marinara sauce

1 large egg

1 cup (8 oz) ricotta cheese

1 cup shredded mozzarella

1/2 cup plus 2 Tbsp grated Parmesan

1 box no-boil, oven ready lasagna noodles


  1. Preheat oven to 375 degrees. Spray an 8 ½ x 4 ½ inch loaf pan with cooking spray. Set aside.
  2. Sauté onion and minced garlic until translucent, about 4 minutes. 
  3. Add ground beef and use a spoon to break it into pieces. Cook, stirring occasionally, until no longer pink, about 4 to 6 minutes. 
  4. Add the Italian seasoning and cook 1 minute. Stir in the pasta sauce and let simmer while you make the ricotta mixture. 
  5. In a medium bowl, combine 1 cup ricotta cheese, 1 egg, 1/2 cup mozzarella cheese, 1/2 cup Parmesan cheese, and mix well. Set aside.
  6. Layer the sauce, ricotta mixture and noodles in the following order:
    - Spread 1/4 cup meat sauce mixture in the bottom of the prepared pan.
    - Add 2 noodles to cover sauce, breaking the ends off, if necessary, to fit the size of the pan.
    - Spread ricotta filling onto the noodles in the pan followed by meat sauce mixture. Make sure to cover all parts of the noodles with sauce so that all parts of the noodles cook completely through.
     - Repeat layering noodles, ricotta filling, and meat sauce.
    - Top the final layer of meat sauce with remaining mozzarella and Parmesan cheese. 
  7. Cover with aluminum foil and bake on 375 for 40 min. Uncover and bake for 10 more minutes. Let stand for 10 minutes before serving.

You Can Get with This or You Can Get with That (Recipe Substitutions):

  • Substitute the ground beef for Italian sausage or ground turkey. 
  • If using beef with a higher fat content, make sure to drain the fat before moving on to Step 4.
  • Substitute 1/2 teaspoon of onion powder or 1/2 tablespoon of dried onion flakes for the fresh chopped onion.
  • Substitute garlic powder or jarred minced garlic for fresh minced garlic.
  • Lazy Lasagna Option: Use steps 1-4 to make meat pasta sauce. Substitute 25 oz. bag of frozen ravioli for ricotta mixture and lasagna noodles. Mix pasta sauce and frozen ravioli in a 9 X 13 casserole dish. Sprinkle mozzarella and parmesan cheese on top. Cover with aluminum foil and bake for 30 minutes. Remove foil and bake another 15 minutes.
  • Easy Spaghetti Night Option: Use steps 1-4 to make meat pasta sauce. Serve over spaghetti noodles with a side of garlic bread and salad.


This Is How We Do It (Kitchen Skills You'll Learn in This Recipe):

  • Browning ground meat
  • Chopping vegetables
  • Cracking eggs
  • Measuring ingredients
  • Preheating an oven
  • Reading and following a recipe
  • Sauteing vegetables
  • Setting a timer


Mama Said Knock You Out (Prep Ahead for Easy Dinners):

Double the recipe and freeze one to enjoy later. You can freeze your extra lasagna either before or after cooking. 

Make your extra lasagna in a disposable aluminum pan; wrap twice in plastic wrap and once in aluminum foil. If you are baking the lasagna before freezing it, allow the lasagna to cool completely before wrapping it. 

When ready to cook the frozen lasagna, remove it from the freezer the day before you want to bake it. This will help it bake more quickly in the oven. Bake according to instructions in Step 7 above.


If You Give a Kid a Cooking Challenge

This recipe is part of the three-part If You Give a Kid aCooking Challenge recipe series. These recipes are designed to: 

  • be easier to make
  • have a minimal number of ingredients (minus pantry staples like oil and spices)
  • be quick to prep 
  • make enough for one person to have leftovers for a few days
Make sure to visit the main post to see all of the recipes in the series.
Saturday, May 31, 2025

If You Give a Kid a Crockpot: Pizza Fondue

Over the next several weeks, we'll be bringing you recipes for beginning cooks designed to teach basic cooking skills. So be on the lookout for all the recipes in the series. Today's recipe is part of the Cooking Challenge series.

This crockpot Pizza Fondue recipe will provide an easy weeknight meal when paired fresh chopped veggies, pepperoni, and cubed Italian bread dippers. And, really, what's not to like? It's a pizza in a crockpot (or fondue pot if you have one)!


Pizza Fondue

1 Tbsp olive oil
3 cloves garlic, minced
24 oz. jar of marinara sauce
1 tsp dried basil
3 cups mozzarella cheese, shredded
1 cup cheddar cheese, shredded
1 cup grated Parmesan cheese
1 Tbsp cornstarch

For serving:
Cubed Italian or French bread 
Fresh veggies (broccoli, carrots, sliced mushrooms)
Pepperoni

  1. Add olive oil, garlic, marinara sauce, and basil to a crockpot.
  2. Add mozzarella cheese, cheddar cheese, Parmesan cheese, and cornstarch to a gallon-sized Ziploc bag, seal, and shake. Add cheese mixture to the marinara sauce in several batches and stir to incorporate.
  3. Set heat on high, and cover for 30 minutes. Turn down to low and cook for another 45 minutes, stirring every 15 minutes. Set heat to warm when ready to serve.
  4. While the fondue is cooking, cut fresh bread and vegetables for serving. 

You Can Get with This or You Can Get with That (Recipe Substitutions):

  • Substitute garlic powder or jarred minced garlic for fresh minced garlic.
  • If you do not have a fondue set, use regular forks instead of fondue forks for dippers. 
  • If you have a fondue pot, make steps 1 and 2 in a pot on the stove. Once cheese has completely melted, transfer to a fondue pot to keep warm and serve.


This Is How We Do It (Kitchen Skills You'll Learn in This Recipe):

  • Chopping vegetables
  • Measuring ingredients
  • Reading and following a recipe
  • Setting a timer
  • Using a crockpot


If You Give a Kid a Cooking Challenge

This recipe is part of the three-part If You Give a Kid a Cooking Challenge recipe series. These recipes are designed to: 

  • be easier to make
  • have a minimal number of ingredients (minus pantry staples like oil and spices)
  • be quick to prep 
  • make enough for one person to have leftovers for a few days
Make sure to visit the main post to see all of the recipes in the series.

Sunday, December 18, 2022

Vegan Collard Greens

I wanted to share with you a new recipe for our family's traditional collard greens for our New Year's meal. It's a vegan recipe that's perfect for our family, which includes two vegetarians.

This recipe is perfect for if you have to consider a variety of dietary needs at your New Year's table. You can serve the traditional meat of ham separately for any meat eaters in your group.

We pair this Southern-style recipe with Vegan Hoppin' John and Sweet Honey Cornbread to start the new year off right!


Vegan Collard Greens

2 bunches fresh collard greens
olive oil
1 small yellow onion, diced
4 cloves garlic, minced
4 cups vegetable broth 
1 teaspoon salt
1/8 - 1/4 teaspoon Liquid Smoke flavoring
1/2 teaspoon red pepper flakes
black pepper (to taste)
balsamic vinegar (for serving, if desired)
hot sauce (for serving, if desired)

  1. Remove bottom stalks of the collard green leaves and chop or tear into small pieces. 
  2. Fill your sink or a large container with cold water, add chopped collard greens, and soak for at least 10 minutes. (Some people prefer to soak greens overnight.)
  3. Remove the collard greens from the sink, place them in a colander, give them a good rinse, and drain. Complete this step in batches, if needed.
  4. Coat the bottom of a large pot with olive oil.
  5. Sauté onions over medium-low heat until they begin to brown and then add in garlic.
  6. Cook until onions and garlic are fragrant, for another 2-3 minutes.
  7. Add in vegetable broth.
  8. Season broth with salt, Liquid Smoke, red pepper flakes, and black pepper (if desired).
  9. Taste and adjust the seasonings if needed. 
  10. Bring broth to a boil, then reduce to simmer.
  11. Add in the greens, cover, and cook until greens are completely tender, about 1 - 1 1/2 hours.
  12. Check at the 30-minute mark to make sure there is still enough broth in the pot. Add more vegetable broth if needed.
  13. Serve with hot sauce or balsamic vinegar, if desired.


Notes:

Make sure you like the taste of the broth when you taste it at step 9, because this is how your greens will taste. Adjust seasonings at this step, if necessary. 

Remember that the heat from the red pepper flakes will increase as the greens cook and you can always add more heat by serving the collard greens with additional hot sauce.

Traditions & Superstitions: 

A long-held tradition in the South, collard greens are often served for New Year’s Day.  According to superstition, if you eat collard greens on New Year’s Day, then you will have financial success for the coming year.

  • collard greens represent green backs (dollars), or cash 
  • black-eyed peas represent coins (this is traditionally served with alongside collard greens on New Year's Day)
  • cornbread represents gold (this is traditionally served with alongside collard greens on New Year's Day)

Thursday, July 7, 2022

Portobello Mushroom Burgers

It's grilling season and these veggie burgers are not only easy-to-make, but they're delicious too. You can marinate them in 15 minutes, and it only takes 8 minutes to grill them. Super simple. 

Portobellos are a great vegetable to grill and a great burger alternative - they're already the same size as a burger patty. They hold their shape well and become soft once you've cooked them. Of course, the tasty marinade is what makes them so delicious!

Portobello Mushroom Burgers

4 large portobello mushroom caps 

2 Tbsp. olive oil

3 Tbsp. soy sauce

2 Tbsp. balsamic vinegar

2 garlic cloves, minced

1/2 tsp. pepper

burger buns (for serving)

burger toppings (for serving)

  1. Clean the mushroom caps by wiping away any dirt and cutting off the stems with a paring knife. Remove the gills by scraping them off with a spoon. Place in a single layer in a casserole dish.
  2. Whisk together olive oil, soy sauce, balsamic vinegar, garlic, and black pepper in a small bowl. Brush the mixture all over the tops and undersides of the mushroom caps and let them marinate for 15 minutes.
  3. Preheat a grill over medium heat. Place the mushrooms cap-side down and brush the gill side with some of the reserved marinade. Cover and cook for 4 minutes until golden brown grill marks appear. 
  4. Flip the mushroom caps and brush the tops with more marinade. Cover and cook another 4 minutes until the mushrooms have softened and shrunken slightly.  
  5. Build your burger using your favorite toppings and serve immediately.

Notes:


Instead of grilling, you can also roast these in the oven at 400 degrees for 12 minutes.

This recipe is also suitable for your vegan friends, since they can choose which toppings to add to their portobello mushroom burger.

We eat them as veggie burgers, but you could also serve them as a vegetarian main dish plated alongside other vegetarian side dishes (to be eaten with a knife and fork in place of a meat, for instance).


Wednesday, June 1, 2022

Vegetable Pancakes

Now that warmer months are upon us and fresh veggies are in season, I thought I'd share a vegetable pancake recipe that features a few different types of vegetables. These can either be straight from your own garden or fresh from the Farmers Market or local produce stand. However you come by your fresh veggies, you'll be glad you decided to make this savory veggie pancake recipe. 

And if you've got picky eaters at home, it's also a tasty way to get more vegetables into their diet. Vegetable pancakes are great for breakfast, lunch, a side dish for dinner, a vegetarian main dish, or even a party appetizer (because of their small size).


Vegetable Pancakes

3 large zucchini, grated and thoroughly drained

2 cups broccoli, grated

6 large carrots, grated

1 onion, diced and sautéed

1, 15 oz. can corn kernels, divided

4 large eggs, beaten

1 tsp. salt

1/2 tsp. pepper

1 tsp. garlic powder

1 cup breadcrumbs

1/2 cup flour

1/2 tsp. baking powder

oil for pan

green onions, thinly sliced (for serving)

sour cream (for serving)

sriracha sauce (for serving, if desired)

Grate & Drain Zucchini

  1. Grate zucchini, sprinkle with 1 teaspoon salt and set in a fine mesh strainer. Place a bowl or plate on top of the zucchini and weigh it down to help it release its liquid. 
  2. Let it sit for at least 30 minutes - 1 hour. After it has drained, wrap it in a clean kitchen towel or a piece of cheesecloth, squeeze to release the remaining liquid, and set aside.

Mix Pancake Batter & Cook Pancakes

  1. In a large mixing bowl, mix together flour, baking powder, pepper, garlic powder, and breadcrumbs. Add zucchini, broccoli, carrots, onion, and 1 cup of corn, and toss to combine.  Make sure to break up the zucchini and coat everything with flour mixture. (Set aside remaining corn for step 8.)
  2. Crack eggs into a small bowl, beat, and pour over the vegetable mixture. Mix to thoroughly combine.
  3. Heat a skillet over medium heat and add enough oil to lightly coat the bottom of the pan.
  4. Using a scoop, drop the vegetable mixture into the hot pan, and flatten with the bottom of the scoop form a patty.
  5. Cook for 2-3 minutes on each side, turning down the heat if they begin to brown too quickly.
  6. Remove from pan to drain on a cooling rack placed over a cookie sheet.
  7. Repeat process with remaining vegetable mixture, adding more oil if the pan becomes too dry.
  8. When final pancake has been cooked, roast remaining corn in pan for 1-2 minutes, or until kernels are lightly browned.
  9. Serve pancakes garnished with sour cream, green onions, and roasted corn. If you'd like your savory veggie cakes spicy, serve topped with a drizzle of sriracha sauce.

Pancake Cooking Tips

  • Use only enough oil to create a crisp, browned crust.
  • Avoid crowding the pan. Leave at least 1 inch of cooking space between pancakes.
  • Wait until first side has browned before turning. Check bottoms of pancakes before turning.
  • Turn each pancake only once.


Notes:

You can use a regular box grater to grate your vegetables, but if you use a food processor, you can cut your prep time for this recipe considerably.

Zucchini is a very watery vegetable, so take care to drain it well so that your pancakes don't turn out soggy.

This is the scoop that I used for this recipe. A small ice cream scoop would work too!

You'll notice that step 6 says to drain them on a cooling rack placed over a cookie sheet. Placing them on a paper towel on a plate will cause them to create steam and lose some of the crispy texture. 

If you'd rather bake these than fry them, bake them at 350 degrees for 20 – 25 minutes. The finished pancakes won't be quite as crispy. 

This post contains affiliate links.

                Wednesday, January 12, 2022

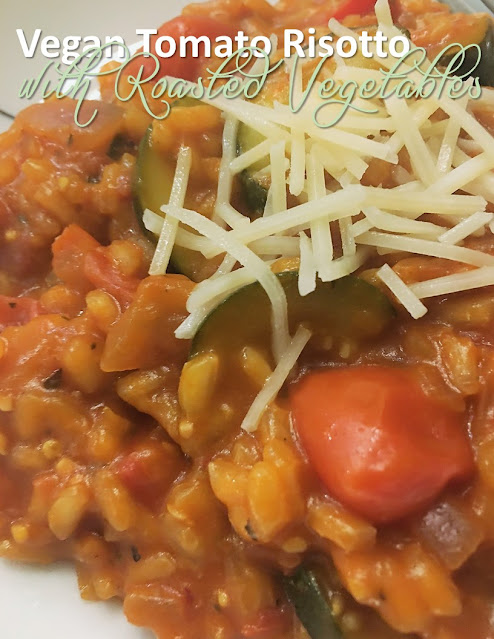
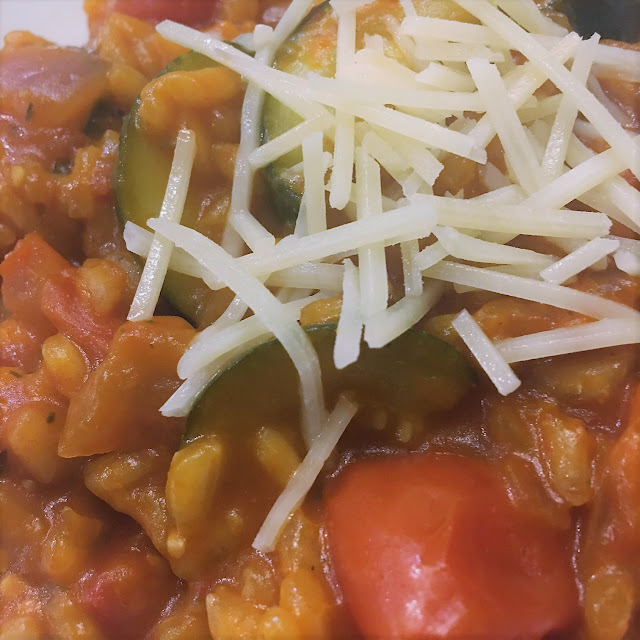
                Vegan Tomato Risotto with Roasted Vegetables

                You just can't beat a risotto in the cold winter months. This creamy dish takes a bit longer with preparation, but it always pays off in the end. 

                I remember the first time I had a tomato-based risotto. I was 29 years old and I was eating dinner in a restaurant with a group of work friends while attending a conference in New Orleans. We somehow ended up in a restaurant that didn't have a single vegetarian dish on the menu. I explained my dilemma to the server, and he spoke with the chef who offered to make me an off-menu creation - a tomato risotto with roasted vegetables.

                This particular recipe features roasted vegetables and is cooked low and slow with a tomato puree base that results in a main dish that's rich and creamy. And it's the closest I've come to that dish that the New Orleans' chef made for me years ago. While your vegetarian and vegan friends will love it, you can also serve it to your gluten-free friends too. So, it checks a lot of boxes.


                Vegan Tomato Risotto with Roasted Vegetables


                Roasted Vegetables

                1 Tbsp. olive oil

                10 oz. cherry tomatoes, halved

                2 medium red bell peppers, chopped

                1 large zucchini, chopped

                salt and pepper, to taste

                Risotto

                1 Tbsp. olive oil

                1 large red onion, diced

                3 garlic cloves, minced

                1 cup Arborio rice

                1 Tbsp. balsamic vinegar

                1 cup of canned tomato puree or plain tomato sauce

                2 cups vegetable stock, heated to a low simmer and kept warm

                6.7 oz. sundried tomato pesto, oil drained

                1 tsp. basil

                salt and pepper, to taste


                1. Preheat the oven to 350 degrees and add the olive oil to a large cookie sheet.
                2. Halve the cherry tomatoes. Chop bell peppers and zucchini into small similar-sized pieces and spread out on the cookie sheet. Add salt and pepper and gently toss together in oil.
                3. Roast vegetables for 30 minutes.
                4. Add vegetable stock to a saucepan, bring to a gentle simmer, and keep warm over a low heat.
                5. Dice onions and add olive oil to a large sauté pan.
                6. Sauté the onion on a low-medium heat for a few minutes. Add the minced garlic and cook for another minute.
                7. Stir in the Arborio rice and balsamic vinegar and stir for approximately 30 seconds.
                8. Alternate adding the tomato puree and warm vegetable stock 1/2-cup at a time. Allow each 1/2-cup of liquid to be absorbed by the rice before adding the next.
                9. After all liquid is absorbed, add in the sundried tomato pesto and the roasted vegetables. Give everything a stir and cook for a further 5 minutes until everything is cooked through and the rice is done. Make sure to taste the rice at this step to ensure that the rice is cooked to desired doneness. If the rice is still chewy at this step, add in more tomato puree or more vegetable stock 1/2-cup at a time until desired doneness.
                10. Remove from the heat and stir in the basil, salt, and pepper. 

                Notes:


                If you've never made risotto the old-fashioned way before, remember to add in the liquids a half-cup at a time and stir until completely absorbed before adding in the next batch of liquids. This will help the Arborio rice to release its starch and gives the dish its signature creamy texture. 

                While you might be inclined to crank up the heat to "speed up the process" this will only make the liquid evaporate more quickly, which isn't the goal. The goal is for it to be absorbed into the rice. If it evaporates, you'll be left with crunchy risotto. So, make sure you cook it over low-medium heat.

                You can substitute 6 sundried tomatoes (diced) for the sundried tomato pesto, if desired.

                Garnish with vegan Parmesan cheese alternative, if desired. If your family is not vegan (we have two vegetarians in our family, but no vegans), then feel free to garnish with Parmesan cheese before serving. 

                If you're a fan of risotto, take a peek at this recipe too:

                Thursday, December 16, 2021

                Vegan Hoppin' John (Black-Eyed Peas and Rice)

                I wanted to share with you a new recipe for our family's traditional black-eyed peas New Year's meal. It's a vegan recipe that's similar to Hoppin' John, and it was perfect for our family, which includes two vegetarians.

                Rather than cooking the rice in the same pot with the black-eyed peas, we served the black-eyed peas over a bed of white rice. But, considering Hoppin' John is a recipe that originated in the Carolinas (just like The Harris Sisters!), Carolina Gold rice would be a great addition to this recipe too.


                Vegan Hoppin' John (Black-Eyed Peas and Rice)

                16 oz. bag dry black-eyed peas, sorted and rinsed
                2 Tablespoons olive oil
                1 large onion, chopped
                1 red bell pepper, chopped
                1 rib celery, chopped
                4 cloves garlic, minced
                15 oz. can diced tomatoes
                1 Tablespoon hot sauce
                1 teaspoon dried oregano
                1/2 teaspoon black pepper
                1/8 teaspoon cayenne pepper
                1 teaspoon salt 
                1/2 teaspoon Liquid Smoke flavoring
                cooked rice to serve
                1. Wash the sorted dry beans. Place them into a pot and cover with at least 2 inches of water. Let them soak 8 hours or overnight. Drain and set aside.
                2. Add olive oil and onion to a large pot and sauté until it begins to brown. Add the bell pepper, celery, and garlic and cook for another 2 minutes. 
                3. Then add all ingredients except salt, Liquid Smoke, and cooked rice to the pot, along with enough additional water to cover the beans by one inch. 
                4. Bring beans to a boil, then reduce to simmer, cover, and cook until beans are completely tender, about 1 1/2-2 hours, adding more water as needed. (Note: water should cook down into a thick sauce, but make sure that beans have enough water to cook in at all times.)
                5. When they’re tender, add the Liquid Smoke and salt, cook for 15 more minutes.
                6. Serve over cooked rice with a side of collard greens and cornbread to complete your vegetarian New Year's meal!

                Notes:

                If you prefer a spicier dish, you can either increase the amount of hot sauce and cayenne pepper in the recipe or serve with additional hot sauce.

                If you prefer green bell peppers to red bell peppers, you can substitute them in this recipe.

                If you want to avoid the "rush" of buying black-eyed peas right before the end of the year, put them on your grocery list for the same week you're buying ingredients to make Christmas goodies. While you're buying ingredients to make Christmas cookies, candies, fudge, etc., swing by the dried beans aisle and pick up a bag of black-eyed peas for your pantry. That way, you'll already have them for when you need them, and you won't have to hunt for them when supplies will be low a few weeks later.

                Traditions & Superstitions: 

                Hoppin' John is a Lowcountry dish that is served for New Year’s Day.  According to superstition, if you eat Hoppin' John on New Year’s Day, then you will have good luck for the coming year.

                • black-eyed peas represent coins
                • tomatoes represent health
                • cornbread represents gold (this is traditionally served with alongside black-eyed peas on New Year's Day)
                • collard greens represent green backs (dollars), or cash (this is traditionally served with alongside black-eyed peas on New Year's Day)
                • Sometimes, the cook slips a coin into the dish before serving, or serves each dish with a coin underneath.

                On the day after New Year's Day, leftover Hoppin' John is called Skippin' Jenny, bringing a hope for an even better chance of prosperity in the New Year.

                Saturday, March 27, 2021

                Springtime Asparagus Tortellini

                Now that spring is here, I like to take advantage of the window of time when there's an abundance of fresh asparagus. This recipe makes a quick pasta with a creamy sauce and fresh asparagus. In about 30 minutes, you can have this vegetarian meal on the table, which leaves you more time to enjoy the nice weather that spring has to offer!


                Springtime Asparagus Tortellini

                2 packages three cheese tortellini, 9 oz. each 
                1 small yellow onion, diced 
                1 bunch asparagus, chopped into bite-sized pieces
                4 garlic cloves, minced 
                2 cups heavy whipping cream 
                1 cup shaved Parmesan cheese
                Salt and pepper to taste 
                Oil for cooking 

                1. Cook tortellini according to package instructions, drain, and set aside.
                2. Preheat a pan over medium heat and add a couple of tablespoons of oil. 
                3. Add onions and sauté until translucent.
                4. Add chopped asparagus and sauté for 5 minutes or until desired tenderness. Add minced garlic, salt, and pepper.
                5. Mix well and cook for about 5 more minutes.
                6. Pour in heavy cream while stirring. Add shaved Parmesan cheese and stir until cheese is melted.
                7. Stir in tortellini until completely mixed and cook for a couple of minutes.
                8. Serve and enjoy.

                If you're looking for other simple asparagus recipes for springtime, give these tried and true Harris Sisters' recipes a try:

                Enjoy!

                Wednesday, November 20, 2019

                Southwest Stuffed Acorn Squash

                You might still have a few different types of fall squash in your grocery store produce section. If so, this would be a fun new recipe for you to try out. We recently posted about Broccoli and Cheese Stuffed Spaghetti Squash, which is a new and different spin on Italian cuisine.

                But, this easy recipe is a way to incorporate Southwest flavor with a fall squash. And just like the other recipe, you serve it right in the squash, so it makes a lovely presentation for your fall table!


                Southwest Stuffed Acorn Squash


                2 acorn squashes
                2 tablespoons olive oil
                1 3/4 cups vegetable stock
                1 cup brown rice, rinsed
                1 tablespoon olive oil
                1/2 red onion, diced
                1 clove garlic, minced
                1/2 teaspoon salt
                1/4 teaspoon pepper
                1 teaspoon chili powder
                1/2 teaspoon cumin
                1/2 teaspoon paprika
                1/4 teaspoon onion powder
                1/4 teaspoon cayenne pepper
                1/4 teaspoon dried oregano
                15 oz can black beans, drained and rinsed
                11 oz can corn, drained and rinsed
                10 oz can roasted diced tomato
                1/2 cup shredded cheese blend
                avocado slices (optional, for garnish)
                sour cream (optional, for garnish)


                1. Preheat oven to 400 degrees.
                2. Cut off the ends of each squash and then cut each squash in half horizontally. Scoop out seeds with a spoon.
                3. Drizzle squash halves with olive oil and sprinkle with salt and pepper to taste. Place cut-side up on a parchment paper-lined baking sheet.
                4. Bake for 40 minutes, or until tender.
                5. In a medium saucepan, add vegetable stock and rice. Stir and bring to boil over high heat.
                6. Cover and simmer for 45 minutes. Remove saucepan from heat.
                7. Heat olive oil in a large saucepan or skillet over medium heat.
                8. Add onions, stirring frequently until translucent.
                9. Add garlic and cook until fragrant.
                10. Add salt, pepper, chili powder, cumin, paprika, onion powder, cayenne pepper, and dried oregano. Stir until spices are evenly distributed.
                11. Mix in black beans, corn, tomatoes, and cooked rice.
                12. Fill squash halves with rice mixture and sprinkle with cheese.
                13. Bake for 5 minutes, or until cheese is melted.
                14. Top with avocado slices or sour cream before serving.

                Notes:

                The 1/2 teaspoon of salt and 1/4 teaspoon of pepper are added with the other spices to the onion and garlic mixture. When salt and pepper are mentioned previously in the recipe, just season the squash halves to taste.

                The ingredient list may seem off-putting at first glance, but 8 of the ingredients are spices. This is not a terribly difficult recipe to put together. My son Jaxon helped!


                You may have additional rice mixture left over after stuffing the squash halves. This will be dependent on the size of the squashes you use. The rice mixture is also good eaten by itself as a side dish, or as a stuffing mixture for tacos or burritos.

                The recipe as written makes enough for 4, with each person getting 1/2 of a stuffed squash as a serving.


                If desired, rather than serving the rice mixture in individual "squash bowls," you could scoop out the cooked squash, mix it with the rice mixture, and bake it in a casserole dish for the last 5 minutes.

                To make the recipe vegan, omit the final cheese garnish and serve with only avocado slices as a garnish.

                Enjoy!


                Friday, October 11, 2019

                Broccoli and Cheese Stuffed Spaghetti Squash

                I don't know about you, but once the fall season rolls around, my grocery store produce section is overflowing with all kinds of different squash and pumpkins! And every year, I think I should really be more adventurous and try out some new recipes with these different types of fall squash.

                So, today I'm sharing with you a recipe that our family tried this week and we're definitely going to make again. It uses spaghetti squash and incorporates broccoli, cheese, and spices to make it into a wonderful Italian meal. And you know what else? It's low carb and gluten free too! Can't beat that!


                Broccoli and Cheese Stuffed Spaghetti Squash

                2 2½- to 3-pound spaghetti squash, halved lengthwise and seeded
                2 Tbsp olive oil
                3 bunches broccoli, chopped
                4 cloves garlic, minced
                1/2 tsp crushed red pepper
                4 Tbsp water
                2 cups shredded mozzarella cheese, divided
                1/2 cup shredded Parmesan cheese, divided
                1 1/2 tsps Italian seasoning
                1 tsp salt
                1/2 tsp pepper


                1. Position racks in upper and lower thirds of oven; preheat to 450 degrees. 
                2. Halve squash lengthwise and remove seeds. Place squash cut-side down in a microwave-safe dish. Add 2 tablespoons of water to the dish. Microwave uncovered on high until flesh is tender, about 10 minutes. Repeat with other squash.
                3. Meanwhile, heat olive oil in a large skillet over medium heat. Add broccoli, garlic, and red pepper (if using). Cook, stirring frequently, for 2 minutes. Cover and turn heat down to low. Cook until the broccoli is tender, about 3 to 5 minutes more. Transfer broccoli to a large bowl. 
                4. Use a fork to scrape the squash from the shells into the bowl. Place the shells in an oven safe baking dish. 
                5. Stir 1 1/2 cups mozzarella, 4 tablespoons Parmesan, Italian seasoning, salt, and pepper into the squash and broccoli mixture. Divide it evenly between the shells. Top with the remaining mozzarella and Parmesan. 
                6. Bake on lower oven rack for 10 minutes. Move to upper oven rack, turn the broiler to high, and broil until the cheese starts to brown, about 2 minutes. Make sure to watch the squash carefully while broiling.


                Notes:

                I used a small 8 1/2" X 11" Pyrex casserole dish to microwave the squash and turned off the turntable while microwaving. Turn the dish halfway through cooking to make sure the squash cooks evenly.

                I used the same casserole dishes that I used for microwaving the squash to bake the squash in for easier cleanup!

                The recipe as written makes enough for 4, with each person getting 1/2 of a stuffed squash as a serving. Add some homemade bread and a salad for a full meal.

                This makes a pretty presentation served in the squash shell, but after you've mixed together the spaghetti squash, broccoli, cheese and spices, you could also add it all to a casserole dish and bake it that way too!

                You Might Also Be Interested In