Showing posts with label breads. Show all posts

Sunday, September 24, 2023

Sweet Cornbread Muffins

Y'all - this homemade cornbread muffin recipe makes the perfect side dish. I'm telling you, if you like sweet cornbread, then this is the recipe to try. It's ready in just 30 minutes, and these easy-to-make sweet cornbread muffins pair well with chili, soup, salad, and so much more! 


Sweet Cornbread Muffins

1  2/3 cups all-purpose flour

2/3 cup cornmeal 

1 1/2 Tbsp baking powder

1/4 tsp salt

1/2 cup sugar

1/4 cup butter, softened

1 cup milk 

2 Tbsp oil

2 large eggs


  1. Preheat oven to 350 degrees. Line or grease a 12 cup muffin tin. Set aside.
  2. Combine flour, cornmeal, baking powder, and salt in a small bowl.
  3. In a large bowl, cream together butter and sugar with an electric hand mixer.
  4. Add milk and oil and mix on low until just combined. Add two slightly beaten eggs to the mixture and whisk or lightly beat to incorporate.
  5. Slowly add in the cornmeal mixture, mixing the two together with a fork until just combined and then stop mixing. The batter should be slightly airy and sticky. Don’t over mix!
  6. Divide batter evenly into prepared muffin tin. (Approximately 1/4 cup of batter per muffin will yield exactly 12 muffins.) 
  7. Bake for 18-20 minutes at 350 degrees F or until toothpick inserted into the center of the middle muffin  comes out clean.
  8. Allow muffins to cool in the muffin tin for about 5 minutes. Invert the muffins onto a wire rack, stand the muffins upright, and cool 5 additional minutes. Serve warm.

Notes:

It is important not to over mix your cornbread batter, otherwise the muffins will be dense, heavy, and dry. If the batter still has a few lumps in it after mixing, that is OK.

A few other things that can cause your cornbread muffins to turn out dry:

  • Baking the muffins too long can dry them out and make your muffins crumbly.
  • If you cool the muffins completely in the pan, it can sometimes dry them out because they keep cooking. Instead, as soon as you are able to remove them, place the cornbread muffins on a wire rack to finish cooling.

What to Serve with Your Cornbread:


More Cornbread Recipes You'll Love:


Monday, November 15, 2021

Easy Brazilian Cheese Bread

This Easy Brazilian Cheese Bread recipe is inspired by the savory pastry from Brazil, pão de queijo. With main ingredients like extra-sharp cheddar and Pecorino Romano cheeses, it's made to be enjoyed warm as a snack, an appetizer, or with your favorite meal. 

These rolls have crunchy outsides, chewy insides, and a yummy, cheesy flavor. Because you combine the ingredients in a blender and pulse until smooth, it's an easy recipe to make. (And one your kids will enjoy helping with!)

As an added bonus, it's also a gluten-free recipe because it uses tapioca flour.


Brazilian Cheese Bread

1 cup whole milk

1 cup shredded extra-sharp cheddar cheese

1 cup grated Pecorino Romano cheese

1/3 cup olive oil

2 eggs

1 tsp salt

2 cups tapioca flour


  1. Preheat oven to 375 degrees. Spray a 12-cup muffin tin with cooking spray. Set aside.
  2. Add milk, cheeses, oil, eggs, salt, and tapioca flour to blender, making sure to add tapioca flour last. Process on high speed for 30 seconds.
  3. Use a rubber spatula to scrape down sides of blender. Replace lid and process on high speed until smooth, about another 30 seconds.
  4. Pour batter evenly into muffin cups, filling each cup about 3/4 full
  5. Bake in oven until rolls are golden brown and puffed, 25-30 minutes.
  6. Remove from oven and place on cooling rack. Let rolls cool on cooling rack in muffin tin for 5 minutes.
  7. Run butter knife around edges of rolls to loosen from muffin tin and transfer to cooling rack. Serve warm.

Notes:

You can change the types of cheeses in this bread if you'd like to change the flavor, but there isn't really a good substitute for the tapioca flour. Tapioca flour provides the crispy crust and chewy texture of the Brazilian cheese bread, which is what makes it unique. This is the reason there isn't a good substitute.

Monday, August 16, 2021

Lemon Blueberry Quick Bread

When our recent blueberry picking excursion left us with a huge bounty of blueberries, we started looking for yummy ways to incorporate them in quick and easy recipes.  This lemon blueberry bread came together quickly and was a huge hit with the whole family.  I love this bread for breakfast with coffee, while the rest of my family enjoyed it as a dessert bread.  Either way, it's a winner.  Bonus points if you make two and freeze one for later.  You will thank yourself!  


Lemon Blueberry Quick Bread

1/3 cup butter, melted

1 cup sugar

3 Tablespoons lemon juice

2 large eggs, room temperature

1 1/2 cups all purpose flour

1 teaspoon baking powder

1/2 teaspoon salt 

1/2 cup 2% milk

1 cup fresh or frozen blueberries

1/2 cup chopped nuts

2 Tablespoons grated lemon zest


Glaze: 

2 Tablespoons lemon juice

1/4 cup sugar


  1. Preheat oven to 350 degrees. 
  2. In a large bowl, beat butter, sugar, lemon juice, and eggs.  In another bowl, combine flour, baking powder, and salt. Stir into egg mixture alternatively with milk, beating well after each addition.  Fold in blueberries, nuts, and lemon zest. 
  3. Transfer to a greased loaf pan.
  4. Bake 60-70 minutes, or until a toothpick inserted in the center comes out clean. 
  5. Cool for 10 minutes before removing from pan to a wire rack. 
  6. Combine glaze ingredients; drizzle over warm bread.  Cool completely. 


And if all this has you wishing for more blueberry recipes, we've got you covered.  Check these out: 

Tuesday, March 5, 2019

It's Now or Never Quick Bread

You might be thinking this is a weird name for a baked good, but it's actually the perfect thing to call it. Why? Well, because most recipes are named after their main ingredients.

How This Recipe Got Its Weird Name

But, the way this recipe works is that you determine the main ingredient based on what you have right now that you need to use up. You can use any type of fruit or nuts or baking chips as the main ingredient in this recipe.

You know how you sometimes go to the grocery store and you buy a pint of blueberries because they were on sale? No? Well, I tend to do this because they are my son Aidyn's favorite fruit.

Well, this week, those same blueberries were still staring at me from the refrigerator at the end of the week, and I hadn't done a darn thing with them. Then, I remembered this recipe . . . .


But spring time is upon us and that is a wonderful time for you to save this recipe too! Before you know it, we'll all be inundated with fresh fruits from roadside stands, farmers' markets, berry picking farms, and if we're lucky, maybe even from our own gardens.

It's hard to resist! We've waited all year for our favorite fruits to come back into season, and this recipe is the perfect thing to make with them when you've got a few pieces of fruit sitting in the crisper drawer in your refrigerator and you're not sure that fruit will make it another few days.

So, that's the story behind the name - it's now or never - get it? Even though Elvis was talking about his love, your fruit also won't wait. :-)


It works with whatever you  happen to have on hand. That's the beauty of the recipe!

It's Now or Never Quick Bread


2 bananas (overripe)
1/3 cup butter, melted
3/4 cup granulated sugar
1 egg, beaten
1 tsp vanilla
1 tsp baking soda
1 tsp cinnamon
pinch of salt
1 1/2 cups all purpose flour
2 cups of chopped fruit, nuts, or baking chips (2 cups total, can be a mixture - do not include melons)

  1. Spray a 9 x 5 loaf pan with cooking spray and set aside. Preheat oven to 350 degrees.
  2. Mash bananas and mix with melted butter in a large mixing bowl.
  3. Add sugar, egg, and vanilla. Mix together.
  4. Add baking soda, salt, and cinnamon. Mix together.
  5. Add flour and mix.
  6. Fold in mixture of chopped fruits, chopped nuts, and baking chips. (This mixture may vary each time you make the recipe.)
  7. Pour batter into greased loaf pan and bake for 1 hour or until a toothpick inserted into center comes out clean.
  8. Cool for 5 minutes in pan and then turn out onto a wire rack to cool completely.


Notes:

I usually save extra overripe bananas in a gallon-sized Ziploc bag in my freezer. That way, I always have them on hand for baked goods like this.

If the fruits you choose are particularly juicy and the bread doesn't want to hold together, it will still make an excellent "fruit crumble" topping for ice cream.


30 Sweet Quick Breads That You Can Make With This Recipe


So now that you have the basic recipe, you can see where you could make all different kinds of quick breads. The possibilities are endless! Here are some interesting combinations to get you started:

  1. Blueberry and pecan
  2. Blueberry and apple
  3. Blueberry and peach
  4. Blueberry and raspberry
  5. Strawberry and peach
  6. Strawberry, blueberry, and blackberry
  7. Blackberry and walnut
  8. Raspberry and pecan
  9. Peach and almond
  10. Apricot and coconut
  11. Apricot and walnut
  12. Pineapple and walnut
  13. Pineapple and strawberry
  14. Pineapple and coconut
  15. Pineapple and cherry
  16. Apple and walnut
  17. Apple and raisin
  18. Cranberry and orange
  19. Cranberry and almond
  20. Cherry and almond
  21. Pear and walnut
  22. Strawberry and chocolate chips
  23. Strawberry and peanut butter chips
  24. Blueberry and white chocolate chips
  25. Raspberry and white chocolate chips
  26. Peach and white chocolate chips
  27. Pineapple, coconut, and white chocolate chips
  28. Apple, raisin, and cinnamon chips
  29. Cranberry, orange, and cinnamon chips
  30. Cherry, almond, and dark chocolate chips

How to Freeze Quick Bread For Later

If you don't want to eat your quick bread right away, you can freeze it. Make sure to cool it completely, then you can wrap it securely in aluminum foil and label it with the name and date. Freeze it for up to 3 months and thaw completely before serving.


If you like quick breads, you might want to take a peek at these other popular Harris Sisters' recipes:


This post contains affiliate links.

Friday, November 11, 2016

Barefoot Contessa's Jalapeno Cheddar Cornbread

I recently mixed up a batch of this yummy cornbread to take a to a neighborhood get together.  I knew the main course would be a hearty chili, so I thought this might be a nice compliment, and IT WAS!  It was simple to make and turned out to be super moist and super flavorful too.   A winning combination all the way around!

Barefoot Contessa's Jalapeno Cheddar Cornbread


3 cups all purpose flour
1 cup yellow cornmeal
1/4 cup sugar
2 Tbsp baking powder
2 tsp salt
2 cups milk
3 eggs, lightly beaten
2 sticks melted butter
8 oz extra sharp cheddar, grated
1/3 cup chopped scallions
3 Tbsp fresh jalapeno peppers, seeded and minced


  1. Combine flour, cornmeal, sugar, baking powder, and salt in a large bowl. 
  2. In a separate bowl, combine milk, eggs, and butter.
  3. With a wooden spoon, stir the wet ingredients into the dry, until most of the lumps are gone. Do not overmix!
  4. Mix in 2 cups of cheddar, scallions, and jalapenos.  Set aside at room temperature for 20 minutes.  
  5. Preheat oven to 350 degrees. Grease 9 X 13 baking pan. 
  6. Pour batter into prepared pan.  Smooth the top.  Sprinkle remaining cheddar and extra chopped scallions over the top. 
  7. Bake for 30- 35 minutes, or until toothpick comes out clean. 
  8. Cool and cut into large squares.


Notes: When I recently made this recipe, I omitted the step of sprinkling extra cheddar and scallions over the top of the cornbread.  Instead, I used all the cheese and scallions in the batter itself and it was perfect that way too. 

I used closer to 4 Tbsp fresh jalapenos, and it was very nice- not at all hot or too spicy- and I'm not a super spicy type of person. Make your adjustments as you see fit!

Sunday, July 31, 2016

No Knead Peasant Bread

This recipe is a real winner. I find most often when I mention making homemade bread to someone, it sparks images of days of yore, churning one's own butter, etc., etc., followed promptly by some exclamation of "Ain't nobody got time fo' dat!"

Well, this recipe is definitely one you'll want to keep around, if for no other reason than to APPEAR as though you spent hours in the kitchen when you really didn't.

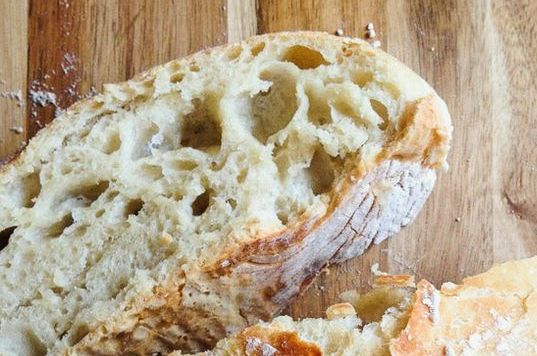
The trick is that it's a no knead bread - so much of the work of traditional bread making is cut out right there. AND, since it's peasant bread, you really don't have to put a lot of work into shaping the dough to having finished bread rounds that look pretty good. Even if they're not perfect, hey, that's the beauty of peasant bread.

You might also recognize this by more familiar terms nowadays of artisan or artisanal bread - those are just schmancy terms for bread that is made (or crafted) in small batches. And this certainly qualifies. So feel free to also call it that when you're serving it -  after all, doesn't it sound SO MUCH MORE difficult to make artisan bread? Exactly.

Super Easy No Knead Peasant Bread

No Knead Peasant Bread

2 1/4 tsp dry yeast (this equals one whole package)
2 cups warm water
1 Tbsp granulated sugar
2 tsp salt
4 cups all purpose flour
1 egg white for topping (if desired)

  1. Mix yeast and warm water in a large mixing bowl. Let sit for 10 minutes.
  2. After 10 minutes, add sugar, salt, and flour. Mix only until ingredients are completely incorporated. Do not knead. Let rise until doubled (45-90 minutes).
  3. Using floured hands, divide dough into two rounds and place onto a greased cookie sheet. 
  4. If desired, brush tops of bread rounds with egg white for a shiny crust.
  5. Let rise until doubled again (45-90 minutes).
  6. Bake at 425 degrees for 10 minutes. Then, reduce heat to 375 degrees and cook an additional 15 minutes or until golden brown.
Super Easy Peasant Bread - No Knead Recipe


Notes

The "dough" for this bread isn't really like any other bread dough you might be familiar with. In fact, it's really sticky and not something that you'd really want to knead at all. It's not as runny as a batter, but definitely not as thick as a regular bread dough, so keep that in mind when making this recipe. It will look like this once you've mixed all the ingredients together.


Because this dough is so sticky, you'll want to make sure your hands are thoroughly floured or oiled before trying to divide the dough onto baking sheets. Alternately, you could divide it with your mixing spoon and sort of ease it out of the bowl onto the sheets. It should naturally form a circle when you do this. This is a loaf that I did using that method.


The longer you allow the dough to rise during each rising period, the higher your bread will rise.

To serve this rustic bread, you can slice it or tear off pieces - your choice.

This bread makes an excellent companion to dipping sauces made of olive oil and spices or olive oil and balsamic vinegar.

Or, serve with your favorite jams and jellies for a breakfast treat.

Sunday, March 20, 2016

Bread Machine Pizza Dough

Homemade pizza is always a real winner in our house. You can make this meal over and over again and with all the different topping choices at your disposal you could never really have the same meal twice. PLUS there's always the bonus of the family time you get to spend assembling the pizzas. That's always fun too!

I thought I'd share my favorite recipe for homemade pizza dough - this one's a real winner. It has some extra spices that really make it the star of the show! In fact, sometimes when we talk about making homemade pizzas, we sometimes settle on just making breadsticks with the dough . . . it's that good!


Bread Machine Pizza Dough


  • 1 1/3 cups water
  • 2 Tbsp olive oil
  • 1 tsp sugar
  • 1 tsp honey
  • 1 1/4 tsp salt
  • 2 Tbsp cornmeal
  • 3 1/2 cups flour
  • 1 tsp baking powder
  • 1/4 tsp garlic powder
  • 1/4 tsp onion powder
  • 1/2 tsp Italian seasoning
  • 1 1/2 tsp yeast


  1. Add ingredients to machine in the order listed.
  2. Set to Dough mode and let the machine run through its cycle.
  3. Once cycle is complete, place in greased bowl and allow to rise about 30 min. 
  4. Divide in half. Cover pizza stones with cornmeal and flatten into desired shape. (If you aren't going to use the dough right away, place into ziplock bags, then stack flat in the refrigerator to be used when needed.)
  5. Add light layer of sauce and pre-bake your crust at 400 degrees for 5 minutes while you gather and assemble your other toppings (this will ensure a nice, crisp crust).
  6. Remove from oven and add toppings of your choice.
  7. Bake at 400 degrees until done (approximately 20-25 min, depending upon topping thickness).


Notes:

For those of you who do not have a bread machine or would rather assemble the dough by hand, check out these general directions for converting bread machine recipes to by-hand recipes by Don't Waste the Bread Crumbs. I have only ever used this recipe with a bread machine, but her post seems to give all the guidance needed for conversions. ;-)

Other Harris Sisters recipes you might enjoy:

Friday, November 6, 2015

Old-Fashioned Cornbread

I ran across this recipe recently and gave it a try. Let me tell you - it will be a wonderful recipe to try for Thanksgiving dinner if you're looking for something new.

Now, I know there are a lot of dyed-in-the-wool folks out there who will only serve the same cornbread recipe that they've served since the beginning of time. That's OK. You can Pin this recipe for later. You'll want to do that because it's so good!

But, if you ARE looking to try something new for Thanksgiving, give this one a try. It's moist because it incorporates both sour cream and actual corn in the ingredients list! Yum!


Old-Fashioned Cornbread

8 oz sour cream
2 eggs
1 cup corn meal
1/3 cup vegetable oil
14.75 oz can cream style corn
1 tsp salt


  1. Preheat oven to 375 degrees. Spray a 9 x 9 baking dish with cooking spray. Set aside.
  2. In a medium mixing bowl, mix together all ingredients until well blended.
  3. Bake for 30 to 45 minutes or until a toothpick inserted in the center comes out clean.
  4. Cool for 15 minutes in pan before cutting and serving.

Notes:
For this old-fashioned cornbread recipe, it is important to wait the 15 minutes before cutting. This will allow this moist cornbread time to "set" before serving.

If you're interested in other favorite Harris Sisters' Cornbread Recipes, give these a try:

Saturday, January 3, 2015

Sweet Honey Cornbread

As the calendar rolls over to another year, I trust that you've had your traditional New Year's meal of black eyed peas and collard greans. This meal, of course, should ALWAYS be accompanied by cornbread.

This year, all three Harris Sisters and their families were in one location for New Year's Day, so we enjoyed this traditional meal together. We whipped up Misty's cornbread recipe to accompany the meal. It's not too late for you to give this one a try. It's super simple and it's got a "secret" ingredient that adds a little sweetness.


Sweet Honey Cornbread

1 cup all purpose flour
1 cup cornmeal
1/4 cup granulated sugar
1 Tbsp baking powder
3/4 cup milk
1/3 cup butter, melted
1/4 cup vegetable oil
1/4 cup honey
2 eggs, lightly beaten


  1. Preheat oven to 400 degrees. Spray a 9 x 9 baking dish with cooking spray. Set aside.
  2. In a medium mixing bowl, stir together dry ingredients.  
  3. Make a well in the center of the dry ingredients and add wet ingredients in the order listed.  
  4. Stir to combine. 
  5. Bake for 20 to 25 minutes in preheated oven.

Notes:

Let the bread rest before serving. You want to do this because the bread will fall apart and become crumby if you slice it too quickly.

If you REALLY want to make your best endeavor to bake cornbread "the Southern way," try your best to wear an apron with a rooster on it whilst baking:


If you're interested in other tried and true New Year's recipes give these a looksee:


Happy new year and happy baking!

Saturday, October 11, 2014

Sweet Potato Pecan Bread

This recipe is another mix of Fall flavors that you'll definitely want to give a try. It's the perfect start to a Fall morning - try it as a complement to a mug of hot apple cider! And for all you coffee lovers, it tastes pretty good with that too. :-)

Sweet Potato Pecan Bread

Sweet Potato Pecan Bread

1 15 oz can sweet potatoes, drained* (2 Tbsp liquid reserved)
1 1/4 cups granulated sugar
1/3 cup water
1/3 cup vegetable oil
2 eggs
1 3/4 cups all purpose flour
1 tsp baking soda
3/4 tsp salt
1/2 tsp pumpkin pie spice*
1/4 tsp baking powder
1/2 cup chopped pecans

  1. Preheat oven to 350 degrees. Spray a 9" x 5" loaf pan with cooking spray. Set aside.
  2. In a large mixing bowl, mash sweet potatoes in 2 Tbsp of reserved liquid. 
  3. Add sugar, water, oil, and eggs to mashed sweet potatoes and mix well.
  4. Add flour, baking soda, salt, pumpkin pie spice, and baking powder. Mix well.
  5. Stir in chopped pecans.
  6. Pour evenly into prepared pan. Bake for 70 minutes or until toothpick inserted into center comes out clean.
  7. Cool for 15 minutes in the pan. Turn out onto a wire rack to cool completely.
Notes:
Canned sweet potatoes might be masquerading in your grocery store as yams. They're the same thing, so don't feel like you "can't find" the ingredients to make this recipe.

Apple pie spice or cinnamon can be substituted for pumpkin pie spice.

This recipe makes one loaf of bread, but it is delicious. Consider doubling this recipe - one loaf will be gone before you know it!

These are so yummy, you might want to package them for gift giving around the holidays!

If sweet potatoes aren't your favorite and you're looking for other delicious Fall breakfast foods to try, give these tried and true Harris Sisters recipes a looksee:
This post contains affiliate links.

Saturday, September 6, 2014

Super Moist Pumpkin Bread

I waited a WHOLE week past Labor Day to post this pumpkin recipe. THAT's self control people.


Super Moist Pumpkin Bread

3 1/2 cups all-purpose flour 
2 cups packed dark brown sugar 
2/3 cup white sugar 
2 teaspoons baking soda 
1 teaspoon salt 
1 teaspoon ground nutmeg 
1 1/2 teaspoons ground cinnamon 
2 cups pumpkin puree 
1 cup vegetable oil 
2/3 cup coconut milk 
2/3 cup flaked sweetened coconut 
1 cup chopped walnuts 


  1. Preheat oven to 350 degrees. Grease and flour two 8x4 inch loaf pans. 
  2. In a large bowl, stir together the flour, brown sugar, white sugar, baking soda, salt, nutmeg, and cinnamon. 
  3. Add the pumpkin puree, oil, and coconut milk, and mix until all of the flour is absorbed. Fold in the flaked coconut and walnuts. Divide the batter evenly between the prepared pans. 
  4. Bake for 1 hour and 15 minutes in the preheated oven, or until a toothpick inserted in the center comes out clean. 
  5. Remove from oven, and cover loaves tightly with foil. Allow to steam for 10 minutes. Remove foil, and turn out onto a cooling rack. Tent loosely with the foil, and allow to cool completely. 

Notes:

You can easily mix this recipe by hand (the way your grandmother used to - unless your grandmother was Grandma Cuisnart or Nana KitchenAid).

This recipe is fantastic for gift-giving! Make up a few extra batches and share the love with your family and friends around the holidays.


If you like this recipe, make sure to try out other Harris Sisters tried and true Pumpkin Recipes:

Roasted Pumpkin Puree (stock up on this for recipes throughout the season!)

Whew! I feel like Bubba and Forrest:


That's all I have to say about that . . . .

This post contains affiliate links.

Wednesday, July 16, 2014

Focaccia Bread

This recipe for Focaccia bread comes straight from Tuscany.  We learned how to make it when we were there last summer; it was one of our favorites then, and still is today.    It is a traditional Italian flatbread.  Give it a try.  You won't be disappointed, I promise!!


Focaccia Bread
1 package active dry yeast (2 1/4 tsp)
2/3 cup warm water
2/3 cup warm milk
16 oz all purpose flour, plus more for kneading
2 Tbsp olive oil
1 Tbsp sugar
1 tsp salt

  1. Proof yeast in warm water (approx 100-110 degrees F).  Mix together with the rest of the ingredients.  Knead dough until smooth.  Put a little olive oil in a bowl, and roll your dough in it to coat evenly. 
  2. Cover bowl with plastic wrap, drape with a clean dish cloth and set aside in a warm location (70-80 degrees F).  Let rise for 1 1/2 hours. 
  3. When doubled in size, punch down and spread out on a well oiled (olive oil) cookie sheet.  Cover with plastic wrap and towel and let rise again for about 30 minutes. 
  4. Poke dimples all over the top of the dough, then drizzle with up to 1/2 cup of olive oil.  Top with course sea salt and desired toppings including: dried olives, rosemary, thyme, sage, oregano, parmesan cheese, sundried or freshly sliced tomatoes. 
  5. Bake for 25 minutes in a 400 degree oven.
Notes:
For this recipe, we used 8 oz bread flour and 8 oz all purpose flour, but we have made it both ways with success. 

We topped our bread with olive oil, fresh rosemary, fresh sliced tomatoes, and sea salt.  However you choose to top your bread, don't omit the olive oil and sea salt.  It is what makes this recipe so special!

For a crispy bottom, bake your bread on the lowest shelf in your oven.  

Tuesday, July 15, 2014

Nutella Banana Swirl Bread

This is another tried and true recipe that will help you use up all of those finicky bananas that seem to go bad before you've had a chance to eat them! And, hey, it's got Nutella in it, so what's not to like?


Nutella Banana Swirl Bread
2 cups all purpose flour
3/4 tsp baking soda
1/2 tsp salt
1/2 stick butter, softened
1 cup granulated sugar
2 large eggs
1 1/4 cup ripe bananas, mashed (about 2 bananas)
1 tsp vanilla
1/3 cup milk
3/4 cup Nutella


  1. Preheat oven to 350 degrees. Spray a loaf pan with cooking spray. Set aside.
  2. In a small bowl, mix together flour, baking soda, and salt.
  3. In a large bowl, beat together sugar and butter with an electric mixer at medium speed until blended. Add eggs one at a time, beating well after each addition. Add banana, milk, and vanilla. Beat mixture until blended.
  4. Add flour mixture. Beat at low speed until flour is incorporated, making sure not to over mix.
  5. Spoon Nutella into a small dish and heat in microwave for 15 seconds. Add 1 cup of batter to the Nutella and stir until incorporated.
  6. Spoon 1/2 of batter into prepared pan, followed by 1/2 of Nutella batter, and repeat. Swirl batters together with a knife.
  7. Bake 60 minutes. Cool for at least 15 minutes in the pan and then turn out onto a wire rack to cool for at least another 10 minutes.
Notes:
The Nutella swirls in the bread may seem slightly "gooey" in the center, but I've found that cooking it longer than stated above makes for a drier bread.

This bread is delicious as is, but if you are a "slatherer," you might want to try frosting your slice of bread with a little more Nutella or even peanut butter.

Saturday, January 4, 2014

Cornbread Waffles, Black-Eyed Peas & Collard Greens

Well, it should come as no surprise that THIS family has had its fill of black-eyed peas, collard greens, and cornbread in the new year.

It's a Southern New Year's tradition to eat black-eyed peas and collard greens for good luck. The black-eyed peas represent coins and the collard greens represent cash-money (as Aidyn Kale Walkush calls it). And if you eat them on New Year's day, you're bringing yourself some prosperity. The cornbread? It's gold in color, which equals EVEN MORE money. And, well, it just tastes good with black-eyed peas and collard greens.  


If you have no idea what I'm talking about, then you must not be a dyed in the wool Southerner, bless your heart. If it makes you feel any better, my husband is originally from Ohio, so he had to be eased into this tradition too. :-) 


This year, I decided to change up the way we made the cornbread, so I served it waffle-style. Let me tell you, this was an excellent decision, as it cooked up quickly, and the leftovers also tasted great served for breakfast with syrup and fruit (and according to my husband we'll be making these again to serve with his Kicking Butt and Taking Names Chili).


Cornbread Waffles

3 cups yellow self-rising corn meal mix
2 eggs
2 Tbsp oil
2 cups milk

  1. Preheat waffle maker.
  2. Measure corn meal mix into mixing bowl. 
  3. Beat together eggs, oil, and milk. Stir thoroughly into corn meal mix. 
  4. Prepare waffles according to your waffle maker directions.


Black-Eyed Peas

1 16 oz bag dry black-eyed peas
1 large onion, minced
6 cloves garlic, minced
2 Tbsp olive oil
2 Tbsp butter
2 tsp salt
2 tsp soul food seasoning*

  1. Wash the dry beans. Place them into a pot and cover with at least 2 inches of water. Let them soak 8 hours or overnight. Drain.
  2. In a large pot, melt butter in olive oil. Saute onion and garlic in mixture. Add soul food seasoning.
  3. Add drained beans and enough water to cover beans by one inch.
  4. Bring beans to a boil, then reduce to simmer for 2 hours. At 1 1/2 hour mark, add salt.
Note: If you cannot find soul food seasoning at your local supermarket, you may substitute 1 tsp cayenne pepper.


Sautéed Collard Greens

2 bunches fresh collard greens
1 large onion, minced
6 cloves garlic, minced
1/8 tsp red pepper flakes, if desired
4 Tbsp olive oil
2 Tbsp butter
Salt (to taste)
Pepper (to taste)
Balsamic vinegar (for serving, if desired)
Hot sauce (for serving, if desired)
  1. Remove bottom stalks of the leaves and chop or tear into 1-inch squared pieces. 
  2. Fill your sink with cold water, add chopped collard greens, and soak for at least 10 minutes. (Some people prefer to soak greens overnight.)
  3. Remove the collard greens from the sink, place them in a colander, give them a good rinse, and drain. Complete this step in batches, if needed.
  4. In a large saute pan, melt butter in olive oil. Sauté onion and garlic until onion is translucent. Add red pepper flakes (if using), stirring well to coat.
  5. Add greens (in batches), salt, and pepper to the sauté pan and cook, stirring often, until wilted and tender. 
  6. Reduce the heat to medium-low, cover, and let steam, about 10-15 minutes. 
  7. Serve with balsamic vinegar or hot sauce.
Notes: I use a 12" straight sided saute pan to fit two bunches of collard greens. As the greens cook down, you can add more batches. This is a quick and easy method of making collard greens in much less time than the traditional cooking method.

This post contains affiliate links.

Saturday, December 28, 2013

Cranberry Zucchini Bread

I have made this recipe for years, but I have always made it with blueberries. Since the holidays are upon us, I thought I would change the fruit to cranberries and add a sugared topping (and it turned out delicious). The recipe that follows is the holiday recipe.


Cranberry Zucchini Bread
1/2 c granulated sugar
1 1/2 tsp cinnamon

3 eggs, lightly beaten
1 c vegetable oil
3 tsp vanilla extract
2 1/4 c granulated sugar
2 c shredded zucchini*
3 c all purpose flour
1 tsp salt
1 tsp baking powder
1/4 tsp baking soda
1 Tbsp ground cinnamon
12 oz cranberries (fresh or frozen)*

  1. Preheat oven to 350 degrees.
  2. Grease bottom and sides of two large loaf pans. Mix 1/2 cup of sugar and 1 1/2 teaspoon cinnamon in a small bowl. Dust the bottom and sides of each pan with half of the mixture.
  3. In a large bowl, mix together eggs, oil, vanilla, and sugar. Fold in zucchini.
  4. Beat in the flour, salt, baking powder, baking soda, and cinnamon. Gently fold in the cranberries.
  5. Transfer to prepared loaf pans and sprinkle the remaining cinnamon sugar mixture over the top.
  6. Bake 1 hour 20 minutes in the preheated oven, or until a knife inserted into the center of a loaf comes out clean. Cool 20 minutes in pans, then turn out onto wire racks to cool completely.
Notes:
I think I've mentioned in other posts that we shred our summer garden-harvested zucchini and store it in 1 cup increments in the freezer. That makes for easy baking throughout the year.

The original recipe called for 1 pint of blueberries (fresh or frozen) instead of the cranberries and did not include the cinnamon sugar topping.

If you have a small family, you might want to eat one loaf and freeze one to eat later. However, as tasty as this recipe is, you might also just want to dive into that second loaf!

Tuesday, April 2, 2013

Cheesy Cowboy Cornbread

Here's a quick recipe for you that's sure to please. And it pairs perfectly with other GirlTalk favorites such as Black Bean & Salsa SoupCrock Pot Black Bean Soup, and Kicking Butt and Taking Names Chili. But, truth be told, it's SO GOOD, you just might want to eat it all by itself.


Cheesy Cowboy Cornbread
1 1/2 cups all purpose flour
1/2 cup cornmeal
1/2 cup granulated sugar
2 cups grated cheddar cheese
1 Tbsp baking powder
1/2 tsp salt
2 eggs
1 1/4 cup milk
1/2 cup vegetable oil

  1. Preheat oven to 350 degrees. Grease an 8 X 8 pan.
  2. Stir together dry ingredients and shredded cheese.
  3. In a separate bowl, beat 2 eggs and mix with remaining wet ingredients.
  4. Pour egg mixture into the flour mixture. Stir until everything is moist.
  5. Pour the batter into the greased pan.
  6. Bake for 35 to 45 minutes or until a toothpick inserted in the center comes out clean and the edges are light brown.

Monday, January 7, 2013

Pesto Swirl Bread

I think it's rare nowadays for people to make bread from scratch. But THIS bread is totally worth it. (And, I'll share a secret with you - it's not even that difficult to make.) It's the perfect companion to any Italian dish you might serve up.


Pesto Swirl Bread
1 1/4 cups warm water
1 Tbsp rapid rise yeast
4 cups all purpose flour
1/3 cup extra virgin olive oil
5 tsp sugar
2 3/4 tsp salt
1 8 oz. jar prepared pesto
Olive oil, salt, pepper, parsley and Parmesan cheese for the top


  1. In a mixer bowl, hand whisk water and yeast together and let stand for 2-3 minutes to dissolve yeast. Add one cup flour and stir briefly. Then stir in oil, sugar, salt, and remaining flour. Mix ingredients and then attach dough hook and knead on lowest speed 6 minutes until smooth and elastic, adding more flour if necessary.
  2. Remove dough hook from machine and dough from bowl. Form dough into a ball and place in an oiled bowl. Cover bowl and set dough aside to rise. Let rise for 45-90 minutes or until almost doubled in size.
  3. Gently deflate dough on a lightly floured surface. Let rest 10 minutes and then roll out to a 20 X 20 inch shape. If dough resists, let it rest a few more minutes then roll out gently.
  4. Spread pesto evenly all over dough's surface. Roll up jelly roll style. Shape into an "S" shape and put on a large, sturdy baking sheet.
  5. Drizzle olive oil on top of dough and dust with salt, pepper, parsley, and Parmesan cheese. Set aside to rise until puffy, about 45-60 minutes.
  6. Preheat oven to 350 degrees. Bake 35 minutes or until well browned. Cool to warm on baking sheet before serving.

Saturday, November 10, 2012

Bread Bowls

I have an easy peesy recipe for you!  Okay, so this may be a little time consuming, but the ingredient list for this is pretty small and after you make these a couple of times, you will be a pro.  This is a Bread Bowl:


I know.  I know.  It doesn't look much like a bowl, but after I started making these regularly, Howard likes the bread so much, he cuts it up and eats it with butter!

The colder it gets, the more soups and chili I am making.  You could also do sloppy joes with these. It's pretty versatile.  It's kind of like an open face sandwich, but the bread is definitely the star of the show.

As long as you don't mind your kitchen looking like this,


you're good to go.  In other words, it may behoove you to rope the hubby in with the old "I'll cook, if you clean" routine.  ;-)

I also have to say that I consider this recipe to be pretty headache-free because the ingredients are already in my pantry.  (except maybe for the yeast)


Ingredients:

2 (.25 oz) pkg Active Dry Yeast
2 1/2 Cups Warm Water
2 tsp Salt
2 Tbsp Vegetable Oil
7 Cups All Purpose Flour

1 Tbsp Cornmeal
1 Egg White
1 Tbsp Water

Directions:

  1. Dissolve yeast in warm water (about 10 minutes).
  2. Add salt, oil and 4 cups of flour to the yeast.  Beat well with an electric mixer.  Stir in the remaining flour 1/2 cup at a time with mixer on medium.
  3. Plop your dough down onto a flour-y work surface and knead for 6 minutes.  (If it gets sticky add more flour, that's the trick!)  Lightly oil in a bowl and cover.  Let rise for 40 minutes.
  4. Punch dough down and cut into 8 portions.  Shape each one into a ball.  Place balls on greased baking sheet that has been sprinkled with cornmeal.  Cover for 35 minutes.  (I usually spray my saran wrap with a little Pam so that it doesn't stick during this step.)
  5. Mix together egg white and water and brush half onto rolls.
  6. Bake for 15 minutes at 400 degrees.  Brush with remaining egg wash and bake for 10 to 15 minutes more.
  7. Let cool on wire racks for 15 minutes.
  8. To make a "bowl," cut the top off and hollow out the center.  Then, pour in your favorite soup or chili.
Don't get discouraged by this one!  I almost was at first because it is definitely a process, but after you make them a couple of times, you'll be a pro.

They definitely spruce up a soup.  If you're feeling a little sassy after all that bread bowl making, you can also sprinkle them with cheese and basil and put them under the broiler before you add the soup!


You Might Also Be Interested In