Showing posts with label desserts. Show all posts

Wednesday, November 13, 2024

Orange Balls

The Harris Sisters used to make this no-bake candy recipe at Christmas time growing up. With it's distinct orange and coconut flavors, it makes a great addition to your holiday treat table and with just 7 ingredients, this old-fashioned recipe is easy to make.


Orange Balls

1/2 cup (1 stick) butter, at room temperature

16 oz confectioner's sugar

1/2 cup granulated sugar

12 oz vanilla wafers, finely crushed

14 oz bag sweetened flaked coconut, divided

6 oz frozen orange juice concentrate, thawed

1 cup chopped nuts


  1. Cream together butter and sugars.
  2. Add crushed vanilla wafers, half of coconut, and orange juice concentrate and mix together.
  3. Roll into 1 1/2 inch balls.
  4. Roll balls into the remaining coconut and place on a cookie sheet lined with parchment paper.
  5. Chill in refrigerator until firm. 
  6. Store orange balls in refrigerator in an airtight container until ready to serve.


Notes:

Recipe makes about 60 orange balls.

Remember to keep orange balls chilled in the refrigerator until you are ready to serve them. Only serve the number of orange balls you need at first, then replenish your serving platter throughout the party as the first ones get eaten.


Wednesday, October 23, 2024

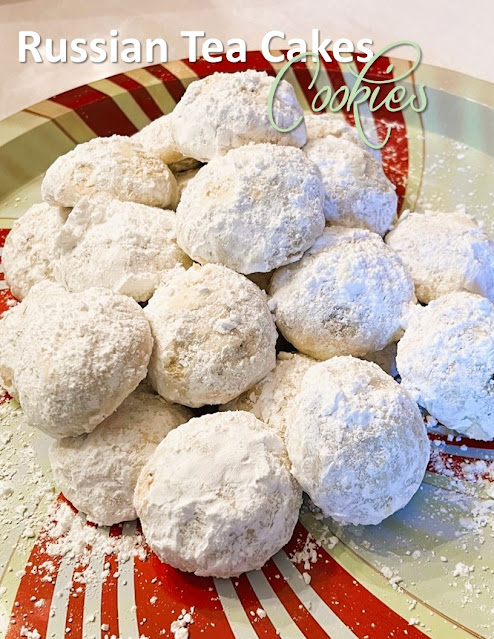
Russian Tea Cakes

Russian tea cakes are an easy-to-make cookie that because of their snowball-like appearance make a perfect addition to your holiday cookie rotation. Are Russian tea cakes actually Russian? No. Are they cakes? Also no. But are they delicious? YES!!!


Russian Tea Cakes

Cookies

1 cup (2 sticks) unsalted butter at room temperature

1/3 packed cup confectioners sugar

1 cup lightly toasted* walnuts, finely chopped 

1/8 teaspoon salt

1 teaspoon vanilla extract

2 cups plus 2 tablespoons all-purpose flour

Coating

Additional confectioners sugar

  1. Line a cookie sheet with parchment paper or a silicone cooking mat.
  2. Add all cookie ingredients to a large mixing bowl.
  3. Use your hands to mix together until all ingredients are incorporated into a dough.
  4. Use a 1-inch scoop to portion dough and roll into balls.
  5. Place balls a few inches apart on the cookie sheet to allow for spreading while baking.
  6. Bake at 350 degrees for 15-25 minutes, checking at the 15 minute mark. Remove from oven when cookies are light golden brown on the bottom.
  7. Let cool for 5 minutes.
  8. Toss cookies in additional confectioners sugar and return to baking sheet to continue cooling. The first coating of sugar will melt into a glaze as the cookies continue to cool.
  9. Let sugared cookies cool completely, then toss in confectioners sugar again to ensure the finished cookies have a generous coating of confectioners sugar.
  10. Store the Russian tea cakes in a shallow, airtight container at room temperature for up to one week.


Notes:

Toast the walnuts on a dry pan over medium heat, tossing frequently for about 5 minutes or until nuts are lightly golden and fragrant then remove to a cutting board to cool and chop. Toasting the nuts will bring out their best flavor and will make your cookies even better.

Nuts can burn very quickly. Never walk away from the pan, and be sure to toss the nuts frequently. As soon as you can smell the aroma of the nuts, they are done toasting.

Recipe makes between 28 to 32 Russian Tea Cakes.

Wednesday, April 10, 2024

Pig Pickin' (Mandarin Orange) Cake

You might have seen this Pig Pickin' Cake called everything from Mandarin Orange Cake to Pineapple Mandarin Sunshine Cake to Pineapple Sunset Cake. This light and fluffy cake is easier than ever to make because it starts with a box cake mix. It has mandarin oranges beaten into the batter and pineapple is mixed into in the Cool Whip frosting.

Perfect for picnics, summertime potlucks, and BBQs, this old-fashioned cake originally got one its name from how popular it was to bring it along to Southern pig pickins. And, of course, North Carolina (the Harris Sisters' home state) is where this cake seems to have originated.


Pig Pickin (Mandarin Orange) Cake

Cake
1 box of yellow cake mix (plus ingredients the box mix calls for)
11 oz can mandarin oranges (drained)

Frosting
20 oz can crushed pineapple (drained)
3.4 oz box of instant vanilla pudding
12 oz Cool Whip

Garnish
marischino cherries (optional)
Mandarin oranges (optional)

  1. Preheat oven to 350 degrees. Spray a 9 x 13 baking dish with cooking spray. Set aside.
  2. Prepare cake mix according to package directions.
  3. Beat in the drained oranges until blended.
  4. Pour into greased 9 x 13 baking dish.
  5. Bake for 30-35 minutes or until a toothpick inserted near the center comes out clean. Remove dish from the oven and place on a wire rack to cool. Allow to cool completely.
  6. Once cake has cooled, prepare the frosting. In a bowl, combine the drained pineapple and dry vanilla pudding mix.
  7. Fold Cool Whip into the pineapple-pudding mixture.
  8. Spread the frosting over the top of the cake.
  9. If desired, garnish with additional Mandarin oranges and maraschino cherries just prior to serving.
  10. Store this cake in the refrigerator.


Notes


If you want larger pieces of oranges in the cake, gently mix or fold them into the batter in step 3.

You can also make this recipe as a layer cake in two 8 inch cake pans, baking for 23-27 minutes or until a toothpick comes out clean.

Keep the cake refrigerated until ready to serve. The cake can be out for about an hour, without direct heat. Refrigerate any leftovers. Cake is best 3-4 days after baking.

Thursday, December 7, 2023

Holiday Peppermint Cake

If you're looking for a new dessert to try this Christmas, look no further! This classic scratch-made white cake is infused with peppermint, topped with creamy peppermint buttercream frosting, and decorated with crushed candy canes.

This festive Christmas candy cane cake is perfect for the holidays! Why? Because Santa's favorite candy is peppermint! Just ask Louis Armstrong: 

"And you gonna flip when Old Saint Nick takes a lick on the peppermint stick." (from Cool Yule)


Holiday Peppermint Cake

Cake Ingredients

3/4 cup unsalted butter, room temperature

1 1/2 cups sugar

3/4 cup sour cream, room temperature

1 tsp vanilla extract

1 Tbsp peppermint extract

6 large egg whites, room temperature

2 1/2 cups all purpose flour

4 tsp baking powder

½ tsp salt

3/4 cup milk, room temperature

1/4 cup water, room temperature

Peppermint Buttercream Ingredients

2 cups unsalted butter, softened

5-8 cups powdered sugar

4 tsp vanilla extract

¼-½ tsp peppermint extract

1 tsp salt

2-4 Tbsp heavy whipping cream (optional)

Garnish

broken candy canes 

To Make the Cake

  1. Prepare three 8 inch cake pans with parchment paper circles in the bottom and grease the sides. Preheat oven to 350°F.
  2. In a large mixing bowl, cream butter and sugar together until light in color and fluffy, about 3-4 minutes. 
  3. Add sour cream, vanilla, and peppermint extract and mix until well combined.
  4. Add egg whites in two batches, mixing until well combined after each. Scrape down the sides of the bowl as needed to be sure all ingredients are well incorporated.
  5. Combine dry ingredients in a separate bowl, then combine the milk and water in a small measuring cup.
  6. Add half of the dry ingredients to the batter and mix until well combined. Add the milk mixture and mix until well combined. Add remaining dry ingredients and mix until well combined. Scrape down the sides of the bowl as needed to be sure all ingredients are well incorporated.
  7. Divide the batter evenly between the cakes pans and bake for about 21-23 minutes, or until a toothpick comes out with a few crumbs.
  8. Remove the cakes from the oven and allow to cool for about 2-3 minutes, then remove to cooling racks to cool completely.

To Make the Frosting

  1. Add butter to a large mixing bowl. Beat butter on high for 1-2 minutes, scraping down sides and bottom of bowl with a rubber spatula.
  2. Add powdered sugar one cup at a time, starting mixer on low speed. Slowly increase speed to high, mixing until smooth after each addition (about 30 seconds or so for each cup). Scrape down bowl every 2-3 cups. If mixture looks grainy, add a small splash of cream when you scrape the bowl.
  3. After adding 5 cups powdered sugar, add vanilla, ¼ teaspoon peppermint, and salt and mix until fully combined. Taste, adding more peppermint if needed. (Do so cautiously, as the flavor intensifies with time, especially in the refrigerator.) Depending on your brand of peppermint, you may need to use more than ½ teaspoon.
  4. Taste your frosting and keep adding sugar, this time ½ cup or less at a time, until it reaches your desired thickness. Add cream as needed, in small splashes, to smooth out the frosting. 
  5. Once you’re happy with the taste and thickness, scrape down the bowl again then beat on high for 3-5 minutes.
  6. Once the frosting is light and fluffy and fully blended, use a rubber spatula or wooden sppon to stir vigorously by hand for about a minute, or until you no longer see any air pockets as you stir.

To Assemble the Cake

  1. Once cakes have completely cooled, use the frosting to generously frost in between layers, the sides, and the top. 
  2. Sprinkle frosted cake with chopped candy canes before serving. (Candy canes can sometimes soften when exposed to moisture, so make sure to add them close to the time you are serving the cake.)


This Peppermint Buttercream Frosting Also Pairs Well with These Recipes

Some of these recipes will help you either make this cake faster (they're doctored recipes) OR will change your final cake with a different flavor. Give these recipes a try with the Peppermint Buttercream Frosting and crushed candy canes for a whole new Christmas dessert!


Wednesday, November 15, 2023

Pecan Pie with Oreo Cookie Crust

This is a fun twist on a Thanksgiving classic. BUT! Because you're elevating the recipe with an all new crust, who says you can't serve it at your next special occasion or upcoming event? 

This is a great recipe to make a day ahead of time and refrigerate until you're ready to serve. (Perfect for any and all get-togethers!)


Pecan Pie with Oreo Cookie Crust

1 3/4 cups Oreo cookie crumbs (approximately 20-22 regular Oreos, crushed)

9 Tablespoons unsalted butter, melted and divided

3 large eggs

3/4 cup plus 2 Tablespoons dark corn syrup

2/3 cup packed dark brown sugar

1 Tablespoon molasses

1 teaspoon salt

1 teaspoon vanilla extract

2 1/2 cups pecan halves


  1. Preheat oven to 350 degrees.
  2. Place Oreos in a food processor and pulse until you have fine crumbs. 
  3. Melt 5 tablespoons butter and combine with cookie crumbs. 
  4. Press mixture into an ungreased 9 inch pie plate and bake for 8 minutes. 
  5. Remove from oven and let cool. 
  6. Lower oven temperature to 325 degrees.
  7. Whisk together remaining 4 tablespoons melted butter, eggs, corn syrup, brown sugar, molasses, vanilla, and salt in a large bowl. Stir in pecan halves.
  8. Pour pecan filling into pie crust. 
  9. Bake for 30 minutes uncovered.
  10. Lightly tent with foil and bake for another 15 minutes. The pie is done when the edges are set and the center is just barely jiggly.
  11. Remove pie from oven to a baking rack to cool completely. Refrigerate cooled pie.

Notes

  • Make sure to use regular Oreos and not double-stuffed ones. Don't remove the cookie filling before crushing them in the food processor.
  • Use the flat bottom of measuring cup sprayed with cooking spray to evenly press the cookie crumbs into the pie plate.
  • Cool the pie for at least two hours before slicing.
  • If you have your own favorite pie crust recipe, feel free to make it and just use this recipe's filling for a traditional Pecan Pie.
  • You can also use steps 1-5 of this recipe to create an Oreo Cookie Pie Crust to pair with your favorite baked pie filling, like Tarheel Pie or Coconut Custard Pie. After baking the crust, fill with filling and bake as directed in the recipe.
  • To use this crust with another no-bake pie filling, chill the crust about 30 minutes before filling, then fill/chill as directed in the recipe.


Sunday, November 5, 2023

No Roll Press in the Pan Pie Crust

I'm going to let you in on a little secret. I LOVE pie, but I will do absolutely anything to avoid making a traditional pie crust.

Why don't you use store bought pie crusts you ask? Well, you'd think that would be the easy solution. And it is probably a go-to for many people. However, if you have food allergies (like I do) or are a vegetarian (like I am), these won't work because so many store-bought pie crusts either contain food allergens or lard.

So, let me share this easy pie crust recipe that you can use for your next pie. You can cater it to whatever food allergies you might have in your family, if needed. (For example, you can use gluten-free flour, soy-free oil, or dairy-free milk.) And the absolute best part? You make this right in the pie pan, so you don't even have to get out your rolling pin!


No Roll Press in the Pan Pie Crust

1 1/2 cups all purpose flour

1/2 teaspoon salt

2 Tablespoons sugar

1/2 cup oil

2 Tablespoons milk

  1. Add dry ingredients to 9-inch pie plate and mix to incorporate.
  2. Add oil and milk and use a fork to mix together until wet ingredients are incorporated.
  3. Press evenly into bottom and sides of plate and flute edges as desired.

Baking Instructions:

  1. If pre-baking crust for an unbaked filling, like a cream pie or lemon meringue pie: 
    • Prick the bottom of the crust and bake at 375 degrees for 15 minutes. 
    • Cool crust before adding filling.
  2. If baking the crust along with the pie filling, like with coconut custard pie or Tarheel pie
    • Preheat the oven to the temperature listed in your pie recipe and pre-bake the crust for 5 minutes in the oven before adding pie filling. 
    • Remove the crust from the oven, add pie filling, and cook filled pie at full time listed in recipe.

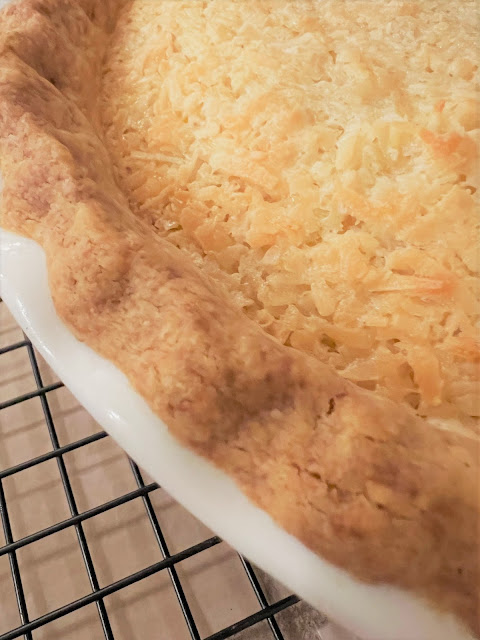
Here's a photo of what it looks like after the pie crust is baked. It turns out a pretty golden color.

Coconut Custard Pie


Notes

  • Pie crust dough should be able to be pressed into the pie pan (up the sides and onto the bottom) and hold its shape.
  • If you find that the pie crust dough is too dry when you're finished mixing, add more milk in small increments to achieve the correct consistency.
  • If you find that the pie crust dough is too wet when you're finished mixing, sprinkle with more flour to achieve the correct consistency.
  • If you omit the sugar, you can use this pie crust for savory dishes, like your favorite quiche recipe.
This recipe is so easy to make, I enlisted the help of my youngest son, Jaxon, to help me make some of them. This is him fluting the edges of one of the crusts. If my teenager can make this recipe, so can you!


I hope you enjoy this new recipe! I've got it queued up for all my Thankgiving pies!

Monday, February 20, 2023

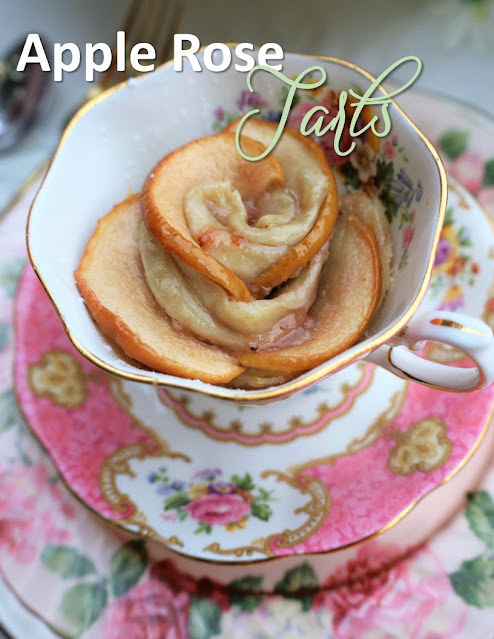
Apple Rose Tarts | How to Make Puff Pastry Apple Roses

Whether you're throwing a wedding shower, baby shower, tea party, or Mother's Day celebration, wow your guests with these tiny glazed apple rose tarts. Perfect for serving alongside your other party appetizers, these individual mini desserts look adorable served in tea cups.


Apple Rose Tarts

2 sheets frozen puff pastry dough

2 medium pink or red apples like Pink Lady or Fuji

juice from half a lemon

4 Tbsp. strawberry preserves

1 Tbsp. water

powdered sugar for dusting


  1. Thaw puff pastry sheets at room temperature.
  2. Preheat oven to 350°F. Grease a 12-cup muffin tin. Set aside.
  3. Remove core from apples. Using a mandoline slicer, slice apples as thin as possible. (The thinner the apples, the more pliable they will be, which will prevent them from breaking when rolling.)
  4. Place apple slices into a medium, microwave-safe bowl. Fill bowl with enough water to cover apple slices. Mix in lemon juice to prevent apples from browning. Heat bowl of apples for about 1-2 minutes in the microwave or until apples are soft and pliable.
  5. Lightly flour a pastry board. Place puff pastry sheets on board and slice each sheet into six equal strips.
  6. In a small bowl, add strawberry preserves and 1 Tbsp. water. Stir together and then heat in the microwave for about 20 seconds, or until warm and easy to spread. Spread a thin layer of  preserve mixture on one side of each strip of dough.
  7. Line apple slices on the upper half of each strip of dough, so that they are sticking out partially, with the skin part of the slices sticking out above the dough. (You don't want too much of the apple sticking out above the dough, otherwise this part of the apple will overcook in the oven. You just want about 1/3 sticking out.) Overlap the apple slices when lining them on the strip of dough. Fold up the bottom half of the dough.
  8. Starting at one end, carefully roll up the strip of dough, forming a tight spiral. Stretch the end of the dough and pinch to close. Place into greased muffin tin. Repeat with remaining dough.
  9. Place muffin pan into the lower half of the oven. (This will prevent the apples from browning too fast.) Bake for about 40 minutes or until puff pastry is fully cooked.
  10. Dust apple roses with powdered sugar right before serving.

If you're planning a party, make sure to check out these other recipes for finger foods:

Sunday, February 5, 2023

Cheerwine Pound Cake

The star of this pink pound cake recipe is Cheerwine soda -  or more specifically "The South's unique cherry soft drink." While not everyone may be familiar with this soda, if you're from the South, you probably know all about the distinct cherry flavor of Cheerwine.

This cake capitalizes on that cherry flavor and adds in a complementary almond flavor to make a one-of-a-kind bundt cake. 

And it's pink, which makes it perfect for sharing with your Sweetie for Valentine's Day! Serve it up with some maraschino cherries and a side of Cheerwine and you've got a sweet date.


Cheerwine Pound Cake

1 1/2 cups butter softened (3 sticks)

3 cups sugar

5 large eggs

3 cups all purpose flour

1 cup Cheerwine

1/4 teaspoon salt

1/2 teaspoon vanilla extract

1/4 teaspoon almond extract

20 drops red food coloring

maraschino cherries to garnish


  1. Lower the middle oven rack to the next to lowest position (or raise the top oven rack to the next highest position). This will allow enough room for the cake to rise without hitting the rack above it. Preheat oven to 350 degrees. 
  2. In a large mixing bowl, cream together butter and sugar. Cream until mixture is light and fluffy.
  3. Add eggs to the mixture one at a time and beat well.
  4. Alternate adding flour and Cheerwine, and mix until incorporated.
  5. With mixer on low speed, add salt, extracts, and food coloring.
  6. Thoroughly grease a bundt pan and add batter to pan.
  7. Bake approximately 1 hour 10 minutes or until toothpick inserted into the center of the cake comes out clean.
  8. Allow to cool in the pan for about 10 minutes before flipping out onto wire rack. Glaze with Simple Vanilla Glaze, if desired (recipe follows).

Simple Vanilla Glaze

1 cup confectioner's sugar, sifted
1-2 Tablespoons milk
1 teaspoon vanilla extract 

  1. Combine sugar with 1 Tablespoon of milk. Add additional milk if needed for desired thickness.
  2. Drizzle onto completely cooled cake by the spoonful.

Notes:

This recipe makes a very thick batter.

While the Cheerwine itself lends some of the coloring to the cake, most of the pink color comes from the food coloring that you'll add. If you'd like a deeper pink, add more food coloring.

If you can't find Cheerwine in your area, you can substitute another cherry flavored soda, such as Cherry Coke, Cherry Pepsi, or Cherry Dr. Pepper.

The flavor that comes through the most in this cake is the almond extract. If you're a big fan of the cherry flavor of Cheerwine, you might want to substitute cherry extract for the almond extract. You can also add cherry extract to the glaze instead of vanilla, if desired.

We opted to make the cake without a glaze, and it was delicious!

Other Soda-Flavored Cakes You Might Like:

If you're a fan of cherries, make sure to check out these other cherry recipes too!

Monday, December 12, 2022

How to Make Ol' Roy Puppy Chow for a Christmas Vacation Party

Our family recently hosted a Christmas Vacation-themed party, and one menu item that we knew we had to include was Puppy Chow. You may also know these as Muddy Buddies. But of course, when it hit our party table, we labeled it Ol' Roy Puppy Chow. 

This was to pay homage to the scene in the movie where Cousin Eddie fills his entire shopping cart with nothing but dog food and then when Clark casually adds a package of lightbulbs, they get obliterated with a GIANT bag of . . . . you guessed it . . . Ol' Roy!

Harris Sister Misty brought this no-bake sweet treat to our party, and it was a hit. And, of course, she served it in a big stainless steel dog bowl to add to the effect. So, we recommend that too!


Cousin Eddie's Ol' Roy Puppy Chow

9 cups crispy rice cereal (Chex or Crispix)
1/2 cup peanut butter
1 cup semi-sweet chocolate chips
1 1/2 cups confectioners sugar

  1. In a saucepan over low heat, melt the chocolate. Add peanut butter and mix until smooth. Remove from heat.
  2. Place the cereal in a large bowl and pour the chocolate peanut butter mixture over the cereal. Stir GENTLY with a spatula until coated. Make sure you don’t break up the cereal, you want it to stay in whole pieces.
  3. Pour powdered sugar into a large Ziploc bag, add coated cereal, seal the bag, and shake until well coated. 
  4. Spread the puppy chow in a single layer so it can cool and not stick together. Let sit until the chocolate is hard.
  5. Store in an airtight container.

Notes:

After the puppy chow is dry, you can put it in a large airtight container and store on the counter for up to 2 weeks. 

If your kitchen is warm, you can store the puppy chow in the refrigerator to make sure the chocolate doesn’t melt.

You can also put puppy chow into decorative Christmas tins or bags to give to friends, family, and neighbors for the holidays. It makes an easy homemade holiday gift, and it's one that the kiddos can help you make!

Tuesday, December 6, 2022

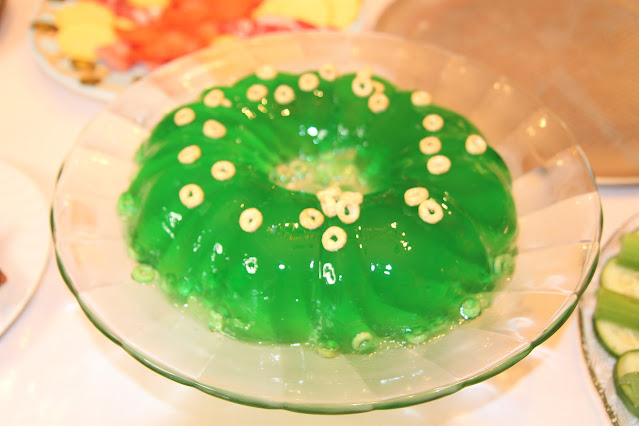
How to Make Aunt Bethany's Jello Mold from Christmas Vacation

Long-time readers of the blog know that we are BIG FANS of the movie Christmas Vacation. So, what better way to celebrate our all-time favorite Christmas movie than to make Aunt Bethany's jello mold for our Christmas Vacation-themed party this year.

For those of you who may not be as familiar with the movie, Aunt Bethany is the lovable older aunt in the movie. She enters with Uncle Lewis bearing wrapped Christmas presents, which are later revealed to be 1) her cat and 2) a lime jello mold.

When they serve the jello mold at Christmas Eve dinner, they reveal that it is topped with dry cat food!


Aunt Bethany's Jello Mold

Non-stick cooking spray
1 standard sized Bundt pan
1/2 cup Cheerios
3 packs lime Jello (3 oz. size)
amount of water needed to prepare 3 packs of Jello, according to package directions

  1. Spray the Bundt pan generously with non-stick cooking spray. Set aside. 
  2. Cut about 1/4 cup of your Cheerios in half. Mix with the remaining Cheerios.
  3. Sprinkle 1/4 cup of the whole and halved Cheerios into your sprayed Bundt pan. Keep the rest for later.
  4. Prepare Jello according to package directions and pour into the prepared Bundt pan. If your Cheerios have moved around during the pouring process, you can use a spoon to redistribute them now. Refrigerate Bundt pan uncovered and allow Jello to set overnight.
  5. The next day, remove the Bundt pan from the refrigerator and allow it to sit in a large bowl of warm water for 30 seconds to 1 minute. This will loosen up the Jello from the pan.
  6. Remove from the bowl of water. Place a large plate on top of the pan and flip over.
  7. Top off the Jello with remaining Cheerios. Refrigerate plated Jello mold until time for your party.


Notes:

If you have never made Jello before, it is most important to use boiling water and ice-cold water to ensure that it sets. (Make sure to actually boil a pot of water and then ladle it into a measuring cup to measure out the amount needed for the recipe.)

Make sure to set your Bundt pan on a level surface in the refrigerator or your Jello mold will set unevenly.

When dipping your Bundt pan into warm water to loosen, pay special attention to what the edges of the Jello look like. You will notice when it starts to come away from the sides of the Bundt pan and it should be ready to unmold then. The amount of time needed for this step will also depend on the temperature of water you use. So, the best indicator for this step is when the edges of Jello pull away from the Bundt pan.

Use a large plate for unmolding. If you've never unmolded a Jello mold before, this part may be tricky. We've had success by having one person hold the two handles on the Bundt pan and the plate together and the other person hold the bottom of the Bundt pan and flipping the whole thing simultaneously. (1, 2, 3, flip!) We also flipped the whole thing while standing over the sink "just in case."

If you have any melted Jello that makes its way onto your plate, you can easily clean that up with a wet paper towel for presentation purposes. (But remember, Aunt Bethany's jello mold was dripping out of her wrapped package when she arrived, so you don't need to clean it up too much!)

Friday, September 23, 2022

Chocolate Peanut Butter Poke Cake

If you're looking for a rich and decadent dessert that's sure to please all the chocolate and peanut butter lovers in your life, then look no further. This easy-to-make sheet cake recipe ticks all those boxes!

With tastes similar to a candy bar, a small piece of this delicious cake will do the trick!


Chocolate Peanut Butter Poke Cake

Cake

Box of chocolate cake mix

3.9 oz. box of instant chocolate pudding

an extra egg if box mix only calls for 2 eggs

Peanut Butter Sauce

16 oz. jar of creamy peanut butter

2 tablespoons butter

2 tablespoons water

Frosting

4 cups powdered sugar

1 cup butter, softened

1 teaspoon vanilla

2 tablespoons or more of milk

Toppings

2 tablespoons chopped peanuts

2 tablespoons chocolate sauce


  1. Preheat oven according to package directions. Spray a 9 x 13 baking dish with cooking spray and set aside.
  2. Mix cake according to package directions, adding a total of 3 eggs and the chocolate pudding mix. Bake at the temperature specified on box. 
  3. Remove cake when a toothpick inserted into the center of the cake comes out clean. Cool on a cooling rack. 
  4. Poke evenly spaced holes in the cake with the end of a wooden spoon.
  5. In a small saucepan, heat peanut butter, butter, and water to make peanut butter sauce. Stir until the peanut butter is melted and drips easily off a spoon.
  6. Reserve 2 tablespoons of the peanut butter sauce and pour the remaining amount over the cake.
  7. Put in refrigerator to set. (about 20 minutes)
  8. Meanwhile make the frosting by mixing powdered sugar, butter, vanilla, and milk together. Add more milk, if needed to get a spreadable consistency.
  9. Remove cake from refrigerator and spread the frosting on top of the cake. 
  10. Decorate cake by drizzling with reserved peanut butter sauce and chocolate sauce. Then sprinkle chopped peanuts over top of cake.

If you're a fan of doctored cake recipes, make sure to give these a try:


Monday, November 8, 2021

The BEST Chewy Triple Chocolate Cookies

These cookies have been a favorite in our family for years, and if you're a fan of chocolate, I think you'll love them too! What sets them apart from other cookies is their fudgy texture.

If you're looking for a new recipe to add to your holiday baking rotation, then look no further. This one is sure to please adults and kids alike (and is sure to be a standout at your next Christmas cookie exchange)!


Triple Chocolate Cookies

2 cups all purpose flour

1/2 cup cocoa powder

2 tsp baking powder

1/2 tsp salt

28 oz. semisweet chocolate chips, divided

4 large eggs

2 tsp vanilla extract

2 tsp instant coffee or espresso powder

10 Tbsp unsalted butter, softened

1 1/2 cups packed light brown sugar

1/2 cup granulated sugar


  1. Sift together flour, cocoa, baking powder, and salt in a medium bowl. Set aside.
  2. Place 16 oz. semisweet chocolate chips in heatproof bowl. Heat in microwave for 1 minute. Remove from microwave and stir. Repeat until melted and smooth.
  3. Beat eggs and vanilla together lightly. Sprinkle with coffee powder to dissolve. Set aside.
  4. In bowl of standing mixer fitted with a paddle attachment, beat butter at medium speed until smooth and creamy, about 5 seconds. Beat in sugars until combined, about 45 seconds. Mixture will look granular. 
  5. Reduce speed to low and gradually beat in egg mixture until incorporated, about 45 seconds. Add chocolate in steady stream and beat until combined, about 40 seconds. Scrape bottom and sides of bowl with rubber spatula. 
  6. With mixer at low speed, add dry ingredients and mix until just combined. Do not overbeat. 
  7. Mix in remaining 12 oz. of chocolate chips with a spoon until incorporated. Cover with plastic wrap and let stand at room temperature until mixture is scoopable and fudgelike, about 30 minutes.
  8. Adjust oven racks to upper-middle and lower-middle positions and heat oven to 350 degrees. Line baking sheets with parchment paper. 
  9. Leaving about 1 1/2 inches between each ball, scoop dough onto lined cookie sheets with 1 1/2 Tbsp cookie scoop.
  10. Bake until edges of cookies have just begun to set but centers are soft, about 10 minutes. 
  11. Cool cookies on sheets about 10 minutes before removing to wire racks to cool completely.


Notes:

This recipe makes about 3 1/2 dozen cookies. You can make a lot of cookies in one batch and they're unique, so they're also a great choice for if you're baking for charity. We've donated these cookies before as part of Aidyn's service organization's volunteer hours.


The balls of raw cookie dough should be about the size of a golf ball. If you make the cookie dough smaller, the cookies won't turn out as chewy. I use the OXO Good Grips Cookie Scoop in size medium, which is the equivalent of the 1-1/2 Tbsp. size needed for this recipe.

The cookies may appear under baked at first, but they will firm up as they cool. Baking them longer will also affect their fudgy texture.

If you're a fan of flavored baking chips (sometimes sold around the holidays), they might be nice to substitute for the 12 oz. of chocolate chips that you add in step 7. For years, we made this recipe with raspberry flavored baking chips when they were readily available. But it might also be fun to substitute caramel, cherry, mint, or peanut butter, according to your specific tastes. Another fun addition around Halloween or fall-time might be to substitute Reese's Pieces in this step.

Because the recipe makes so many cookies, you could also divide the dough before adding the baking chips in step 7. That would allow you to make a half-batch of triple chocolate cookies and a half-batch of double chocolate cookies with your choice of flavored chips.

Make sure to check out these other favorite Harris Sisters holiday cookie recipes:


This post contains affiliate links.

Thursday, September 16, 2021

Holiday M&M Cookie Bars

These chewy cookie bars are packed with chocolate chips and when you decorate them with your choice of colored M&M's, they make the perfect addition to your holiday party table. Use the classic bag of M&Ms for a dessert any time of year (or to celebrate birthdays!), or use the limited edition seasonal M&Ms to color coordinate with Valentine's Day, St. Patrick's Day, Easter, Fourth of July, Halloween, and Christmas. The possibilities are endless!


You can cut them in generous portions or into smaller, bite-sized pieces to share. If you love the idea of chocolate chip cookies, but you don't have the time to scoop individual cookies and bake batches of them 10 minutes at a time, then making a BIG chocolate chip cookie in a 9 X 13 pan will be perfect for you. The kids are going to love these yummy cookie bars (and you will too)!


Holiday M&M Cookie Bars

2 sticks of butter at room temperature

1 cup of granulated sugar

1 cup of firmly packed brown sugar

3 large eggs

1 1/2 teaspoons of pure vanilla extract

3 cups of all purpose flour

3/4 teaspoon of baking soda

3/4 teaspoon of salt

1 1/2 cups of M&M's

1 1/2 cups of chocolate chips


  1. Preheat oven to 350 degrees.
  2. Line a 9x13 baking dish with foil, leaving some overhang to make removal easier.
  3. Spray foil generously with nonstick cooking spray.
  4. Beat butter, granulated sugar, and brown sugar together until fluffy.
  5. Add in eggs and vanilla extract and continue to beat.
  6. Lower speed of mixer and add flour, baking soda, and salt. Mix until combined.
  7. Add 1 cup of M&M's and 1 1/2 cups of chocolate chips and stir with a spoon until incorporated.
  8. Transfer cookie dough to prepared baking dish.
  9. Evenly press 1/2 cup of M&M's into top of cookie dough.
  10. Bake 30 to 35 minutes.
  11. Let cool completely. Use foil overhang to remove from pan and cut into squares for serving.


This post contains affiliate links.

Monday, August 16, 2021

Lemon Blueberry Quick Bread

When our recent blueberry picking excursion left us with a huge bounty of blueberries, we started looking for yummy ways to incorporate them in quick and easy recipes.  This lemon blueberry bread came together quickly and was a huge hit with the whole family.  I love this bread for breakfast with coffee, while the rest of my family enjoyed it as a dessert bread.  Either way, it's a winner.  Bonus points if you make two and freeze one for later.  You will thank yourself!  


Lemon Blueberry Quick Bread

1/3 cup butter, melted

1 cup sugar

3 Tablespoons lemon juice

2 large eggs, room temperature

1 1/2 cups all purpose flour

1 teaspoon baking powder

1/2 teaspoon salt 

1/2 cup 2% milk

1 cup fresh or frozen blueberries

1/2 cup chopped nuts

2 Tablespoons grated lemon zest


Glaze: 

2 Tablespoons lemon juice

1/4 cup sugar


  1. Preheat oven to 350 degrees. 
  2. In a large bowl, beat butter, sugar, lemon juice, and eggs.  In another bowl, combine flour, baking powder, and salt. Stir into egg mixture alternatively with milk, beating well after each addition.  Fold in blueberries, nuts, and lemon zest. 
  3. Transfer to a greased loaf pan.
  4. Bake 60-70 minutes, or until a toothpick inserted in the center comes out clean. 
  5. Cool for 10 minutes before removing from pan to a wire rack. 
  6. Combine glaze ingredients; drizzle over warm bread.  Cool completely. 


And if all this has you wishing for more blueberry recipes, we've got you covered.  Check these out: 

Wednesday, August 11, 2021

Hot Fudge Cake

If you're a fan of chocolate cake, but you'd like to try something new, then I've got the recipe for you! This hot fudge cake is surprisingly simple to make at home. Similar to chocolate lava cakes that are a staple of restaurant dessert menus, this cake has a crispy outside and on ooey-gooey inside. It's best served warm with a scoop of vanilla ice cream on top. I PROMISE this recipe won't disappoint!


Hot Fudge Cake

1 cup all purpose flour

3/4 cup sugar

6 Tablespoons cocoa powder, divided

2 teaspoons baking powder

1/4 teaspoon salt

1/2 cup milk

2 Tablespoons canola oil

1 teaspoon vanilla extract

1 cup packed brown sugar

1-3/4 cups hot water

Vanilla ice cream to serve, optional


  1. Preheat oven to 350 degrees. 
  2. In a large bowl, whisk flour, sugar, 2 Tablespoons cocoa powder, baking powder, and salt. In another bowl, whisk milk, oil, and vanilla until blended. Add wet ingredients to dry ingredients and stir just until moistened. Transfer to an ungreased 9-inch square baking pan. 
  3. In a small bowl, mix brown sugar and remaining cocoa powder. Sprinkle mixture over batter. Pour hot water over top. (Do not stir.)
  4. Bake 35-40 minutes. 
  5. Serve warm. If desired, top with vanilla ice cream.

If chocolate cake is your absolute favorite, give these other Harris Sister recipes a look-see:

Wednesday, April 7, 2021

Lemon Velvet Cake

We recently made this cake for Easter lunch, and it did not disappoint. This old-fashioned recipe for a lemon velvet cake hits the spot with not only the lemon flavors in the cake but also a creamy lemon cream cheese frosting. I cannot begin to tell you how delicious this cake was.

If you're looking for a new springtime dessert recipe now that warm weather is upon us, give this made-from-scratch cake a try.


Lemon Velvet Cake with Lemon Cream Cheese Frosting

Lemon Velvet Cake

2½ cups all purpose flour

1 teaspoon baking soda

1 teaspoon baking powder

1 teaspoon salt

1¾ cups granulated sugar

3/4 cup vegetable oil

1/4 cup butter, softened

2 eggs

2 teaspoons pure vanilla extract

1 tablespoon pure lemon extract

1 heaping teaspoon lemon zest (from 1-2 lemons)

1 cup buttermilk

1/2 teaspoon white distilled vinegar

1/3 cup hot lemon water (hot water mixed with 2 tablespoons fresh lemon juice)

6 drops yellow food coloring

Lemon Cream Cheese Frosting

2, 8 oz. blocks of cream cheese, softened

8 tablespoons unsalted butter, softened

1 ½ teaspoons pure vanilla extract

1 ½ teaspoons pure lemon extract

1 ½ heaping teaspoons lemon zest (from 2 lemons)

5 cups powdered sugar

2 teaspoons lemon juice

5 drops yellow food coloring


Lemon Velvet Cake

  1. Preheat oven to 325 F. Thoroughly grease and flour two 9-inch cake pans. Set aside.
  2. In a large bowl, sift together flour, baking soda, baking powder, and salt. Set aside.
  3. In another large bowl, mix together sugar, oil, and shortening.
  4. Mix in eggs one at a time.
  5. Mix in vanilla extract, lemon extract, and lemon zest.
  6. Combine dry ingredients into wet ingredients, alternating with the buttermilk.
  7. Mix together the distilled vinegar and hot lemon water and mix into the batter.
  8. Mix in the food coloring until you reach your desired shade of yellow.
  9. Pour batter evenly into prepared pans and shake pans to release any trapped air bubbles.
  10. Bake for 25-35 minutes, checking it at the 25-minute mark and adjusting the time, if needed. (See note below about timing.)
  11. When moist crumbs cling to a toothpick inserted into the center of the cake, remove cake from oven. Let cakes rest in the pans until pans are cool enough to touch. The cakes will continue to cook in the pans as they cool.
  12. Once cooled, carefully remove cakes from pans and place on cooling racks to cool completely.

Lemon Cream Cheese Frosting

  1. In a large bowl, mix together cream cheese and butter.
  2. Mix in vanilla extract, lemon extract, and lemon zest.
  3. Mix in powdered sugar until creamy, adding lemon juice one teaspoon at a time to thin it out (if needed).
  4. Mix in food coloring.
  5. Place frosting in the refrigerator to allow it to firm up a bit before frosting the cake.
  6. Stir the frosting until it's creamy and spreadable. Frost the cake.
  7. Decorate the cake with additional lemon zest if desired.


Notes

The batter for this cake is thinner than many cake batters. This is because of the addition of the hot lemon water, which adds to the lemon flavor of the cake.

Don't overbake the cake. The key is to take the cake out of the oven when moist crumbs cling to a toothpick inserted into the center and allow it to finish baking as it cools down in the hot pan. This timing will vary depending on your oven, which is why it's best to check the cake at the 25-minute mark.

Wrap warm cakes in plastic wrap to seal in moisture. (This step is optional and is not specific to this cake!) The plastic wrap traps warmth and creates a moist and tender cake. When the cakes are warm but the pans are cool to the touch, wrap them in plastic wrap for a few hours as they continue to cool (or even overnight if you can't frost the cake right away).


If you're looking for other tried and true dessert recipes for spring, make sure to give these Harris Sisters' favorites a try:

Enjoy!

Sunday, November 15, 2020

Old Fashioned Rice Pudding

This old fashioned rice pudding recipe is a favorite of my husband's. When he was a young boy, his grandma used to make this for him, so I made sure to learn how to make it myself and was surprised at how easy it is to make!

This is a quick and simple dessert recipe that you cook on the stovetop.


Creamy Rice Pudding

1 1/2 cups water
3/4 cup uncooked white rice
2 cups milk, divided
1/3 cup white sugar
1/4 teaspoon salt
1 room temperature egg, beaten
1/2 teaspoon cinnamon
1 tablespoon butter
1/2 teaspoon vanilla


  1. In a medium saucepan, bring 1 1/2 cups water to a boil. Add rice and stir. Reduce heat, cover, and simmer for 20 minutes.
  2. In another saucepan, combine 1 1/2 cups cooked rice, 1 1/2 cups milk, sugar, and salt. Cook over medium heat until thick and creamy, 15-20 minutes. 
  3. Slowly add 1/4 cup of your heated mixture to the beaten eggs while beating constantly to temper the eggs. 
  4. Slowly add in remaining milk, beaten eggs, and cinnamon and cook 2 minutes more, stirring constantly.
  5. Remove from heat and stir in butter and vanilla. Serve warm.
  6. Sprinkle with additional cinnamon if desired.

Notes:


The original recipe calls for 2/3 cup of golden raisins, but my family are not fans of raisins, so we omit these. If your family would enjoy them, you can add them in step 4.

This recipe doesn't work well with other types of grains or rice like long grain rice, brown rice, couscous, quinoa, or wild rice. It's truly a recipe for good old fashioned white rice.

This is a fun recipe to try in the fall since it's served warm and its primary flavor is cinnamon. If you'd like to try a Christmas version, you could change the spices used to 1/2 tsp Allspice (substituted for the cinnamon), 1/2 tsp orange extract (substituted for the vanilla), and 2/3 cup dried cranberries/craisins (substituted for the golden raisins if you used them).


Fun Fact:


The dish you see this rice pudding shown served in is a vintage Anchor Hocking Champagne/Tall Sherbet Dish in the Wexford pattern. I found a set of 12 of them at a thrift store for $5 about a year ago. They were covered in plastic wrap and packing tape within an inch of their life (as thrift stores often do), so I originally mistook the set for Hazel Atlas promotional glassware that originally came in Big Top Peanut Butter. 

However, I purchased the set, and after I got it home and unearthed it from the four layers of plastic wrap and packaging tape and could inspect the pattern better, I realized what I really had. This pattern by Anchor Hocking was produced from 1967 to 1998, which still places it in the vintage category. They currently sell for $5.99 per sherbet glass at Replacements.com, so $5 for a set of 12 turned out to be a steal!

Tuesday, October 20, 2020

Happy Hallo-WINE!!

Just in time for Halloween, The Harris Sisters have yet another Covid-19-friendly Halloween option for you to try.  How about a virtual or socially distanced wine and Halloween candy pairing this year?- for the over-21 crowd, that is...  On our recent Girls' Weekend getaway trip, we did just that.  We sampled a mix of five wines with an even bigger selection of popular Halloween candy, and we offer our feedback on the pairings below.    Read on for all the details on these surprising and sometimes frightful combinations.  


Getting Started


Whether you are looking to pair a few candies with one good bottle of wine, or like we did, try several different combinations, your first step is finding a good list to provide you with great wine and candy matches.  We used the Candy and Wine Matchmaker list from shoptipsy.com/blog.  There are a number of others out there available for you to try.  Or use our notes below to try the pairs that we tried and see how you like them.  

Sweet White Wine Pairings


For this pairing, we chose to use Moscato as our wine, but you could also choose a varietal like Malvasia or Riesling, depending on your preference.   This wine is said to pair well with Candy Corn, Skittles, Starburst, and Hershey's Milk Chocolate.   After sampling all these pairings, we all agreed that Starburst and Moscato, as well as Hershey's Milk Chocolate and Moscato, make excellent pairs.  We agreed less on the other two pairings.  Misty liked the Candy Corn when paired with Moscato.  Donna did not, and I was completely undecided after the tasting, so the jury is still out on that one. And both Donna and I agreed that Skittles and Moscato make a tasty pair.  Misty was less sold on this combination, but we all agreed that it could definitely depend on which flavor(s) of Skittles you are pairing with your wine. 


Rich White Wine Pairings


We chose to use Chardonnay for the rich white wine pairing, but you could also use Marsanne or Viognier instead.  This time, we sampled Candy Corn, Hershey's Milk Chocolate, and Butterfinger with our Chardonnay.   And this time we were completely in agreement.  The Harris Sisters give both the Butterfinger and Hershey's Milk Chocolate a thumb's up when paired with Chardonnay.  And we gave the Candy Corn pairing a resounding MEH- this was neither great nor awful- just somewhere in between.


Sparkling Wine Pairings


For these pairings, we used Prosecco, but you could certainly also choose a Sparkling Rose or Champagne instead.  I should preface this particular review by saying that Harris Sister Misty is not a fan of sparkling wine in general.  Having said that, she was also not a fan of any of these pairings.  We sampled the Prosecco with Candy Corn, Nerds, Kit Kat, and Almond Joy.  And both Donna and I enjoyed all of those pairings.  But the pair of Almond Joy and Prosecco was a surprise in that it topped both of our lists, and I personally would not have predicted that one.  Trust me though, it was a winner!  


Medium Red Wine Pairings


We chose a Red Table Wine for this pairing, but most Red Blends or a Merlot would work here as well.  The medium reds are said to pair well with Kit Kat, Snickers, and Hershey's Milk Chocolate.  We all agreed that Snickers and Kit Kat paired extremely well with the Red Table Wine.  We were more divided on the Hershey's Milk Chocolate pair.  While Donna and I enjoyed it together, Misty did not.  But both Donna and Misty pointed out that I eat Kit Kat wrong.  I didn't know there was a right way.  They both break off one bar and eat from that.  I don't break it.  I just bite it across the top.  Let me tell you, they were deeply disturbed.  


Bold Red Wine Pairings


For this final set of pairings, we used Cabernet Sauvignon, but you could also try a Malbec or Syrah if you prefer.  We paired the Cab with Snickers, Reese's, and Twix.  Harris Sister Misty did not enjoy any of these pairings, but she also typically does not enjoy bold red wines.  Both Donna and I agreed that the Snickers and Reese's paired with the Cab were among the best pairings of the night.  However, the Twix definitely did not measure up.  On a related note, Misty and Donna were once again disturbed to learn that I don't love Reese's.  In fact, I would say I really don't like it at all.  I would never seek out a Reese's; however, when paired with the Cab, it was off the charts good.  Maybe that's what it's been missing for me all this time.  


So there you have it.  The Harris Sisters are nothing if not committed to in-depth research involving wine and candy.  Feel free to call on us if you decide to host your own pairing, and from all of us to all of you, Happy Hallo-WINE! 

You Might Also Be Interested In