Saturday, November 30, 2013

Bells on Bobtail Ring

Poor Bo (Diddly) - I bet he gets that one a lot around Christmas time! And I bet he doesn't mind one bit because he's such a sweet horse. 


Last night the Walkush family braved the cold to take a horse-drawn carriage ride in downtown Winston-Salem, and it was such a wonderful experience!


For $15 per adult and $7 per child ages 3-12 (kids 2 and younger ride free!), you can take a 25 minute ride around downtown Winston-Salem. Or you can choose to upgrade to a private ride for a flat rate of $50 for up to 4 people. Each ride is different and is narrated by the driver. They provide lap blankets (although we brought our own) and wine glasses or hot chocolate mugs upon your request.

Perhaps because we rode near the holidays, the carriage was decorated with white lights. And of course, some of the sites we saw were also decorated for Christmas already!


Camel City Carriage Company is a family owned small business. Last night, our driver was the patriarch of the family, and our greeter was one of his daughters. If you are in or near the Winston-Salem area on a Friday or Saturday night and would like to have a unique experience (perhaps when you visit for the Tanglewood Festival of Lights?), consider giving them a call to schedule a ride. You won't be disappointed!


Friday, November 29, 2013

How to Make Homemade Butter in 10 Minutes

Before you get concerned and think that making homemade butter "sounds difficult" - this is actually a simple process and it serves a purpose for holiday get-togethers. It gives the kiddos something to do while you're traveling to your destination or preparing the rest of the meal. Plus! They get to contribute to the meal.

This will be one of those instances where you will be lucky if you haven't lost all of your marbles (literally).


How to Make Homemade Butter

whipping cream
small jar with tight fitting lid
marble
salt (if desired)
  1. Place whipping cream on counter for a few hours so that it comes to room temperature.
  2. Fill jar three quarters full with cream and insert marble. Close lid tightly.
  3. Shake the jar vigorously until the cream turns into butter and whey (about 10-15 minutes).
  4. Drain whey and remove marble from jar.
  5. Place butter in a bowl and use a spoon to press out any remaining whey (drain).
  6. Rinse with cool water until the whey is gone and the water runs clear. May mix in a pinch of salt if desired.
  7. Transfer to a serving plate and refrigerate.

Here's your finished product:


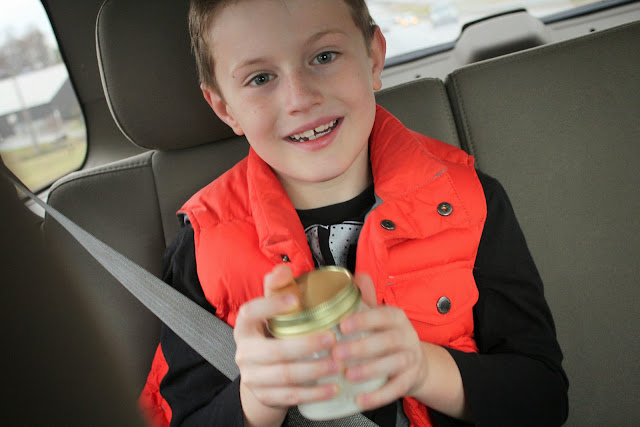
We've made homemade butter twice this year. Once on the way to Daddy's house for our Harris Family Thanksgiving get-together and once on Thanksgiving day. It kept the boys busy both times, and they enjoyed contributing to the meal. Here they are shaking the butter container on the way to Daddy's house:


Now with a process that's so simple, all you have to decide is how you're going to shake it. ;-)


Thursday, November 28, 2013

Happy Thanksgiving from the Peanuts


I hope you're having good times with family today, and I hope all is going well with the Thanksgiving feast preparations, and by Thanksgiving feast, I mean:

  • toast
  • popcorn
  • jelly beans
  • pretzels
  • Jello parfaits
And remember, all the cool kids serve their Thanksgiving feast on ping-pong tables with mismatched (albeit slightly argumentative) lawn chairs.

And if YOU can't get enough of A Charlie Brown Thanksgiving, it airs tonight on ABC at 8:00 PM EST. This will be the 40th anniversary of the beloved cartoon, having originally aired on November 20, 1973. 

Try not to miss this momentous occasion and don't forget to pop over to our 100 Things to Do This Fall List to see how many things you've marked off this week. (I bet you'd be surprised!) 

Tuesday, November 26, 2013

Decorations of Red on a Green Christmas Tree . . .

A few days ago, we brought you a collection of FREE Christmas printables for your "Blue Christmas" but I'm certain that we've got some traditionalists out there who are thinking, "What about me? I want my tried and true red and green!" So, if this is more you're decorating style:


We've got you covered! I have an entire Pinterest Board dedicated to Free Christmas Printables, so check that out for the most up to date freebies.

But, today I've rounded up all FREE Christmas printables with a red and green color scheme. I've included direct links for all of them below. (Neutral colors more your thing? Then check out our Neutral FREE Christmas Printable Roundup featuring chalkboard prints, calligraphy, burlap, and all sorts of schmancy stuff!)


Wood Type Holiday Kit from The Elli Blog:


Wine Tags and Gift Tags from Kind Over Matter:


Gift Tags from Orange You Lucky:


Christmas Tags for You + Yours from Lovely Design:


Whimsical Holiday Tags from A Fanciful Twist:


Santa Stamp from Therapeutic Crafting:


Mega Party Pack 1 and Mega Party Pack 2 from Peonies and Poppyseeds:


Jingle All the Way Party Printables from Serendipity Soiree at Catch My Party:


And just like our Blue FREE Christmas Printable Roundup and Neutral FREE Christmas Printable Roundup, I thought I'd wind down the post with some printables to jazz up your gift items. So, here are some Hershey's Kisses Stickers from Lil' Luna:


And also from Lil' Luna are these labels for jarred sweet treats. They'd be perfect for 1/2 pint jars of Crockpot Apple Butter:


And we'll wrap up with a few printable decor items. First up is a Believe in the Spirit of Christmas Print from Over the Big Moon:


And this one is near and dear to my heart - it's the Harris Sisters' own Sugarplum Ornament. You crafty types can make it yourself in a few easy steps with our very own free printable.


This post contains affiliate links.

Monday, November 25, 2013

How to Care for a Fresh Boxwood Wreath

I have always loved the look of a fresh boxwood wreath, but until now I found them to be quite expensive and a little hard to find.  They still aren't as popular as a traditional evergreen wreath. Although, they would honestly be easy enough to make if you have large boxwood bushes in your yard that you don't mind trimming a little for the sake of a fabulous wreath.  

In any case, our boxwoods are still quite small, and can't spare any cuttings just yet.  Not to fear though, Trader Joe's has come through once again!  While we were out this weekend doing a little grocery shopping, I spied the most fabulous fresh boxwood wreaths for sale there for only $9.99! They were big (22 inches) and quite full.  I quickly snapped one up and brought it home.  

And here she is in all her glory!  I made the jaunty bow and affixed it to the wreath, and centered the whole thing over our door knocker (another fine Nashville flea market score from a couple years ago). Somehow, the door knocker peaking out reminds me of the passage from A Christmas Carol when Scrooge sees his late partner Marley in his door knocker the night he is visited by the Ghosts of Christmas.  Ooooh, what's not to love!


Now, pretty as it may be, it is a live wreath and therefore, requires a few simple tricks to keep it looking tip top through the Christmas season.  

1.  Any kind of live wreath, boxwood or otherwise, will always do better outside than inside.  The dry heat from inside your house will dry it out faster.  However, if you choose to display your wreath inside, then you may want to set it outside overnight each night to expose it to the cooler and moister outdoor air. 

2.  Live wreaths also last longer if you spritz them with water from time to time.  It doesn't have to be daily, but treat it as you would any other house plant and be sure not to forget about it when it's time to do your other waterings.  

3.  Finally, as your wreath starts to dry out, (they can last up to 2 months or longer with the proper care) lay it flat until it completely dries.  When it is completely dried out, you can spray paint it for future use.  The realist in me says that spraypainting it green would look pretty unnatural, but I am planning to spray ours a soft metallic gold once we are at the end of our season.  It's certainly worth a try, and might just make my $10 investment last even longer!

Here's to a festive and beautiful Christmas season!  Happy decorating!


This post contains affiliate links.

Crockpot Apple Butter

If you enjoyed our Crockpot Baked Apples, then you'll definitely love this recipe too. This just might be one of the simplest things I've ever made, and you know me and simple recipes!

Crockpot Apple Butter

12 apples, peeled, cored, and cubed
1/4 cup apple juice
1/2 cup brown sugar
1/4 cup granulated sugar
1 tsp vanilla
1/2 tsp cinnamon
1/2 tsp allspice

  1. Add ingredients to crockpot. Stir to incorporate.
  2. Cook on high for 10 hours, stirring occasionally and removing the lid for the last three hours of cooking. (Cook for additional time on low if apples are still watery.)
  3. Blend with an immersion blender.
  4. Store in an airtight container for up to two weeks in the refrigerator. Freeze the rest to enjoy later.

Notes:

Water can be substituted for apple juice. Makes about 3, 1/2 pint jars of Apple Butter.

And you might be wondering "now that I have this schmancy apple butter (that I made with this super-easy recipe), what in the world can I eat with it?" Here are some ideas:

You Can Eat Apple Butter:
  • on toast
  • as a dip with graham crackers
  • mixed into oatmeal
  • as a topping for waffles, pancakes, or French toast
  • as a filling for layer cakes
  • as the topping for your favorite brie recipe
  • as a topping for baked sweet potatoes
  • as a topping for vanilla ice cream
  • mixed into your favorite BBQ sauce
  • with oil, balsamic vinegar, salt, and pepper - to create a vinaigrette
  • mixed with cottage cheese or vanilla yogurt
  • as a topping for leftover ham or turkey sandwiches

If you're in the mood for other Fall Favorite Recipes, give these tried and true Harris Sisters recipes a try:
This post contains affiliate links.


Sunday, November 24, 2013

I'll Have a Blue, Blue Blue Blue Christmas

So, I'm not talking about the song (sorry, Elvis) or even the book - I'm being very literal here. Like this:


Or these:


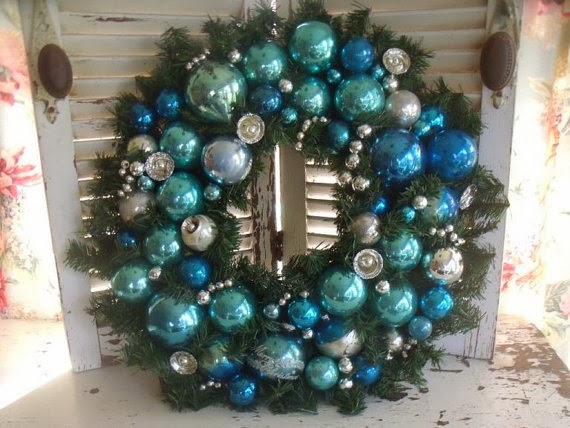
You see, Misty and I were driving down Roxboro's Main Street yesterday and we saw a fully decorated Christmas tree. I suppose seeing a fully decorated Christmas tree a week before Thanksgiving was not quite as surprising as the fact that is was decorated top to bottom in aqua blue in hot pink ornaments. THAT definitely caught our eye!

Some of you might not know that I have an entire Pinterest board dedicated solely to FREE Christmas Printables and I've been loading it up with Christmas themed items of late. So make sure to check that out for the most up to date freebies. 

But today, I thought I'd round up all FREE Christmas printables with specifically those retro aqua blue colors that seem to be coming back into fashion. I've included direct links for all of them below. (And if traditional red and green colors are more up your alley, check out our Red and Green FREE Christmas Printable Roundup. Neutral colors more your thing? Then check out our Neutral FREE Christmas Printable Roundup featuring chalkboard prints, calligraphy, burlap, and all sorts of schmancy stuff!)


These tags will look great on plain white, red, or brown craft paper wrapping. And that will surely making wrapping that much easier when you're not trying to match the wrapping to the ribbon to the tag in each instance. And for the EASIEST use, I would suggest printing these on sticker paper (available at your local office supply store). That way, you can just stick them directly on the gifts!

Noel Holiday Tags from PaperCrave:


Vintage Gift Tags from Free Pretty Things For You:


Gift Tags from Orange You Lucky!:


Hand-Illustrated Gift Tags from Emily McDowell at WorldLabel.com:


Gift Tags from Hey Look:


Holiday Mail Stripes Gift Tag from Eat Drink Chic:


Gift Tags from Sass & Peril:


Dangly Gift Tags from Lemon Squeezy:


Holiday Tags from Design Sponge:


And for you crafty types who might want to make some gifts and THEN label them - here's an idea for you from Balancing Home (link to the hot chocolate recipe is also included at the site):


And finally, I thought this one was too awesome not to include. It's a free printable from A Pair of Pears of the Bible verse that Linus quotes in A Charlie Brown Christmas (note the last line on the print).


This post contains affilaite links.

You Might Also Be Interested In