
Harris Sister Misty helped to organize a Sock Hop for Charlotte's homeschool group. Of course, this meant that the kiddos would need to come dressed in all the latest 1950's fashions. A poodle skirt and crinoline were in order, and they're super easy to make (very low sew!). So, pin this tutorial for inspiration should you need one for your next Sock Hop, school play, or Halloween costume:

The Poodle Skirt
- 2 yards of 72" wide felt (in color of your choice)
- 2 inch wide elastic the same length as child’s waist measurement
- Measuring tape
- Sharpie marker
- Scissors
- Additional felt in color of your choice for "poodle" accent
- Ribbon, cord, etc. for the “leash” (should be enough to go from “poodle” to waist of skirt with a few loops and flourishes), if desired
- Sequins or rhinestone embellishments, if desired
- Hot glue gun
First, measure the waist of the child you're making the skirt for and measure for the length of the skirt. Write down these two measurements, as you will be referring to them throughout the process of making the skirt.
Lay your large piece of skirt felt on a flat surface. (I used the floor because this is a very large piece of felt.) Find the center of this piece of felt.
Make a circle in the center of the felt that is slightly larger than your child's waist measurement. I used a kitchen mixing bowl that was a larger measurement and traced around that with the Sharpie marker. If you want to go with the "trace around something" route, make sure to measure around the thing you plan on tracing to make sure that it's larger than your child's waist. Remember: measure twice, cut once.

You can see that the circle isn't exactly in the middle, but you'll be cutting away some of the felt at the bottom, so nobody will notice. :-)

Now, you'll need to take out your measuring tape and measure from the center circle, marking the length of the skirt. Do this all the way around the circle, making a mark about every 5 or 6 inches.


Now, go back into the recesses of your mind and try to remember what Pee Wee Herman instructed us to do with dots. That's right! "Connect the dots, La-la-la-la!" :-) This will form your outer circle - the hemline of your skirt.

When you're finished, you should have something that looks like this:

Cut out the outer and inner circles:

Next, you'll need to cut your elastic for the waist and do the only bit of sewing required for the whole project. Cut the elastic the same size as the waist measurement. Overlap it by 1 inch and sew it into a circle, making sure to sew down both overlapping edges to make the waistband sturdy. Use this tutorial from Dana Made It to pin and sew the elastic waistband to the skirt.

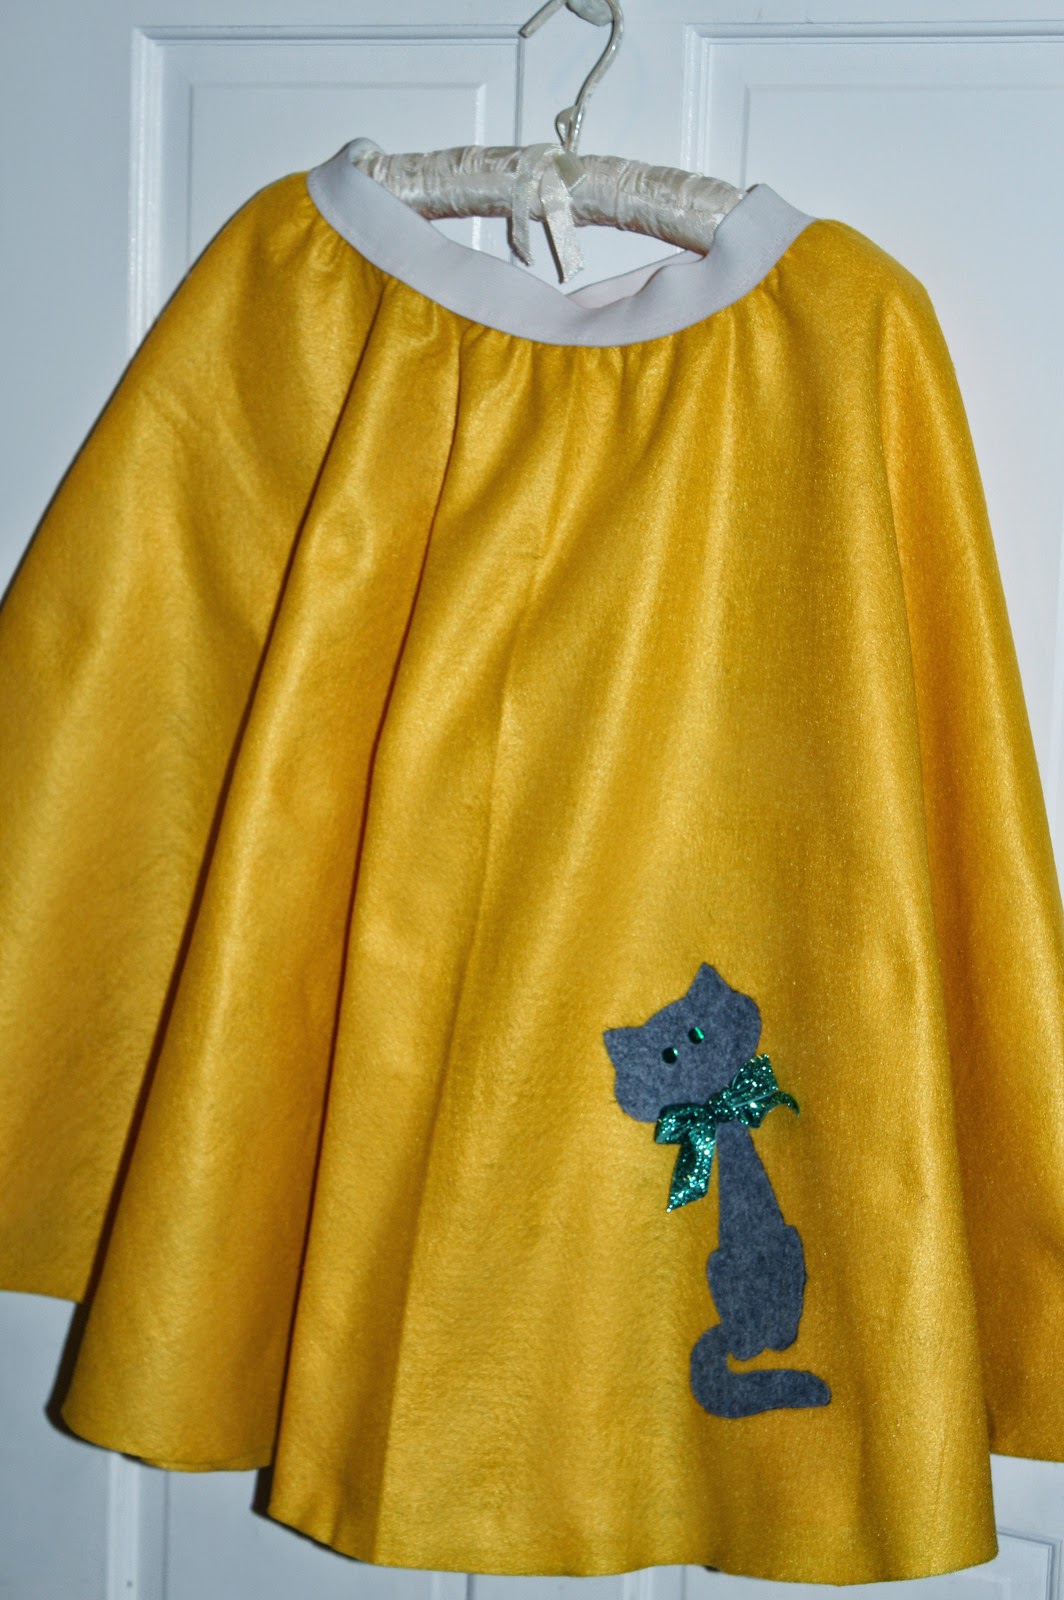
To embellish the skirt, choose a design that will complement the style of the era. Most people would opt for a poodle here, but Charlotte is a cat lover, so I hunted down a cat design that reminded me of Kitty Boo Boo from Laverne and Shirley.
Here are some free patterns for you to consider for your skirt. Remember, what you choose for your skirt can help distinguish you from the other gals, so while a poodle might be the "go-to" choice, there are other options that would be just as cute. Be creative:
I could not find a cat pattern that looked vintage enough for this skirt, so I opted to print an image of a vintage birthday card that had a cat on it.
After you've chosen your image, print it to size, cut it out, flip it over, and use the Sharpie marker to trace it onto your contrasting felt. (You'll trace on the back side so that any errant Sharpie marks can be flipped to the back side when you're done.) Cut out your image, position it on your skirt (typically lower left corner) and hot glue it in place.
Embellish with ribbons, sequins, rhinestones, etc. Here, I used sequins for the cat's eyes and hot glued a ribbon tied into a bow onto the cat's neck.

The skirt is done and you can wear it as is OR you can step it up a notch and add a no sew crinoline.
The Crinoline
- 20 yards of tulle in color of choice
- Elastic or ribbon for waistband
- Cutting mat
- Rotary cutter
Remember the two measurements you took at the beginning of your project? (Waist measurement and length of skirt measurement.)
Take the length of skirt measurement and multiply it by two. Add four inches to that measurement. Use rotary cutter and cutting mat to cut the tulle into strips that are that length. Set aside.
Cut each strip into thinner strips on the cutting mat. Note: strips do not have to be a uniform width. You'll get into a groove when cutting!
Measure out elastic or ribbon for waistband. For a completely no sew project, plan to tie these to form the waist. If using elastic and you don't mind sewing, then measure, cut, and sew the elastic in the same manner as described above for the poodle skirt.
Use the tutorial from Living Well Spending Less to assemble the skirt. And for all of you paying attention, yes, this is basically a longer version of a no sew tutu. But it works perfectly to give the effect of a crinoline in this costume!


And here's the finished project in action:


The Devil's in the Details
Now that you've got your snazzy poodle skirt AND crinoline, don't forget the other accessories. Here's how Charlotte accessorized her costume:
- vintage cat's eye glasses (found at Daddy's house - you can try Goodwill)
- matching neck scarf
- high ponytail
- hand painted saddle shoes (paint white canvas tennis shoes with craft paint in the color of your choice)
- bobby (ankle) socks
- matching belt
This post contains affiliate links.
This is fabulous! I have a question in regards to the crinoline, though? Why did you have 4" to the length of the double tulle? Wouldn't this cause the tulle to hang below the poodle skirt?
ReplyDeleteHi Nancy! You're basically going to be doubling it over the elastic waistband and knotting it. The extra 4" accommodates for the extra tulle that is gathered in the knotted portion. I suppose you could leave off the extra 4" but then your crinoline would definitely be shorter than your skirt. The goal is to have the crinoline and skirt end up being about the same length. I think if a bit of it peaks out, that's OK. In fact, that might be preferred to putting all that work into it and never seeing any of it at all! :-)
ReplyDeleteGood luck with your project, Nancy!