Showing posts with label afghan. Show all posts

Tuesday, November 20, 2018

Crochet Charity Projects

If you guys have been following us for any amount of time, you know that I share my crochet projects when I complete them. Last year at the beginning of January, I shared a Super Thick Stash Busting Afghan that I had been working on.

Well, what you don't know is that immediately after I finished that project, I started on a year-long project for a charity donation. My goal was to make as many afghans as I could make in one year. And at the end of this year, I would donate them to a charity who provides blankets and afghans to foster children from The Harris Sisters' hometown of Roxboro, NC. I had no idea how many I would end up making - but I ended up making 8 crochet afghans to donate!


I made them in a variety of colors that would appeal to both boys and girls. And I also made them in various sizes so that they would be appropriate for any age from babies all the way up to big kids. If I had stuck with the baby sized blankets, I probably could have churned out a few more, but I felt like the big kids needed a few to choose from too. So you will see two gigantic ones in the group!

For these afghans, I chose simple patterns that I was already familiar with so that I could make them quickly. But, if you're interested in crocheting for charity, you might want to take the opportunity to expand your skill set and learn some new stitches or patterns. That's part of the fun!


Here are some close up photos of the individual afghans so that you can see how they turned out. This one is a toddler/little kid sized corner to corner afghan with 5 skeins of Lion Brand Homespun Mixed Berries. Perfect for any little girl who is a fan of princesses, or unicorns, or fairies, or fairy princess unicorns!


This one is a toddler/little kid sized granny square afghan in Lion Brand Homespun Candy Apple, Fawn, Fiesta, Olive, and Colonial.


This one is a baby sized afghan that is four different squares joined together. Three of the squares are traditional granny squares and the fourth square is a granny stripe. I used Lion Brand Homespun Golden and Lion Brand Homespun Black and Red Heart Baby Clouds in the colorway Cloud on this blanket. Since we are in North Carolina, this one is perfect for the baby who has parents who are Appalachian State or Wake Forest fans!


This is a baby sized corner to corner afghan. The majority of the afghan is two strands held together: Bernat Baby Sport Pink Rose and Bernat Super Value White. The two stripes are Red Heart Baby Steps Binky Prints, which is a variegated yarn baby yarn (although they look a little green in this photo).


This is a BIG kid super thick stash busting afghan. I didn't keep track of how many skeins of yarn are in this one, but I held together three skeins of blue yarn at a time and used a size S hook to make it. It created a pretty variegated affect.


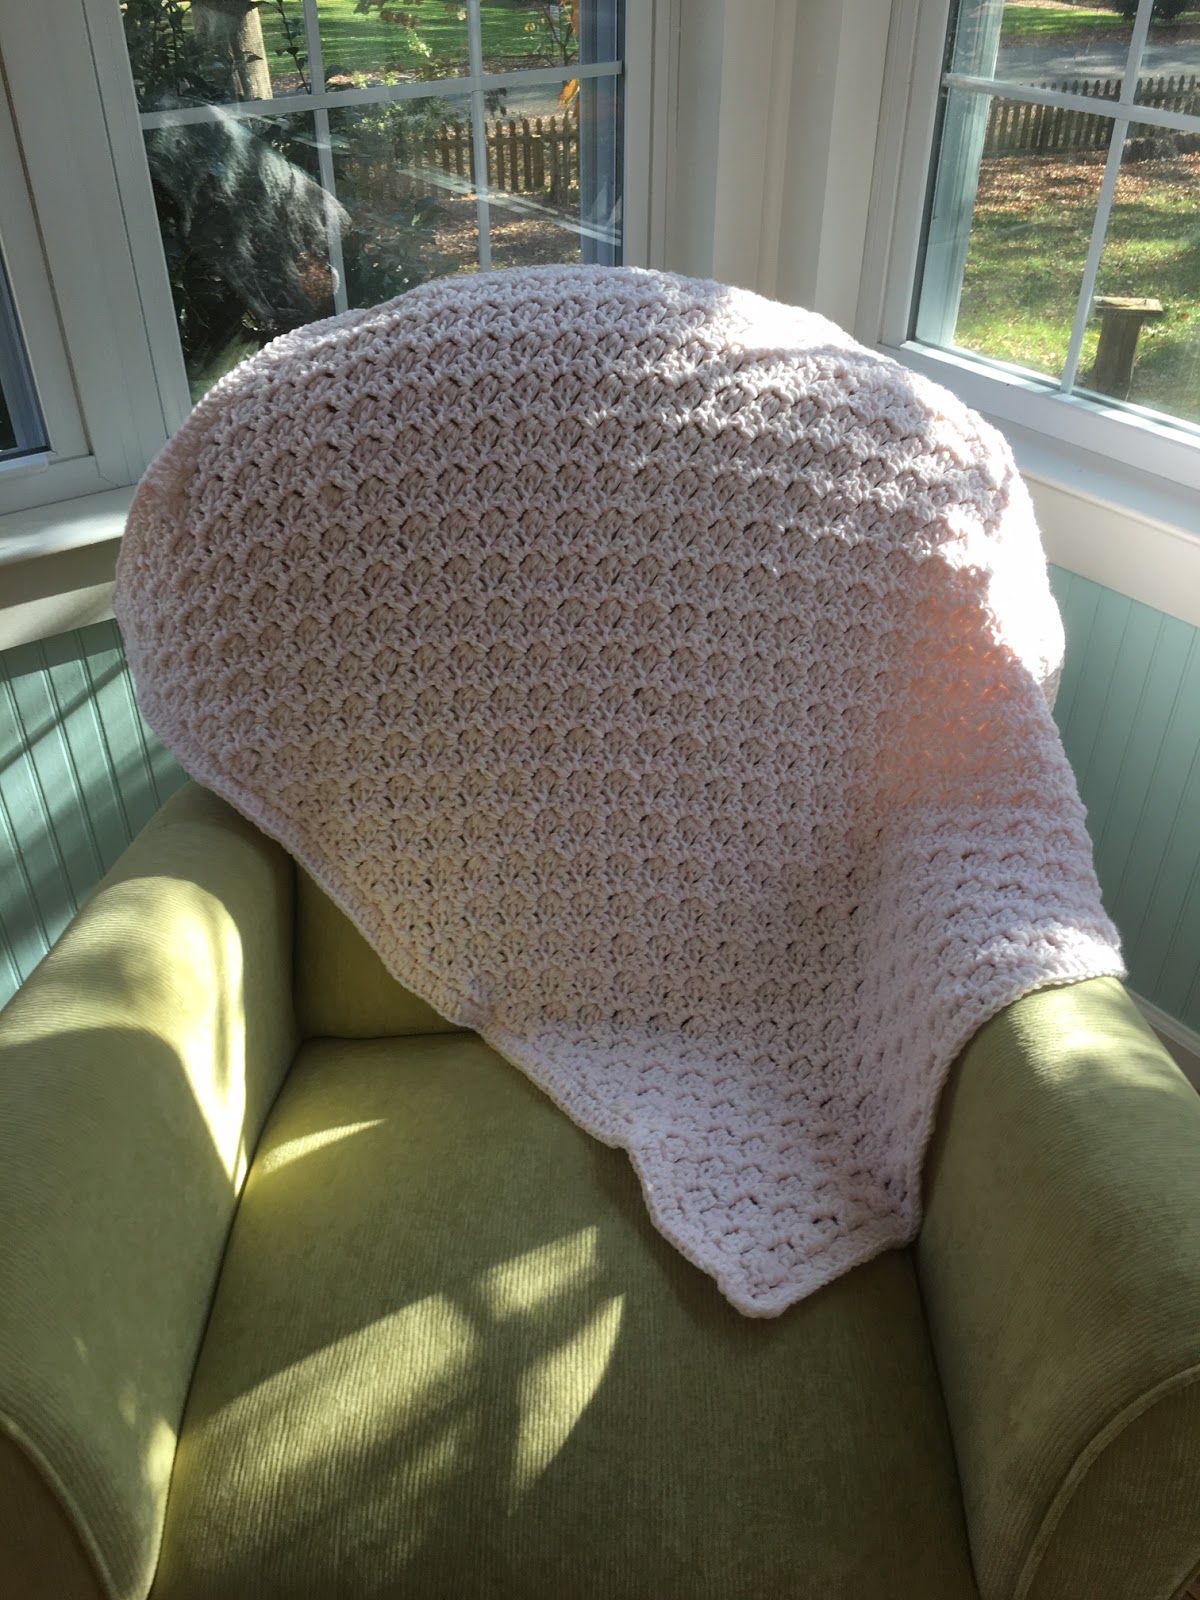
This is a toddler/little kid sized corner to corner afghan that I made holding two strands together throughout: Bernat Baby Sport Pink Rose and Bernat Super Value White.


This is the other BIG kid sized afghan. For this one, I held together a red, white, and blue strand together and used an S sized hook to create a patriotic afghan.


This one is a toddler/little kid sized granny square afghan using Lion Brand Homespun in Candy Apple, Fawn, and Edwardian.


So this was my BIG crochet project for the year. And I know some of you might be thinking "How on earth did she do all of that?" (in addition to the king-sized Captain America Afghan that she finished in September???)

Well, the short answer is a little bit at a time! And, you know what? It doesn't really matter to me how much I am donating, either! I am sure that whatever I am able to donate will be appreciated by the group and ultimately the receivers - even it if was only one!

And if afghans seem like too big of a project for you to tackle, or if hats or baby booties or scarves are more up your alley, then you can seek out charities that accept those kinds of donations! Here's where you can find places to donate your work.


Crochet for Local Charities


This is the perfect time of year to decide to get involved and crochet for a charity that is local to you! You can talk to people at hospitals, cancer centers, nursing homes, children's homes, women's shelters, homeless shelters, churches, or animal shelters to see if they might be interested in crochet donations and what types of items they would accept.

Other Charities That Accept Crochet Donations


If you don't have a local charity that accepts crochet donations, these are 10 organizations that accept donations of crochet projects:


  1. Project Linus accepts blankets for children in need. You donate your projects to a local chapter.
  2. Binky Patrol gives handmade blankets to children with chronic and terminal illnesses and those who are in foster care or are experiencing trauma.
  3. Crochet for Cancer accepts chemo caps for cancer patients.
  4. Warm Up America distributes crocheted afghans, caps, and other items.
  5. Operation Gratitude sends care packages to troops overseas and will include handmade items that are donated.
  6. Soldiers' Angels sends afghans to active duty military, VA hospitals, and military families who are expecting new babies.
  7. Snuggles Project provides scared or difficult animals a handmade blanket to help them calm down and increase their chances of adoption.
  8. The Red Scarf Project provides red scarves to foster children who are headed to college.
  9. Hat Box Foundation gives handmade crochet hats to to people with cancer and others in need.
  10. The Pink Slipper Project gives crochet slippers (any color) to women and children living in shelters for victims of domestic violence.

Find Other Charities That Accept Crochet Donations


Here are a few online resources to find charities that are seeking crochet donations:


  • CGOA This is a huge alphabetical listing of charity organizations across the United States that accept crochet donations.
  • The Crochet Crowd This is an interactive map showing charities that accept crochet donations near you.


Whether you're looking to do some stash-busting, or looking to expand your crochet skills, or just looking to make a difference by donating your time and your talents, I hope this has inspired you to put your talents to use!

Now you know what you can make and where you can donate it, so you're all set to crochet some projects to donate in the new year! Maybe get together with some friends and plan a crochet charity project party. Sounds like a great way to ring in the new year if you ask me.

Happy Crocheting!

This post contains affiliate links.


Wednesday, September 12, 2018

Captain America Afghan

For Jaxon's birthday, I decided that I was going to finish an afghan that I started for him quite some time ago. This Captain America shield afghan is probably one that you've seen making the rounds, and as crochet afghans go, it's really pretty easy to make. However, as crafters are known to do, I had a tendency to put it down after I'd started it to start and finish other projects. 

But since his birthday was coming up (and since as of the last Avengers movie, things are not looking so good for our superhero), I thought now would be the perfect time to finish this project. Here's a look at this patriotic afghan.


The Materials


The yarn I used for this project was a mix of some yarn I already had in my stash (the blue and white) and a red that I chose as a complementary color. I used a size I hook with these yarns:


If you prefer Red Heart brand yarns (as many people do for afghans), these colors work well for superhero themed projects:


The Pattern and Notes


The inspiration for this blanket came from the Lion Brand Little Superhero Blanket Pattern, which is a free crochet pattern. But, that pattern uses a chunky yarn and makes a smaller sized blanket for a young child.

Since I wanted to make a larger blanket for a 10-year old, I decided to "wing it." Really, if you look at photos of Captain America's shield, it's easy to get a feel for how large the red and white bands are in relation to the blue center circle.

This Captain America shield afghan is a simple double crochet circle with increases as needed to get to the size you desire. Here's a tutorial for creating a crochet circle to get you started.

The pattern I used for the white star in the center was a free pattern from Jessie at Home for a Star Trivet. I just continued increasing rounds until I reached 13 total rounds.

For the entire afghan, I used the following repeats:


  • 24 DC rounds - blue
  • 16 DC rounds - red
  • 16 DC rounds - white
  • 16 DC rounds - red
  • 1 crab stitch round - red

Because the entire afghan is worked in double crochet, I thought finishing in a crab stitch would add some variety. Here's a close up look at the crab stitch border.


Advice for Creating Large Crochet Circles


The biggest challenge with this project will be keeping a large crochet circle flat and looking like a circle. My best advice is to remember that as you increase the size of your circle, if you continue placing increase stitches at even intervals (2DC, 1DC, 1DC, 1DC, 2DC, all the way around, for example), then eventually your project will start to look more like an octagon, an then a nonagon, and then a decagon. Flashback to your geometry classes, I know - but you get the idea!

If you want it to smooth out into a circular shape, you're going to have to randomly increase on some of the rows so that all of the increases don't perfectly line up with each other (which is what eventually forms points in the project).

Then, you'll need to start watching out for curling and waving. If your project is curling at the edges (like a bowl shape or a hat), you don't have enough stitches and you need to increase more frequently. And if your project is waving or ruffling at the edges, then you have too many stitches. You will get a feel for it!

Attaching the Star


To sew the star to the front of the afghan, I lined up the star on top of the blue circle where I wanted it to sit on the final afghan. Then I cut long pieces of white yarn and tied down each of the five points of the star.


I used the long tails of those pieces of yarn to sew the star to the blue circle, being careful to only sew into the front posts of the blue stitches (so as not to have any white showing through to the back of the afghan). If you catch the back loops of the star as shown below, the yarn you are using to sew the star to the afghan should blend nicely when you're finished sewing.


In the photo below, the stitches to the left of the yarn have already been sewn down and the stitches to the right of the yarn have not yet been sewn. See how they look very similar?


The finished size of this afghan is 91" in diameter across the center of the afghan. That's 7 feet 7 inches - enough to cover a king size bed! And perfect for snuggling under!


Other Superhero Afghan Options

Some of you may remember that years ago (when my oldest son was 5 years old - he's almost 13 now by the way!?!?!) that I made a crochet Spiderman Afghan for him. And he still uses it to this day!

It has held up well, and I'm quite sure that at the time (and maybe even right now) many people were thinking "why on Earth is this woman making such HUGE afghans for such little boys?" Well, it's because those little boys grow up to become young men and their fascination with superheroes has not wavered yet. They still love them.

And here's a peak at what both boys look like with their afghans today. Aidyn's is a little smaller on him than it was when I originally made it, and Jaxon's is a little bigger on him than it will be in a few years. But they have lots more years of enjoyment left in these. 


So, I would encourage you to consider making superhero afghans larger than you think you'll need to. They will use these for a lot longer than their toddler and childhood years!

Some other superhero projects you might enjoy:


This post contains affiliate links.

Thursday, January 4, 2018

Super Thick Stash Busting Crochet Afghan

This afghan was my second attempt at stash busting for 2017. You might remember my other big stash busting project - the Granny Square Scrap Afghan that I completed at the end of last January.

I was able to complete this super thick and cozy afghan in the span of one weekend (and then I proceeded to let it sit because I didn't want to weave in the ends). That's why I'm just now getting around to sharing it.

Look at how it came out!

Harris Sisters GirlTalk: Super Thick Stash Busting Crochet Afghan


Because it's so thick, this scrap afghan certainly is coming in handy for the unusually cold temperatures we've been having this winter.

This afghan was crocheted with a simple double crochet stitch using a BIG size S hook while holding 3 different strands of worsted weight yarn together, which is what makes it so cozy. The best part about this pattern is that you can make the afghan as big as you want depending on how much yarn you have to use up!

I just saved quite a few balls of yarn that were leftover from various projects that looked like they matched each other pretty well. Once I thought I had enough to make an afghan, that's when I started work on this project.

Harris Sisters GirlTalk: Super Thick Stash Busting Crochet Afghan

The BEST part is that this type of afghan is very forgiving - if you choose to use a variegated strand throughout, then that does a lot of color changing for you and helps to make an overall pretty finished product. And, I'll tell you a secret - it can also hide some not so pretty colors too!

You know how every now and then you'll end up with a few balls (sometimes even almost whole skeins of yarn) in your stash that you look at and you're just like "how in the world did I end up with this color?!?!" Maybe it's something you bought years and years ago and the color is no longer in fashion or maybe someone gave you a bag of free yarn and it was in the bag (and you're not going to turn down free yarn because that's crazy!)

So, if you mix in some of your "not the prettiest colors in the whole world" with some variegated yarns in coordinating colors and some solids in coordinating colors, then it kind of hides the ones that aren't so pretty and the prettier ones stand out.

Here's a closeup of some of the colors for this particular afghan:

Harris Sisters GirlTalk: Super Thick Stash Busting Crochet Afghan

Long time readers of the blog might recognize some of the colors from past projects I've posted:


For the entire afghan, I held together 1 variegated strand, 1 dark strand, and 1 light strand. The effect it created was very mermaid-y and ocean-y.

I used this free crochet pattern from A Lively Hope and added big 8 inch tassels to the corners. The finished afghan is 48" x 65" and is the perfect size for snuggling for the foreseeable future (or at least until temperatures get somewhere above freezing).

Our pup Smitty seems to enjoy it!

Tibetan Terrier in colorful crochet afghan

Fluffy dog in colorful crochet afghan

Cute fluffy dog in colorful crochet afghan


So, if you're looking to use up some of your extra scrap yarn and you'd like to create a super fast afghan, I would definitely recommend this project.

Happy crocheting!

This post contains affiliate links.

Sunday, January 29, 2017

Granny Square Scrap Afghan

I've been diligently working on this granny scrapghan since before Christmas, and I'm so happy to share it with you today!

This project is the ultimate stash-buster and, truth be told, that was my main objective with this crochet afghan.

Take a look at how it came out!

Colorful Granny Scrapghan

Multicolor Granny Scrapghan

The afghan is a simple crochet granny square that I completed with worsted weight yarn and a size I hook. The finished size of the piece is 72" (that's six feet!) square, and it is a generous size for snuggling.

Colorful Granny Square Afghan Free Pattern

Colorful Granny Square Afghan Free Pattern


I'm especially proud of the border, so I will share the free pattern for that below so that you can try it on your next afghan!

Crochet Afghan Border Free Pattern

Crochet Afghan Border Free Pattern

Scrap Crochet Afghan Border


For the eight color crochet border shown:

Row 1: With final color from afghan (white shown), SC in each stitch around, placing 2SC, 2CH, 2SC in each corner space. Join with a slip stitch to first stitch. Finish off.

Row 2: With color 2 (lime green shown), repeat row 1. Finish off.

Row 3: With color 3 (royal blue shown), SC, CH, SC around, placing SC, CH, SC in each corner space. Join with a slip stitch to first stitch. Finish off.

Row 4: With color 4 (turquoise shown), SC into previous row (row 2) in each CH space, CH around, placing SC, CH, SC in each corner space. Join with a slip stitch to first stitch. Finish off.

Row 5: With color 5 (pink shown), repeat row 4, SCing into row 3. Finish off.

Row 6: With color 6 (lavender shown), SC in each SC and CH around, placing SC, CH, SC in each corner space. Join with a slip stitch to first stitch. Finish off.

Row 7: With color 7 (yellow shown), DC, CH, DC (V stitch made), CH, V stitch in each corner space. *Skip two stitches, V stitch* Repeat from * to * around, completing other corners as the first corner. Join with a slip stitch to first stitch. Do not finish off.

Row 8: With color 7 (yellow shown), SC in first V stitch of corner space, 5 DC in CH stitch between V stitches in corner space, SC in next V stitch of corner space (corner made). Repeat 5 DC in V stitch, 1 SC in next V stitch around, completing other corners as the first corner. Join with a slip stitch to first stitch. Finish off.

Row 9: With color 8 (purple shown), *SC in first three stitches of V stitch, CH 3 in same space, join with slip stitch to first CH stitch (picot made), SC in same space and in remaining two stitches of V stitch* Repeat from * to * around. Join with a slip stitch to first stitch. Finish off.

Long-time readers of the blog might recognize some of these colors from past projects that I've featured. I've linked the projects to the colors below. The colors I used in this project were as follows with two rows of white between each color change:


You can make one of these today with the leftover yarn you already have! Scrapbusting at its finest!

Colorful Granny Square Afghan Free Pattern

Colorful Granny Square Afghan Free Pattern


Friday, January 22, 2016

Mermaid Tail and Shark Lapghans

Did you craft anything as a gift for Christmas? Well, I did.

I decided that for all the kiddos on the Harris side of the family, I would crochet them matching lap afghans (or lapghans). You may have already seen the popular mermaid tail and "eaten by a shark" personal afghans floating around on Pinterest and Facebook.

With sharks being all over the news this past Summer and with our family's association with The Little Mermaid having been well documented time and time again, I thought that sharks for Aidyn and Jaxon and mermaid tails for Charlotte, Emma, and Lexi would be perfect.


I used these free crochet patterns and adjusted them for sizing: Eaten by a Shark Pattern and Mermaid Tail Pattern.

Here's the whole motley crew. I know, Lexi, you have crazy cousins! ;-)


But she soon figured out what to do with it . . . 


Of course, my boys wanted to show you what it looks like to fend off a shark attack:


And also what it looks like when you lose (silly boys):


Pattern Modifications

For the smaller mermaid tails, I only completed each half tail until there were 16 stitches left. This made a smaller tail that looked more appropriately sized for a smaller mermaid tail.

For all tails (both mermaid and shark), I only completed the very last row (12 or 16) with one row of stitches. That way, the matching row on the other half tail would complete the two row pattern that all other rows had formed. If you complete two rows on both sides, then when you sew the two half tails together, you'll have four of the same sized rows together in the middle, which I thought would look odd.


For the mermaid tails, I used this decorative stitch around the top edges: *7dc in same space, skip a stitch, repeat from * 


For shark teeth, instead of the bobbles, I used this decorative stitch to form triangle "teeth" around the mouth: *hdc, dc, tr, dc, hdc, skip two stitches, repeat from *


Measurements

You'll note that both patterns walk you through the bottom portion, which includes all shaping, and then instructs you to complete the rest of the pattern "to desired length." Well, since these were for gifts, I had to sort of figure a way to ask for measurements so that I would have something to work with.

For the mermaid tails, I asked for the girls' measurements (standing) from floor to waist height and then I added to that measurement the length of their feet. This will give them room to move their feet around at the bottom of the tail, and for the little girls, will give them some "growing room." I crocheted to this length in each instance and then added the final decorative stitch in the contrasting color.

For the sharks, I measured the boys from underneath their arms (standing) to the floor and then added to that measurement the length of their feet. I crocheted to this length in each instance and then added the jaws.

Yarn Choice & Colors

For the mermaid tails, I used:


For the sharks, I used:


(Note: You certainly don't need one pound of the black, red, or white color for the shark pattern. These were just leftover from another project, so I put them to good use for these projects to accomplish some stash busting!)

All in all, I would certainly recommend these patterns, as they are very beginner friendly. They do take some time with the finishing (for the sharks more so than the mermaids), but the majority of the work is a simple Granny Stitch. Easy peasy!

Add these patterns to your Ravelry queue:


Note: Designer is the same for both the Eaten by a Shark and Mermaid Tail lapghans. Eaten by a Shark is featured on Ravelry, but that link will also take you to the free Mermaid Tail pattern on her website.

Enjoy!

This post contains affiliate links.

Sunday, November 22, 2015

Christmas Granny Square Afghan

Today I'm sharing with you a crochet project that was actually quite simple to make. I've made several of these granny square afghans in the past, and if you're at all uncertain about crocheting a large project, such as an afghan, I would encourage you to go this route.

This particular project was a gift for Harris Sister Deanna, so I knew without a shadow of a doubt that it needed to be a Christmas colored afghan, since that is her favorite holiday. It is traditional red, white, and green in color, but you can use the same process to make a granny square afghan in any color you choose.


The reason the project was so simple is that I spread it out over the course of an entire year and completed it as part of a crochet-along, otherwise recognized in the craft community by the acronym CAL. Here are some photos of all of the squares "in progress":


If you choose to make a granny square afghan through a crochet-along, you're really only committing to one or two 12-inch squares per month plus additional assembly in the final month. And here's the finished product:


This afghan is made up of 25 different 12-inch squares that are edged and joined in cream colored yarn.

For this project, all the squares ended on a different pattern. So, I made them all the same by either single crocheting or double crocheting around the edges to make the squares all the same size. Then I used the joining method described on Carina's Craftblog. But instead of making clusters of three, I just did one DC, skip one, one DC, repeat.

Once all the squares were joined, I edged the whole afghan in another couple of rows of double crochet in the cream color. And then I finished in a row of red picot stitches. You can find a tutorial for the picot stitches at For My Girl Nina.

The finished afghan is 5 1/2 feet x 5 1/2 feet square, but afghan joining and finishing techniques are your choice and will affect the final size of your finished piece!


(Note: By making exactly 2 squares per month, you will end up with 24 squares that can be arranged in a 4 x 6 grid to make a rectangular afghan. I completed one additional square so that I would have 25 to make a square afghan.)


I used Caron One Pound in Cream, Red Heart in Cherry, and Red Heart in Tea Leaf to provide the Christmas color scheme you see here.


The specific 12-inch granny square free crochet patterns that I used are linked below at original sources (where provided) and also to my personal squares on Ravelry so that you can see my color changes in Christmas colors for these squares and/or favorite and download the free crochet patterns from Ravelry:

  1. Mulberry Bush (add to your Ravelry queue here)
  2. Winter Burst (add to your Ravelry queue here)
  3. Popcorn Delight (add to your Ravelry queue here)
  4. Double Framed Lace (add to your Ravelry queue here
  5. Pavo (add to your Ravelry queue here)
  6. Majesty (add to your Ravelry queue here)
  7. Crown Jewels (add to your Ravelry queue here)
  8. Le Vesinet (add to your Ravelry queue here)
  9. Grannie's Red Flower (add to your Ravelry queue here)*
  10. Shell Around Square (add to your Ravelry queue here)
  11. More Vs Please (add to your Ravelry queue here)
  12. Impossible Hexagon (add to your Ravelry queue here)
  13. Chocolate Delight (add to your Ravelry queue here)
  14. Velvet and Lace (add to your Ravelry queue here)*
  15. Big June (add to your Ravelry queue here)
  16. Eternal Braid (add to your Ravelry queue here)
  17. On the Huh (add to your Ravelry queue here)
  18. Wandith (add to your Ravelry queue here)
  19. Tiptoe Through the Tulips (add to your Ravelry queue here)
  20. Half-n-Half (add to your Ravelry queue here)
  21. Easter Day (add to your Ravelry queue here)
  22. Violet (add to your Ravelry queue here)
  23. Sun Daze (add to your Ravelry queue here)
  24. Cute as a Button (add to your Ravelry queue here)
  25. E-ZEE V-ZEE (add to your Ravelry queue here)


Notes:

Grannie's Red Flower Square is a 7-inch square pattern. I modified the original pattern to make it a 12-inch square pattern by adding three rows of dc chain one and one row of dc.

Velvet and Lace Square is a 7-inch square pattern. I modified the original pattern to make it a 12-inch square pattern by using a size H hook and a worsted weight yarn. I also an extra row or two to get it to the desired 12-inch size.

You'll need somewhere to keep all of the squares laying flat from month to month until you're ready to assemble them. I've heard people mention that new pizza boxes are good options, but they're very skinny boxes and you can only fit a few squares per box. I've found that a better option is Victoria's Secret large gift boxes. They are 15" x 15" x 5" and because they are 5" deep, they hold quite a few squares at one time. I always have a few of these stacked up holding a few squares for different projects. :-)

So there you have it! If you ever thought that an afghan was too big of a project for you to tackle, you're just looking at it all wrong. After all, how do you eat an elephant? One bite at a time. ;-)

This post contains affiliate links.

Monday, January 19, 2015

Granny Square Baby Blanket

I recently made this baby blanket for a friend's new bundle of joy. Her new baby boy's nursery was decorated in green and gray, so I thought a traditional granny square pattern featuring those colors along with some white would make a lovely blanket for the dapper young fellow. Turns out I was right. :-)


This could not have been simpler to make and it's easy to adjust for any size and colors that you want.


This particular blanket is 33 1/2 inches square, which can be used as a baby blanket, but then also as a toddler size blanket as the baby grows bigger (and that happens very quickly - I speak from experience). To recreate this blanket, you'll need the following:

Materials
Loops and Threads Impeccable yarn in Kelly Green, True Grey, and White (about 2 skeins of each color)
I crochet hook
Scissors
Tapestry needle

Note
dc cluster = 3 dc into the same stitch

Instructions
Round 1: Using your first color, ch 3. 2 dc into the first ch, ch 1. *dc cluster into the same stitch, ch 1* 3 times. Sl st to the top of the beginning ch. (4 dc clusters and 4 ch 1 spaces)

Round 2: Sl st in the next two stitches and into ch 1 space. Ch 2, 2 dc into the same ch 1 space. Ch 1, dc cluster into the same ch 1 space. *dc cluster, ch 1, dc cluster in the next ch 1 space* around. Sl st to the top of the first ch 2. (8 dc clusters and 4 ch 1 spaces)

Round 3: Sl st in the next two stitches and into the ch 1 space. Ch 2, 2 dc into the same ch 1 space. Ch 1, dc cluster into the same ch 1 space. Dc cluster into the space between the clusters on the previous round. *dc cluster, ch 1, dc cluster in the next ch 1 space. dc cluster into the space between the clusters on the previous row* around. Sl st to the top of the first ch 2. (12 dc clusters and 4 ch 1 spaces)

Continue with this pattern for all remaining rounds. Work two double crochet clusters into each corner, with a ch 1 in between them. Work 1 dc cluster into each space between the clusters in the previous round. 

When it’s time to change colors, cut your first color and weave ends. Join your second color in any of the ch 1 spaces. Continue the same pattern with the next color.

Border
Round 1: Using the same color as the final round of clusters from previous round, hdc around the entire blanket working 3 hdc into each corner stitch. Cut yarn and weave ends. 
Round 2: To create picot edging, join white yarn using a slip stitch  *sc in the next five stitches, ch 3, hdc in the first chain* around. (Note: If you would like to have a picot in each corner, you may need to sc more or fewer stitches between picots as you approach the corners.)

For the blanket shown, the color pattern I used was:
6 rounds of Kelly Green
2 rounds of White
2 rounds of True Grey
2 rounds of Kelley Green
2 rounds of White
2 rounds of True Grey
2 rounds of Kelley Green
2 rounds of White
2 rounds of True Grey
2 rounds of Kelley Green
2 rounds of White
2 rounds of True Grey
2 rounds of Kelley Green
1 round of Kelley Green (hdc border round)
1 round of White (picot edging round)


This post contains affiliate links.

You Might Also Be Interested In