Tuesday, November 20, 2018

Crochet Charity Projects

If you guys have been following us for any amount of time, you know that I share my crochet projects when I complete them. Last year at the beginning of January, I shared a Super Thick Stash Busting Afghan that I had been working on.

Well, what you don't know is that immediately after I finished that project, I started on a year-long project for a charity donation. My goal was to make as many afghans as I could make in one year. And at the end of this year, I would donate them to a charity who provides blankets and afghans to foster children from The Harris Sisters' hometown of Roxboro, NC. I had no idea how many I would end up making - but I ended up making 8 crochet afghans to donate!


I made them in a variety of colors that would appeal to both boys and girls. And I also made them in various sizes so that they would be appropriate for any age from babies all the way up to big kids. If I had stuck with the baby sized blankets, I probably could have churned out a few more, but I felt like the big kids needed a few to choose from too. So you will see two gigantic ones in the group!

For these afghans, I chose simple patterns that I was already familiar with so that I could make them quickly. But, if you're interested in crocheting for charity, you might want to take the opportunity to expand your skill set and learn some new stitches or patterns. That's part of the fun!


Here are some close up photos of the individual afghans so that you can see how they turned out. This one is a toddler/little kid sized corner to corner afghan with 5 skeins of Lion Brand Homespun Mixed Berries. Perfect for any little girl who is a fan of princesses, or unicorns, or fairies, or fairy princess unicorns!


This one is a toddler/little kid sized granny square afghan in Lion Brand Homespun Candy Apple, Fawn, Fiesta, Olive, and Colonial.


This one is a baby sized afghan that is four different squares joined together. Three of the squares are traditional granny squares and the fourth square is a granny stripe. I used Lion Brand Homespun Golden and Lion Brand Homespun Black and Red Heart Baby Clouds in the colorway Cloud on this blanket. Since we are in North Carolina, this one is perfect for the baby who has parents who are Appalachian State or Wake Forest fans!


This is a baby sized corner to corner afghan. The majority of the afghan is two strands held together: Bernat Baby Sport Pink Rose and Bernat Super Value White. The two stripes are Red Heart Baby Steps Binky Prints, which is a variegated yarn baby yarn (although they look a little green in this photo).


This is a BIG kid super thick stash busting afghan. I didn't keep track of how many skeins of yarn are in this one, but I held together three skeins of blue yarn at a time and used a size S hook to make it. It created a pretty variegated affect.


This is a toddler/little kid sized corner to corner afghan that I made holding two strands together throughout: Bernat Baby Sport Pink Rose and Bernat Super Value White.
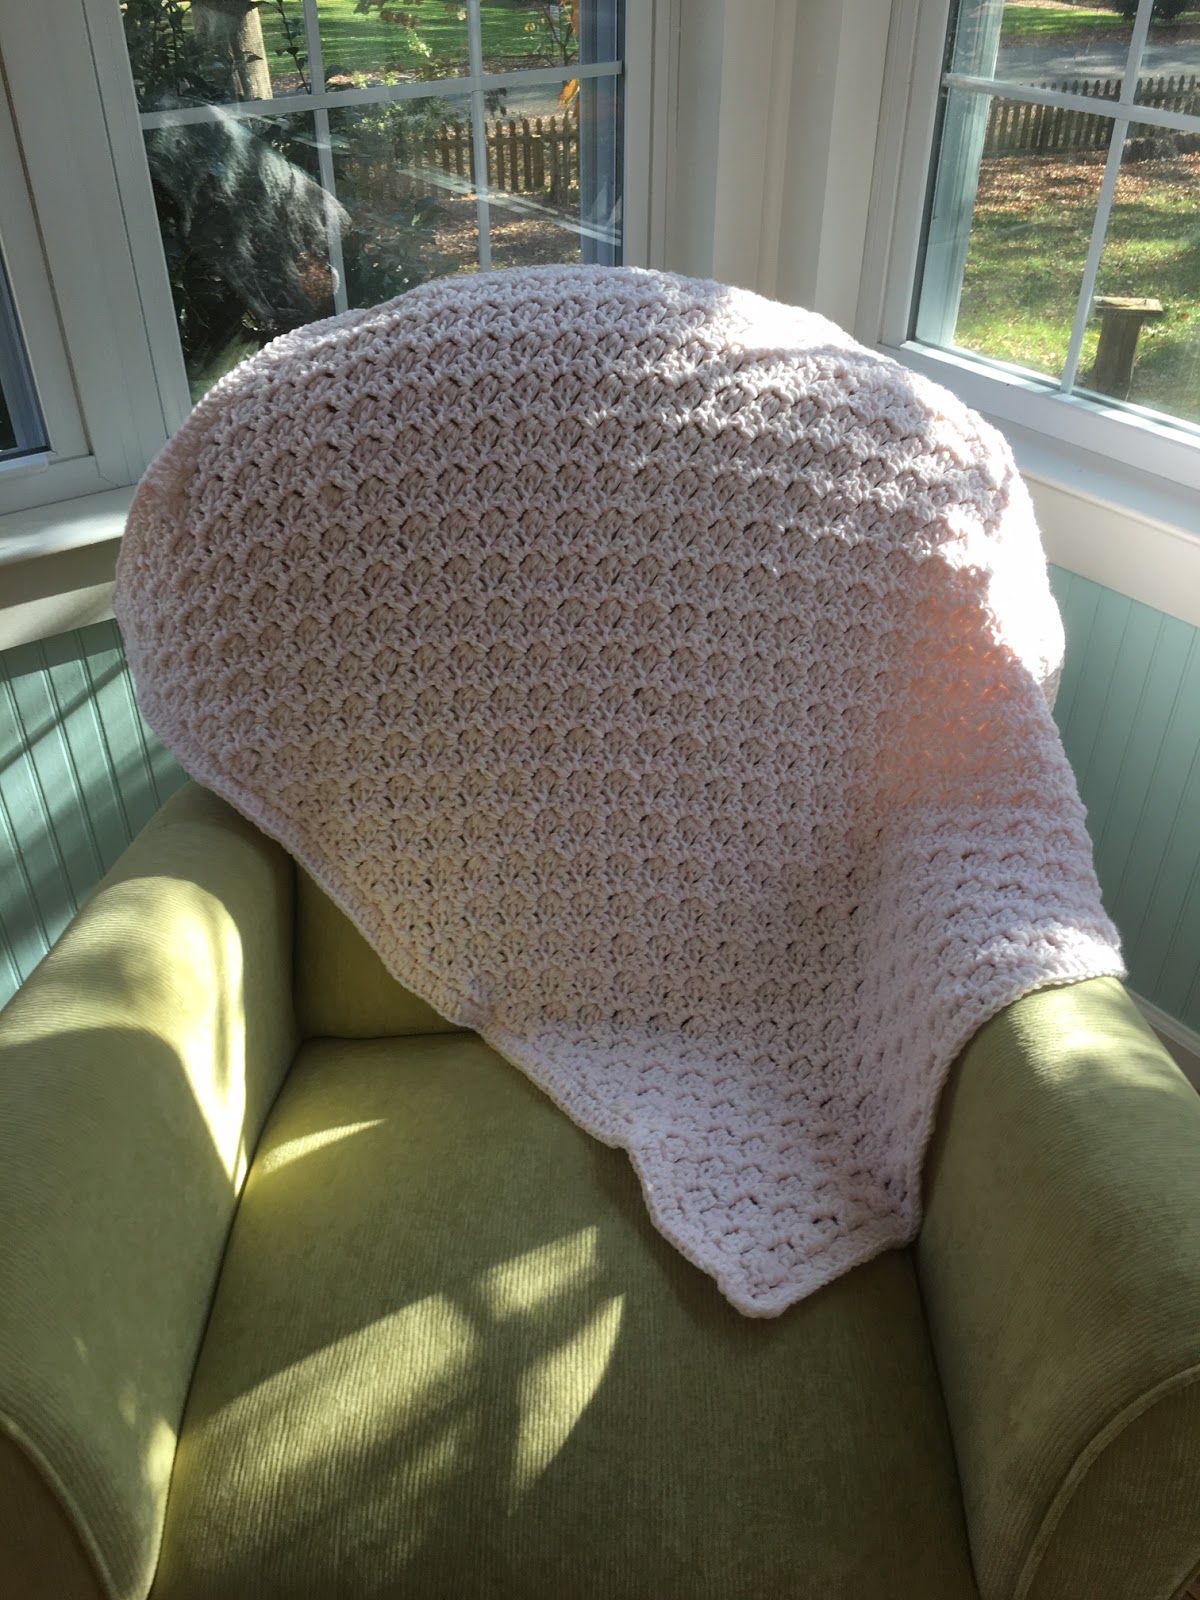


This is the other BIG kid sized afghan. For this one, I held together a red, white, and blue strand together and used an S sized hook to create a patriotic afghan.


This one is a toddler/little kid sized granny square afghan using Lion Brand Homespun in Candy Apple, Fawn, and Edwardian.


So this was my BIG crochet project for the year. And I know some of you might be thinking "How on earth did she do all of that?" (in addition to the king-sized Captain America Afghan that she finished in September???)

Well, the short answer is a little bit at a time! And, you know what? It doesn't really matter to me how much I am donating, either! I am sure that whatever I am able to donate will be appreciated by the group and ultimately the receivers - even it if was only one!

And if afghans seem like too big of a project for you to tackle, or if hats or baby booties or scarves are more up your alley, then you can seek out charities that accept those kinds of donations! Here's where you can find places to donate your work.


Crochet for Local Charities


This is the perfect time of year to decide to get involved and crochet for a charity that is local to you! You can talk to people at hospitals, cancer centers, nursing homes, children's homes, women's shelters, homeless shelters, churches, or animal shelters to see if they might be interested in crochet donations and what types of items they would accept.

Other Charities That Accept Crochet Donations


If you don't have a local charity that accepts crochet donations, these are 10 organizations that accept donations of crochet projects:


  1. Project Linus accepts blankets for children in need. You donate your projects to a local chapter.
  2. Binky Patrol gives handmade blankets to children with chronic and terminal illnesses and those who are in foster care or are experiencing trauma.
  3. Crochet for Cancer accepts chemo caps for cancer patients.
  4. Warm Up America distributes crocheted afghans, caps, and other items.
  5. Operation Gratitude sends care packages to troops overseas and will include handmade items that are donated.
  6. Soldiers' Angels sends afghans to active duty military, VA hospitals, and military families who are expecting new babies.
  7. Snuggles Project provides scared or difficult animals a handmade blanket to help them calm down and increase their chances of adoption.
  8. The Red Scarf Project provides red scarves to foster children who are headed to college.
  9. Hat Box Foundation gives handmade crochet hats to to people with cancer and others in need.
  10. The Pink Slipper Project gives crochet slippers (any color) to women and children living in shelters for victims of domestic violence.

Find Other Charities That Accept Crochet Donations


Here are a few online resources to find charities that are seeking crochet donations:


  • CGOA This is a huge alphabetical listing of charity organizations across the United States that accept crochet donations.
  • The Crochet Crowd This is an interactive map showing charities that accept crochet donations near you.


Whether you're looking to do some stash-busting, or looking to expand your crochet skills, or just looking to make a difference by donating your time and your talents, I hope this has inspired you to put your talents to use!

Now you know what you can make and where you can donate it, so you're all set to crochet some projects to donate in the new year! Maybe get together with some friends and plan a crochet charity project party. Sounds like a great way to ring in the new year if you ask me.

Happy Crocheting!

This post contains affiliate links.


Tuesday, November 13, 2018

How to Save Marigold Seeds

I'm not sure about the weather where you are, but in the South, we're still having warm days this Fall. This means that my marigolds are still going strong in the garden. We've had a cold snap here and there, though, so I thought I'd pass along a tip for you fellow gardeners who might want to save marigold seeds from your own garden this year so that you can have free marigolds next year!


This has become somewhat of a tradition in our home. Last year, we purchased a 25 cent package of marigold seeds from the dollar store and planted those in a pot on the deck. They took off and bloomed from May all the way through November. That's a lot of blooms for 25 cents!

The boys helped me to collect seeds from those marigolds and we dried them and gave them away as Christmas gifts from the boys to their grandparents, aunts, and uncles last year. And we kept a package for ourselves.


Well, the marigold seeds that we saved and planted this year have bloomed even more than the ones last year! And they're still blooming midway through November. So we wanted to make sure to keep some seeds from those plants too! And once you know how easy it is to save seeds from marigolds, you'll want to do it every year.

Saving marigold seeds is easy. Here's how you do it:

Collect Dried Marigold Blooms (Seed Pods)


As you walk through your garden to deadhead your spent marigold blooms, wait for them to begin to dry out if you want to save them to collect the seeds. The best time to collect dried marigold blooms to harvest the seeds when the petals are dried out, and the base (the seed pod) is turning brown.


If you find some seed pods still on the plant that have turned completely brown, you can collect those too, and see if the seeds inside are still viable (not rotted or molded).


Dry Marigold Blooms Inside


To make sure the blooms are completely dry before removing seeds, leave them on a paper towel for a few days before opening the seed pods. This step isn't completely necessary, but I always do it just to make sure I'm not working with partially dried blooms. You want the seed pod part of the blooms to be mostly brown. A little green is OK, but if there's too much green, you might want to do this step just to make sure they've dried out enough to proceed to the next steps.

Open Marigold Seed Pods & Remove Marigold Seeds


Hold the base of the seed pod over top of the paper towel and pull off and discard the dried marigold petals. You will see the marigold seeds inside attached to the base. Marigold seeds are slender, pointy, and two colors.

Pull the base apart and discard it. Separate the marigold seeds and spread them on the paper towel to dry.


Dry & Store Marigold Seeds


Allow your seeds to air dry on the paper towel for about a week.

Place your seeds in a plain paper envelope to store over the winter. Store the envelope in a cool, dry place.


Plant Marigold Seeds


Plant the marigold seeds that you saved this year directly outdoors the next growing season. Marigolds are easy to grow and make a perfect project to let the kiddos help you with in the garden.

Once you plant them, marigolds grow quickly without a lot of extra effort on your part. Most will do really well in full sun. Marigolds can, however, stand up to 20% shade if they have bright light the rest of the day.

You can plant marigolds in poor to average soil as long as it's not soggy. In fact, marigolds bloom better in poor soil (which is how I got better blooms the second year, it turns out - the second year they were planted in good, old-fashioned North Carolina red clay). Better soil will cause marigolds to grow lush foliage at the expense of flowers.

And as an added bonus, marigolds are deer resistant - can't beat that!


If you're past the season of saving marigold seeds this year in your region, I hope you'll save this idea for next year.

And if you're looking for other DIY gardening ideas, don't forget to check out our list of free or cheap things for your garden, how to dry your own herbs, and how to start seeds with k-cups.

Happy (fall) gardening!

This post contains affiliate links.

Thursday, November 1, 2018

DIY Star Wars Family Halloween Costumes

With the popularity of the Star Wars movies on the rise again, we just knew it wouldn't be long before the boys wanted to be Star Wars characters for Halloween. And 2018 was that year! We actually chose Star Wars as our family costume theme in 2006 when Aidyn was only a little over 1 year old. That go round, Aidyn was Yoda, and Jaxon had not yet been born, so in fairness, neither of them remember us ever doing family Star Wars Halloween costumes. They've just seen pictures.


So guess where I headed? Straight to my costume closet to search for our Han Solo and Princess Leia costumes. Of course, Ryan and I are old school Han and Leia from A New Hope. (We are old enough to remember the original movies the first time they were in theaters.) And you know what? After 12 years, the costumes still fit! If that ain't some Halloween magic, I don't know what is.


The original Han and Leia are in prime form!


Aidyn also wanted to be Han Solo, and lucky for him, I knew how to sew a DIY Han Solo costume since I had already done that once before. (Details below.)


So that meant we had a duo of Solos, which is OK by us. We'd like to think of it more along the lines of the happy Ben Solo that Han and Leia never got to have. Can't you just imagine it? Father-Son talks about how to always shoot first.


And swinging on the swing set without a care in the world . . . but things like that can only come to fruition on Halloween because we ALL KNOW that the real Ben Solo turned out to be a rotten egg and followed in his Grandpappy Darth Vader's footsteps.


But I digress. Jaxon wanted to be Chewbacca, which took a little more ingenuity to create a DIY version. (Details below.) And he totally got into character - even making random Wookie noises throughout the night while we were trick-or-treating.


And if you're wondering whatever happened to Aidyn's old Yoda costume, well that fit our pup Smitty perfectly this year. We repurposed our old Darth Vader costume for our boy Chance too! Here's a picture of the whole motley crew:


So that's a wrap for the Walkush Family Halloween 2018 - Star Walkush.

If you want the Force to Be with You on Halloween, read on for tutorials for how to make your own Star Wars costumes.


DIY Han Solo Costume Tutorial


So, the main pieces of any good Han Solo costume should be relatively easy to find. You will need a pair of navy blue dress pants, a black vest, tall black boots, and long sleeved cream colored or off white shirt. (Han's was actually more of a 3/4 sleeve fit, but long sleeve is easier to find and will work perfectly for a costume.)

I headed straight to the thrift store to hunt for these pieces, and I found the pants, the cream colored shirt, and a black button-down shirt that I then modified into a vest.

Supplies Needed for Han Solo Vest:
Black button down shirt
Seam ripper
Black extra-wide double fold bias tape
Black thread


This requires a minimal amount of sewing. First you'll use a seam ripper to take off the collar, buttons, and sleeves. It will start to look more like Han's vest almost immediately!


Next, you'll try it on your model and pin the bottom up to the right length and cut off any excess. Use a sewing machine to hem the bottom and sew black bias tape around the arm and neck holes.

Cut the excess fabric into four pockets, hem, and sew them to the front of the vest. And you're all done.

Lucky for us, Aidyn and I have the same size feet right now, so I lent him a pair of black riding boots to complete the costume. We purchased a gun holster and some iron-on blood stripes for the pants. And his costume was all set!


DIY Chewbacca Costume Tutorial


Chewbacca Costume Top

The Chewbacca costume needed a little more effort in the sewing department. I purchased a furry Chewbacca hoodie for the main part of the costume, but if you are a more accomplished seamstress, you could easily sew one of these too.


Chewbacca Costume Pants


Supplies Needed for Chewbacca Pants:
Brown Grizzly bear faux fur
Black or brown thread
Parchment paper or wax paper
Marker
T-shirt material (optional)
Elastic
Safety pin
Pair of pajama pants that fit your child to trace

For the furry pants, I purchased one yard of brown Grizzly bear faux fur at our local craft store. Instead of using a purchased pattern, I traced a pair of pants that already fit Jaxon onto parchment paper and then used this DIY pajama pants tutorial for the main part of the sewing.


The only thing I did different from the tutorial is that before I finished the waist, I sewed a band of t-shirt fabric to the waist opening and then threaded the elastic through that. I figured that would probably feel more comfortable on the skin than an elasticized waist made out of the faux fur.

Chewbacca Costume Shoe Covers


Supplies Needed for Chewbacca Shoe Covers:
leftover Brown Grizzly bear faux fur
Black or brown thread
Elastic
Chalk pencil

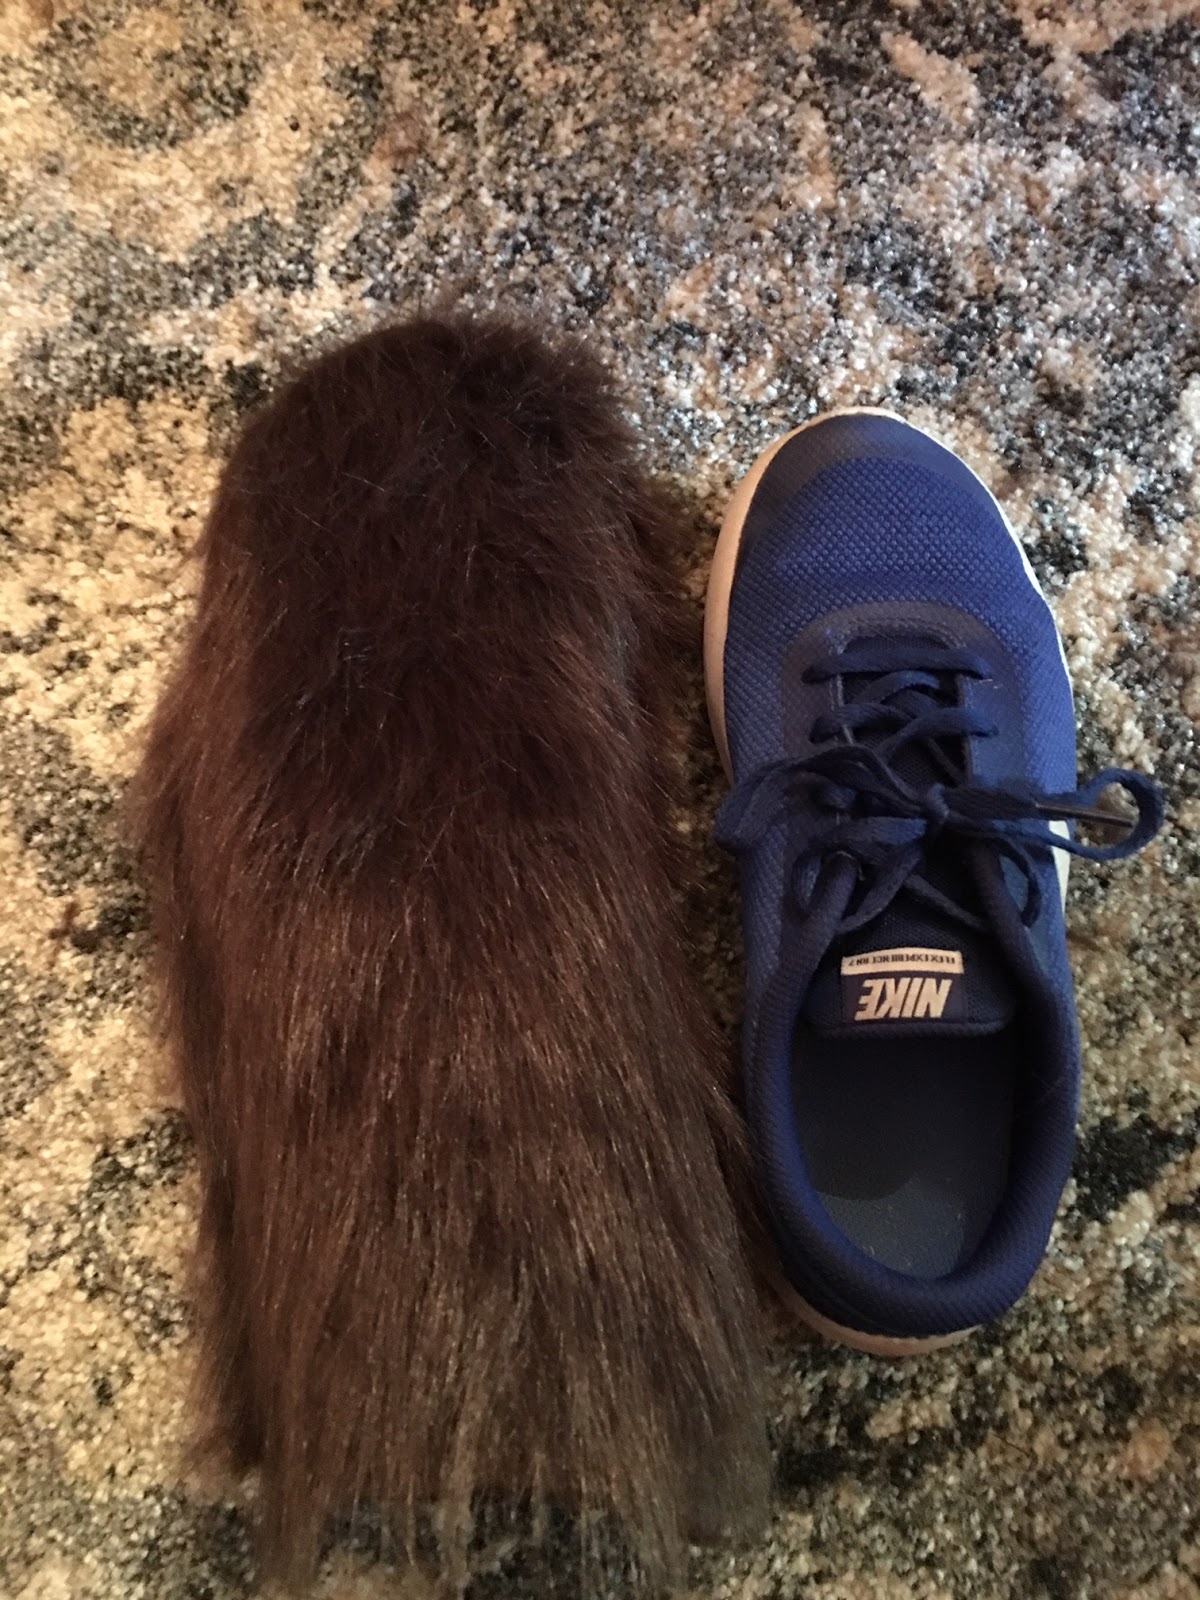
I used the leftover fur fabric to sew some simple shoe covers for the costume. I took a pair of Jaxon's shoes, draped the faux fur over top of the shoes, and cut around the edges (making sure to leave plenty of extra).


I then cut another piece of fur the same size as the first one.


I then flipped the fur inside out and roughly sketched a line up the back of the heel where I would need to sew a seam.


And I sewed a straight seam on that line, which looks like this when you turn the fur right side out.


But, we're not done with the wrong side yet! While you have the fur on the wrong side, roughly trace an opening for the foot by feeling where the shoe opening is beneath the fur. Remember, it is better to trace a hole too small and go back and cut more than to cut the hole too big the first time!


Sew two pieces of elastic to the shoe cover so that they will cross under the shoe at the ball of the foot and at the heel.


Cut out the hole and flip the shoe cover inside out, and repeat for the other shoe. Your shoe covers are complete and Chewie will have furry feet for Halloween night!


Chewbacca Makeup Tutorial


I used this makeup tutorial to recreate the look of Chewie's face:


And you're all set with your homemade Chewbacca costume!


DIY Leia Costume Tutorial


Most of these notes are from memory, since I made this costume years ago, but if you want to attempt your own costume instead of purchasing one, here's the way to do it.

My costume dress is actually a white liturgical (praise) dance dress. It was the right length and had the high neck and flowing sleeves. I opened up both shoulder seams and then took a small strip of fabric and sewed it into the seams to mimic the hooded part of her dress.

The belt is made out of faux white leather and the silver parts are actually the backs of soda cans cut into the right shapes and then glued on. I outlined the metal shapes and "drew" on buttons in the center with silver glitter paint.

I wear white go-go boots with this costume since those are the easiest white boots to find in costume shops.

And this is the tutorial I use for doing the big Leia buns. You'll need faux hair in the same color as your own to get the volume to create large buns and don't forget LOTS of bobby pins!


I actually split the hair into two portions and wrapped the portions in two separate directions, pinning as I went along. If you don't want to go to the trouble of using faux hair, and you have fairly long hair, you can always use the hair donuts to make smaller buns or just purchase a Leia wig.


Happy Halloween from the Walkush Family!


This post contains affiliate links.

You Might Also Be Interested In