Harris Sister Misty's daughter Charlotte has shown an interest in learning how to crochet. As part of her Christmas present, I bought her a few crochet kits but I also promised to write her a blog post with some crochet tips and tricks for beginners.
These pro tips and tricks will help any beginning crocheter get off on the right foot while they learn how to crochet. And if you're thinking of taking up crochet as a new craft for the new year, then these tips will be perfect for you too!
First, Learn the Basics
You might have wanted to learn how to crochet because you fell in love with a beautiful handmade sweater or an adorable (and tiny!) amigurumi toy, but before you jump into the deep end, you've got to learn some basic stitches.
I learned how to crochet at the ripe old age of 10 from a book that I checked out from our local library. Since dinosaurs are no longer roaming the earth, I would recommend heading straight to your computer to check out video tutorials to learn basic stitches.
The Crochet Crowd on YouTube has lots of how-to tutorials, including basic stitches (and many videos for left-handed people too!):
 |
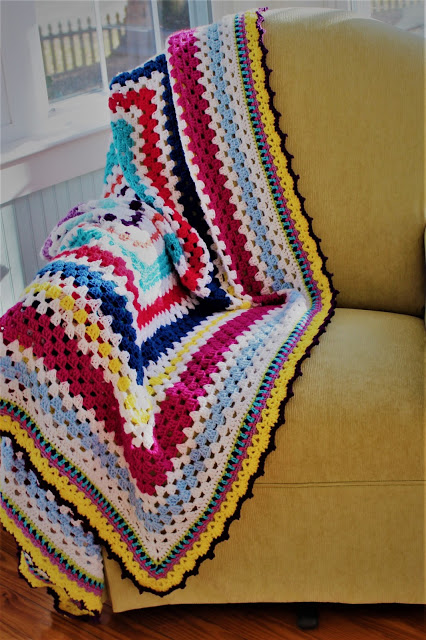
| Granny Square Scrap Afghan |
Crocheting Will Take Patience and Practice
 |
| Retro Cherry Baby Dress |
Use a Big Hook and Yarn
When you first start to learn how to crochet, one thing that can really help you with your stitch counting and knowing which stitch to insert your hook into is to start with a big hook and yarn. When I first learned how to crochet in the days of yore, larger sized yarns weren't as readily available as they are now. So, I learned on H and I size hooks with worsted weight yarn.
However, now that bulky weight yarns are easy to find, you can pair those with L, M, or N size hooks. To find the weight of a yarn, look on the yarn label and you will see a number in a box. Worsted weight yarns are size 4, and bulky weight yarns are size 5.
Having bigger hooks and thicker yarn will make it easier for you to see your stitches. Lighter colored yarn is also a little easier to see the stiches in, so you might want to use that for some of your practice work. (For example, work your way up to using black or navy blue yarn.)
Pick the Right Yarn for Your Project
Acrylic yarn is the best type to use when you're first learning how to crochet for a few reasons. First, acrylic yarn will make it easy to see your stitches, which is important when you're first starting out. And second, chances are you're going to frog your work a time or two, and if you start with some fancy-pants, super-floofy yarn, you might not be able to frog your project. (The fibers in these types of yarns sometimes get tangled as you go, so if your work isn't perfection, there might not be a chance of frogging all the stitches you need to.)
Once you're ready to tackle an actual project, acrylic yarn is also a good choice for any item that will be washed a lot (blankets, baby clothing, etc.). Also, acrylic yarns are safe for babies’ sensitive skin. Some good brands are Red Heart, Hobby Lobby I Love This Yarn, Caron Simply Soft, and Lion Brand Yarns. Save fancier yarns (wool or wool blends, alpaca, hand-spun craft fair purchases, etc.) for clothing items like hats and scarves that don’t get washed as often and can easily be hand washed and laid flat to dry.
Pay Attention to Dye Lots
When you're purchasing yarn for a project, make sure to purchase enough yarn in the right dye lot at the same time and then save your receipt. (A dye lot is the batch the yarn was dyed in and this number is also listed on the back of the yarn label. You will want to buy skeins of yarn with matching dye lot numbers to ensure that the yarn was dyed the same time and the colors match exactly.) Keep all of the yarn for that project in a clean container with the receipt. If you have any leftover, unused skeins of yarn, you can return them to the store for a refund. But, it is unlikely that you will be able to purchase more yarn in the same dye lot at a different time.
Ball Your Yarn or Pull from the Center of a Skein
Always Do These Things Before You Start Crocheting
- Make sure you will be relatively uninterrupted and can concentrate on the project, especially if you are following a pattern.
- Remove all bracelets and rings so that you don't have any jewelry that might snag on your work.
- Wash your hands so that you won't transfer anything to your work. This is especially important if you're working with white yarn.
- If you have long hair, pull it back into a ponytail or a bun so that you don't accidentally crochet shedding hair into your project.
- Pull out only the yarn that you need for the part of the project that you will be working on. (For example, if you are working on a large blanket with multiple colors, but you will only be working on one green row, you only need to pull out the green yarn.) All other yarn should stay in a dedicated bin or tote that you can close to keep pets away from it. (The project itself should also go back into that bin or tote while it's a WIP - work in progress. This helps to keep the project clean and away from pets.)
- BONUS TIP: If your hands start hurting (or your neck muscles), stop at the end of the row you're on and come back to it on a different day. This is especially important when you're just learning how to crochet because you won't yet be used to moving your hands this way or looking down at your work. So, instead of making yourself miserable and not having a great experience crocheting, give your muscles a break and come back to it.
 |
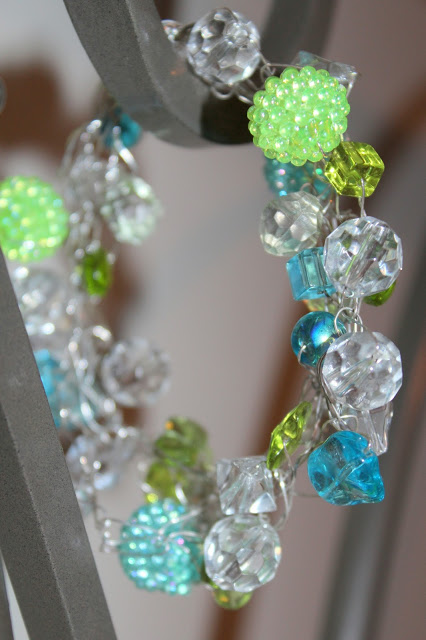
| Wire Beaded Bracelet |
Learn How to Read Written Crochet Patterns
Dedicate a Space for All Your Crochet Supplies
Save Any Leftover Yarn
 |
| Granny Mandala Ottoman Cover |
How to Weave in Ends of Crochet so They Don't Come Out
- leave a long enough tail of yarn to actually weave in (don't clip the yarn close to your project to "save more" to crochet with)
- if possible when changing colors, hold that tail of yarn down on top of the previous row of stitches and crochet over top of the tail of yarn with the newly attached yarn for a few stitches
- attach a yarn needle to the tail of yarn and weave the yarn in three different directions through the same color of stitches as the yarn tail (e.g. weave a blue yarn tail through blue yarn stitches rather than white yarn stitches so that the woven area will disappear). Make sure to go through the fibers of the yarn in at least one pass.
 |
| Spiderman Afghan |


