Saturday, April 23, 2022

DIY Gift Idea for Your New Teen Driver

Our son Aidyn has recently turned 16 and will soon be getting his driver's license. While he'll be getting a new (to him) car, we wanted to also give him a personalized gift to help him remember this milestone event. 


DIY Gift Idea for Your New Teen Driver

The DIY gift that we decided on was a photo book that included photos of family members with cars and advice for new drivers. Many of you may remember getting similar types of advice from relatives when you got married or when you had your first baby. We used this same thought process (just geared toward a new driver) while including photos of family members with cars to make it into a keepsake photo book.

Since we have a BIG family, I got lots of photos and advice to include in this photo album for Aidyn.


FUN FACT: We have 14 family members on the Harris side of our family and 12 family members on the Walkush side of our family. (4 of those family members are our family and represent on both sides.) But you can see how it would be easy to collect lots of content for this book! (We ended up with 81 photos and 45 pieces of advice - not too shabby.)

Tips for Making a Custom Photo Book for Your New Driver


Collecting Content for the Book

First, you'll want to contact anyone who you want to contribute photos and advice for the book and give them a due date to submit their content. Make sure to leave yourself enough time to assemble the book, have it printed, and shipped to you. 

If you have old printed photos that need to be converted to digital (I did), I would recommend downloading the PhotoScan app by Google Photos to your phone. You can use this app to digitally capture your printed photos without the glare that you sometimes get when you just take a photo of them with your phone. Pro Tip: The app will automatically save a version of the photo to the app and to your Photos on your phone. The version saved in your Photos on your phone will be higher resolution and won't have the PhotoScan frame around the edges.

As tips and advice rolled in from different sources, I saved it all into a Microsoft Word document. That way, I was able to gather it all in one place before starting the project. This also gave me one document to proofread before starting. Once I proofread that document, I then copied and pasted directly from that document into the photobook. Make sure to re-proof the photobook before purchasing, though, because some special characters, like colons and apostrophes, may be removed from your text in the copy-and-paste process. You'll need to manually insert those if that happens, but that is still easier than typing everything again from scratch.


Designing the Book

  • I used Shutterfly to create our book, but other online vendors also offer this service, so you might want to shop around to compare pricing or designs. (The design that I chose for this book is Outdoor Adventures by Sarah Hawkins Designs, and the size that I used was 8" x 8".)
  • When designing your book, remember to save early and often.
  • Make sure to customize the book with the new driver's name and the date. 
  • Make sure to add the name of the person giving the advice after each piece of advice so that the new driver knows who said what.
  • Make sure to include at least a few photos of the new driver in or with a car. (We had photos of Aidyn with different cars from many stages of life, from toy cars when he was young all the way up to driving actual cars with his learner's permit pre-license. That photo of Aidyn on the front cover? That's him behind the wheel of Granddaddy's 1964 Chevrolet C10, Pretty Boy!)
  • I added a Memorabilia Pocket to my order. This is a clear plastic pocket that adheres to the inside back cover of the book. I thought this would be a good place for Aidyn to keep his previous learner's permits and any of his old driver's licenses through the years. 
  • Include a dedication at the front of the book, just like a real author!


Advice for New Drivers

If you're asking a bunch of adults for driving advice, you're bound to get duplicates, right? You'd be surprised! I emailed everyone on the list and had them email their advice back to me. The beauty of this project is that with everyone sending their advice back in their own words, we really didn't have any duplicates. (Of course, since the advice is in everyone's own words, this is why it will be important to note their name beside the advice in the book for reference.) 

The advice was far and wide, and it was just what I was looking for! 

Here are a few of my favorite tips that rolled in:

  • Don’t turn right in front of someone who has their blinker on to turn. They could just have their blinker on and could plow right through you.
  • Don’t tailgate; it doesn’t make them go any faster, and you will not have enough time to stop without hitting them.
  • Always pull over for emergency vehicles and funeral processions, even if no one else does. It’s the right thing to do. 
  • Cup holders are the most essential thing to look for when buying a car. 
  • Your car is a fish bowl. Other people can see directly inside. So don’t pick your nose. 


Photos of Vintage Cars

We had all sorts of photo submissions for this book. We were originally looking for photos of family members with their cars (previous cars or current cars), but what we received was SO MUCH MORE THAN THAT! Family members dug deep and submitted not only those photos but also photos of themselves with other types of vehicles too. So we dedicated an entire two-page spread to other types of transportation.

And, of course, my favorite photos were the ones of vintage cars. Here are some of my favorite photos that we included:

Mama when she was a little girl (Aidyn's Grandma Harris)


Gram when she was a young lady (Aidyn's Great Grandma Lopresti)


Daddy circa 1980's with his beloved conversion van (Aidyn's Granddaddy)


The Harris Sisters circa 1990s with the Wayne's World car (Aidyn's Mama and Aunts)


The Walkush Brothers circa 2004 with a vintage car (Aidyn's Dad and Uncles)


Collecting and passing down these words of wisdom and photos allows you to share important life lessons that you and your family members have accumulated throughout the time you've been driving. Sharing these pieces of advice creates a personalized gift that will make a one-of-a-kind family heirloom that will be cherished for generations to come. I hope you'll try recreating this gift idea for your new teen driver. 


Sunday, February 6, 2022

How to Transform a Christmas Tree into a Valentine's Day Tree

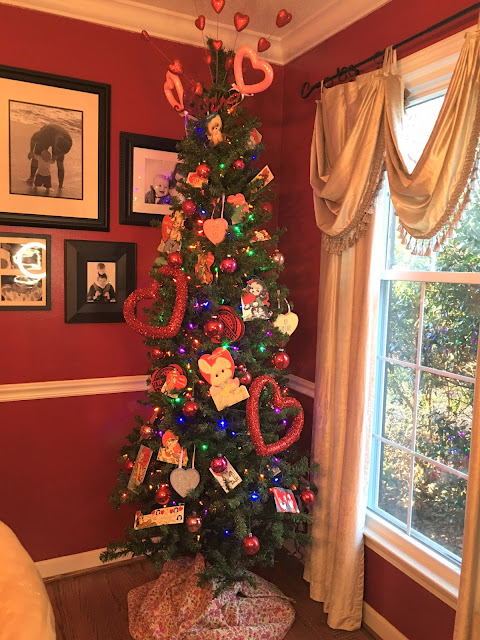
With a little over a week until Valentine's Day, I thought I'd share what I did with my dining room Christmas tree this year. Instead of packing it away with all the other Christmas decorations in early January, I left it up and changed the decorations to make it into a vintage Valentine's Day tree.

Here's what it looks like now:


Valentines Trees are becoming increasingly popular, and you see a lot of them using pink, white, or vintage aluminum (silver) trees. I wanted to see if I could make a Valentine Tree with a regular green Christmas tree base. 

For this particular tree, I started out with my dining room Christmas tree, which is a green pencil tree with colored lights. It looks like this at Christmas:


I removed all of the candy-themed ornaments, the tree topper, and the tree skirt, until I was left with just the bare, lit tree. (If you have a lot of red or pink ornaments on your tree, you can leave those on the tree and just remove any Christmas-y ornaments.)


After removing all the Christmas ornaments, it was easy to create a Valentine Tree! I gathered my supplies and then added them to the tree in the order listed below. 

What Supplies Do I Need to Make a Vintage Valentine Tree?

  • red and/or pink vintage glass ornaments
  • vintage Valentine's Day cards
  • small heart-shaped candy boxes
  • floral picks to create ornaments and a tree topper
  • pink or red fabric to create a tree skirt

This first batch of Valentine's Day cards are actually from The Harris Sisters' childhood. My favorite one might be the one that says "I like you for a lot of raisins" and shows some sort of odd raisin cake. You can read our thoughts on Raisin Creme Pies here. And check out that Amazing Spider-Man card - guess Spider-Man was just as popular in 1980 as he is now.


This next batch of Valentine's Day cards are some that I've collected. They are much older than The Harris Sisters' stash above, and they all have great graphics!


Here's some close ups of the collection:


And the next most important decoration for the tree was a collection of pink and red vintage glass Christmas ornaments. Red is a popular color for Christmas ornaments, so you probably have some similar ornaments stashed away too! I only have about a 1/2 box of pink ones, but they look right at home on the Valentines Tree.


And after adding the vintage ornaments and the Valentine's Day cards, I used floral picks to create a set of conversation heart ornaments, a few larger heart ornaments, and a tree topper. I nestled two small heart-shaped candy boxes into the branches. The cards are also just nestled into the branches, and they seem to be staying put with no further assistance. If you'd like to secure them a little better, you can use small clothespins to clip them to the branches without damaging the cards. I wrapped a pink floral tablecloth around the base of the tree to create a tree skirt. (If your Christmas tree has a plain red tree skirt, then you're good to go!)

Here's the finished product:


Make sure you check out these other Harris Sisters blog posts for ideas on how to decorate for Valentine's Day:

Hope we've inspired you to keep a tree up and decorate it for Valentine's Day. (If you're a person who hates putting away all the Christmas decorations because you'll miss the lights, this would be a great solution to keep those lights out longer!)

Happy Valentine's Day!

Wednesday, January 12, 2022

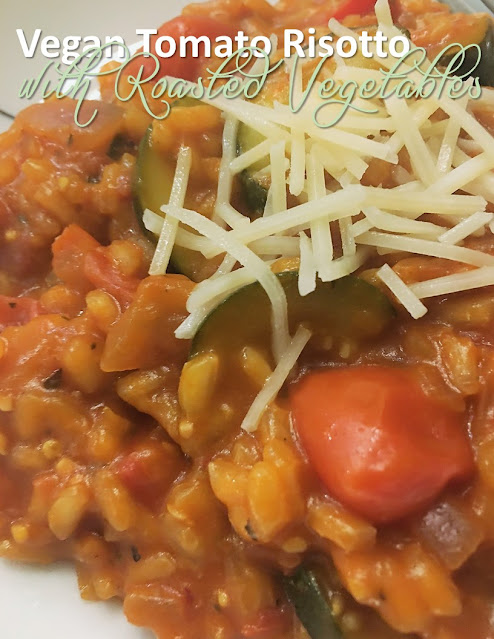
Vegan Tomato Risotto with Roasted Vegetables

You just can't beat a risotto in the cold winter months. This creamy dish takes a bit longer with preparation, but it always pays off in the end. 

I remember the first time I had a tomato-based risotto. I was 29 years old and I was eating dinner in a restaurant with a group of work friends while attending a conference in New Orleans. We somehow ended up in a restaurant that didn't have a single vegetarian dish on the menu. I explained my dilemma to the server, and he spoke with the chef who offered to make me an off-menu creation - a tomato risotto with roasted vegetables.

This particular recipe features roasted vegetables and is cooked low and slow with a tomato puree base that results in a main dish that's rich and creamy. And it's the closest I've come to that dish that the New Orleans' chef made for me years ago. While your vegetarian and vegan friends will love it, you can also serve it to your gluten-free friends too. So, it checks a lot of boxes.


Vegan Tomato Risotto with Roasted Vegetables


Roasted Vegetables

1 Tbsp. olive oil

10 oz. cherry tomatoes, halved

2 medium red bell peppers, chopped

1 large zucchini, chopped

salt and pepper, to taste

Risotto

1 Tbsp. olive oil

1 large red onion, diced

3 garlic cloves, minced

1 cup Arborio rice

1 Tbsp. balsamic vinegar

1 cup of canned tomato puree or plain tomato sauce

2 cups vegetable stock, heated to a low simmer and kept warm

6.7 oz. sundried tomato pesto, oil drained

1 tsp. basil

salt and pepper, to taste


  1. Preheat the oven to 350 degrees and add the olive oil to a large cookie sheet.
  2. Halve the cherry tomatoes. Chop bell peppers and zucchini into small similar-sized pieces and spread out on the cookie sheet. Add salt and pepper and gently toss together in oil.
  3. Roast vegetables for 30 minutes.
  4. Add vegetable stock to a saucepan, bring to a gentle simmer, and keep warm over a low heat.
  5. Dice onions and add olive oil to a large sauté pan.
  6. Sauté the onion on a low-medium heat for a few minutes. Add the minced garlic and cook for another minute.
  7. Stir in the Arborio rice and balsamic vinegar and stir for approximately 30 seconds.
  8. Alternate adding the tomato puree and warm vegetable stock 1/2-cup at a time. Allow each 1/2-cup of liquid to be absorbed by the rice before adding the next.
  9. After all liquid is absorbed, add in the sundried tomato pesto and the roasted vegetables. Give everything a stir and cook for a further 5 minutes until everything is cooked through and the rice is done. Make sure to taste the rice at this step to ensure that the rice is cooked to desired doneness. If the rice is still chewy at this step, add in more tomato puree or more vegetable stock 1/2-cup at a time until desired doneness.
  10. Remove from the heat and stir in the basil, salt, and pepper. 

Notes:


If you've never made risotto the old-fashioned way before, remember to add in the liquids a half-cup at a time and stir until completely absorbed before adding in the next batch of liquids. This will help the Arborio rice to release its starch and gives the dish its signature creamy texture. 

While you might be inclined to crank up the heat to "speed up the process" this will only make the liquid evaporate more quickly, which isn't the goal. The goal is for it to be absorbed into the rice. If it evaporates, you'll be left with crunchy risotto. So, make sure you cook it over low-medium heat.

You can substitute 6 sundried tomatoes (diced) for the sundried tomato pesto, if desired.

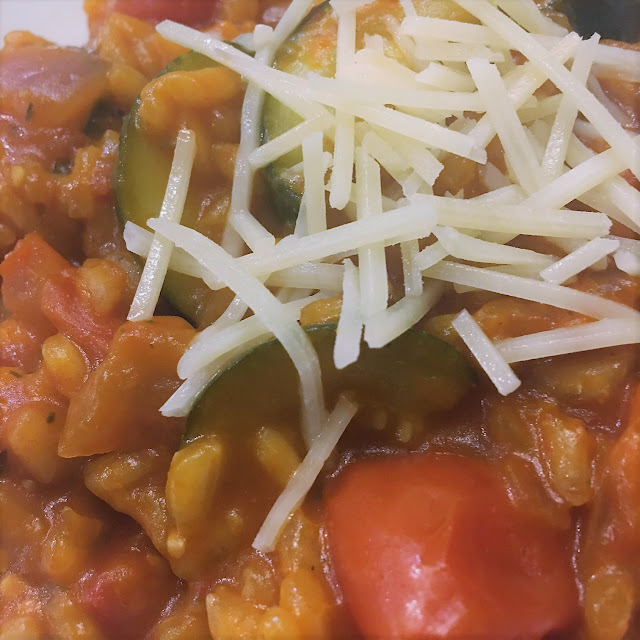
Garnish with vegan Parmesan cheese alternative, if desired. If your family is not vegan (we have two vegetarians in our family, but no vegans), then feel free to garnish with Parmesan cheese before serving. 

If you're a fan of risotto, take a peek at this recipe too:

You Might Also Be Interested In