Pages

Friday, August 26, 2022

Watermelon Child's Swing Top

Today I'm sharing with you a child-sized crochet swing top that I made as a present for Niece Dolly to help her celebrate her fifth birthday. The original pattern was written for a solid color with no color changes, but I decided to modify the pattern slightly to create a watermelon top.


I used the Child Swing Top free crochet pattern with a size H hook using these yarns:

  • Red Heart Super Saver Shocking Pink
  • Big Twist White (enough white yarn for one DC row)
  • Red Heart Super Saver Black
  • Red Heart Super Saver Spring Green

Pattern Help

In order to help me follow the pattern better, I printed it out and numbered the rows. (Note: I did not number the Magic Ring or 7 DC in ring as rows.)

The pattern as written includes: 

Magic Ring
Foundation Row (7 DC in ring)
16 increase rows 
Finishing row 1 (one shell row across bottom)
Finishing row 2 (across top)
Separate section for straps (not written in rows - see below in pattern modifications)

Pattern Modifications

  1. I completed all of the foundation and increase rows with pink as the main color.
  2. In order to achieve the watermelon "seeds": On rows 3, 5, 7, 9, 11, and 13, I evenly spaced black DC stitches across the increase rows and carried the black yarn, changing colors as needed. 
  3. I added one additional row in white with 16 DC between 2 DC and another increase row in green with 17 DC between 2 DC.
  4. I completed the final shell row in green.
  5. Instead of SC across the top, I completed HDC across. This was a preference, but I thought it cleaned up the edge a little better.
  6. I used 1" diameter buttons, which fit instructions for big button holes.
  7. For the straps, I SC the first 28 rows as described then finished differently to put a little more space between the two button holes:
    1. *SC across 5 stitches, CH 1, turn* repeat for 28 rows
    2. CH 1, turn, SC in first SC, CH 3, Skip next 2 SC, SC in last 2 SC
    3. CH 1, turn, SC in first 2 SC, 2 SC in chains, SC in last SC
    4. CH 1, turn, SC across 5 stitches
    5. CH 1, turn, SC across 5 stitches
    6. CH 1, turn, SC in first SC, CH 3, Skip next 2 SC, SC in last 2 SC
    7. CH 1, turn, SC in first 2 SC, 2 SC in chains, SC in last SC
    8. CH 1, turn, SC across 5 stitches
    9. CH 1, turn, SC across 5 stitches

Final Sizing

The final top measurements with a size H hook ended up being 24" around the chest, 11" from top to bottom, and having 9" straps. I considered making the straps longer, but given the fact that yarn stretches, I didn't want to make them too much longer for fear of them getting stretched out over time.
  
Here are a few photos of the top laying flat.


A sweet little top for a sweet little girl. I hope you'll give this pattern a try.

Friday, August 19, 2022

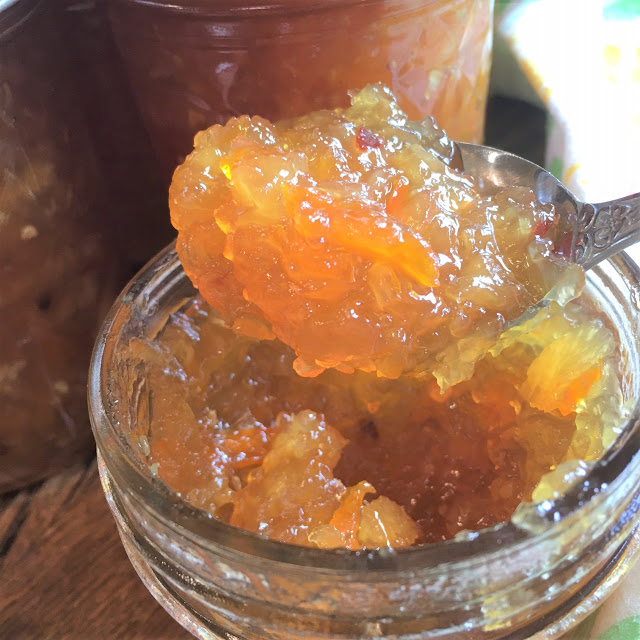
Pineapple Habanero Pepper Jelly

Right now, it's harvest season for peppers. If you've got a pepper lover in your group, you're going to love this recipe for Pineapple Habanero Jelly! My sister-in-law grows habanero peppers in her garden and gave me some of her habanero peppers. So, I made a batch of this jelly, which is sweet with the smallest kick of heat (so it's not too hot for even the kids in your group).

If you have never used a water bath canning method to can jams or jellies before, you'll want to read the complete instructions online before you start making your Pineapple Habanero Pepper Jelly.

Tips for Working with Habanero Peppers in the Kitchen

If you haven't handled habanero peppers in the kitchen before, keep in mind these must-follow rules when cooking with habanero peppers:

  1. Wear disposable gloves.
  2. After handling (even with gloves), wash your hands thoroughly. I use Dawn dishwashing detergent to ensure that any oils that may have made their way onto the skin are absorbed and washed away.
  3. Do not touch your eyes after handling these peppers.


Pineapple Habanero Pepper Jelly

3 cups finely chopped fresh pineapple, well drained (from 2 large fresh pineapples)
5 cups granulated sugar
1 cup apple cider vinegar
1 cup finely chopped golden delicious apple (from 1 large apple)
1 cup finely chopped orange bell pepper (from 1 large pepper)
3 orange habanero peppers, seeded and finely chopped
1 teaspoon crushed red pepper flakes
1 teaspoon butter
3 ounces liquid fruit pectin
2 tablespoons lemon juice
6 half pint (8 oz.) glass preserving jars with lids and bands
4 oz. glass preserving jar with lid and band

  1. Place the finely chopped fresh pineapple in a strainer set over a bowl. Press on the pineapple with the back of a spoon to release as much of the juice as possible. Allow the pineapple to drain while you're prepping the other ingredients.
  2. Combine the sugar, vinegar, apple, bell pepper, habanero, red pepper flakes, butter, and exactly 3 cups of the well-drained pineapple in a large pot. 
  3. Stir until sugar is dissolved. Bring the mixture to a full rolling boil and cook for 10 minutes. Watch the pot carefully and lower the heat a bit if the bubbling jelly rises near the top.
  4. Add pectin and lemon juice and bring the mixture back to a rolling boil. Cook for exactly 1 minute, stirring frequently.
  5. Remove pot from heat and skim off any foam on the surface. Ladle jelly into sterilized jars.
  6. Follow water bath canning directions to complete the canning process.  Process Pineapple Habanero Pepper Jelly 10 minutes. 
  7. Recipe yields 6 half pint jelly jars plus 1, 4-oz. jelly jar for taste-testing.


Notes:

When you purchase your fresh pineapple for the recipe, make sure to purchase very large pineapples. If the pineapples are on the smaller side, purchase more than two to ensure that you have 3 cups of chopped pineapple after the pineapple is peeled and cored. You can also substitute canned pineapple for this recipe. 

Jam and jelly recipes are finicky, so these types of things can cause your recipe not to set:
  • Doubling the recipe.
  • Measuring less than the full amount of sugar listed in the recipe or using a sugar substitute. If you want to use less sugar, use a recipe specifically developed for low sugar.
  • It is important to only add 3 cups of well-drained pineapple to this recipe. Don't try to add more than 3 cups or the recipe will not set correctly.
  • It is important to drain the pineapple well for the recipe to set correctly.
Serve this jelly:
  • as an appetizer with cream cheese on crackers or alongside your appetizer cheese tray as a complement to Havarti, gouda, fontina, or goat cheese.
  • as a topper for your baked brie. (If you've made our Pineapple Marmalade Brie before, this jelly would be very similar to the topping in that recipe.)
  • as a marinade, glaze, or sauce for chicken, fish, or pork.
  • as a sauce for meatballs in the crockpot.
  • slathered on warm cornbread or peasant bread, fresh from the oven.
This post contains affiliate links.