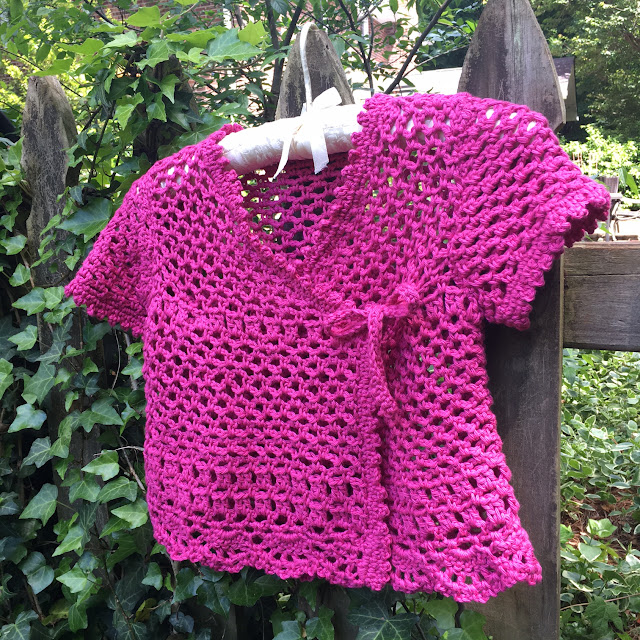
Little Miss Lexi recently celebrated her seventh birthday, and I wanted to make her a special handmade present to celebrate her big day.
The free crochet pattern I chose to make was the Lacy Child's Top in the size Child 7-8. (Sizes for 24 months/2 years, Child 4, Child 5-6, and Child 7-8 are included with the pattern.) I used a size I hook with Lion Brand Yarn Pima Cotton in the color Caberet to complete the project. I substituted the yarn for the project because Lion Brand Organic Cotton (the yarn the pattern was originally written for) is no longer available. I used about 2 1/2 balls of the Pima Cotton yarn to make the pattern in size 7-8.
Pattern Notes
Several times throughout the pattern, it says to work Ch-3 mesh. What it really means is to kind-of-sort-of work Ch-3 mesh while simultaneously decreasing on one side of the pattern. You're just going to have to figure that out on your own. It's not that difficult, it's just not exactly as written.
In the section for Shaping the Cap Sleeves, the second to last row instructed to "Repeat the last 3 rows" (which was supposed to leave you with 11 ch 3 spaces). Considering that there were only 2 previous rows any way you sliced it (either rows 1 and 2 of the original part of the pattern or rows 1 and 2 of the Ch-3 mesh), I wasn't really sure what it was getting at here. I opted just skip this part and move to the next line, which was to repeat row 2 until 3 chain 3 spaces remained. (If you repeated row 2, the next count of chain 3 spaces would be 11, which was what you were trying to get to in the directions that were confusing, so this seemed to work for me.)
In the next section for Sleeve Edging, to get 45 SC evenly across on Row 1, I put 1 SC in each ch and 2 SC in each ch space across for the size 7-8 pattern.
Pattern Modifications
At the end, I chained 35 to create the ties. I also single crocheted back across the chains to create thicker, sturdier ties. Instead of using snaps to fasten the insides, I also created ties for the that part too. (I thought that would give a little more ease to the pattern if needed.)
Also, the pattern seems to suggest that Row 1 single crochet should stop before moving down the left placket to the bottom edge and that Row 2 picots would only go around the neckline portion. I opted to single crochet around the entire front placket and neckline for Row 1 and to complete the decorative picot trim of Row 2 all the way around as well. Even though the left side of the sweater is covered when it is closed and the picots are not necessary for this part, I felt like it added a nice finishing touch to the sweater.
Pattern Rating
All in all, I would rate this pattern a definite intermediate to difficult in terms of pattern clarity/difficulty. In addition to some challenges with the how the pattern is written (noted above), it also includes quite a bit of seaming. The only finishing notes included in the pattern are: "Sew shoulder, side, and sleeve seams. Sew in sleeves." So you will need to look up how to correctly sew in sleeves if you've never done that before to ensure that they line up correctly on the sweater.
You can definitely make this one yourself, but you will have to dedicate time to figuring out parts of the pattern.
I hope my notes are helpful to you!
Lexi looks great in her birthday present, so I am definitely happy with the outcome!
This post contains affiliate links.


